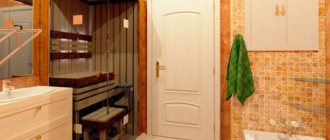
Almost everyone loves the sauna - with its powerful heat that forces the body to work harder, the tart pine or birch smell, and the amazing healing effect.
The relaxation that comes after visiting her can be compared to a good rest. Unfortunately, in the metropolis there are very few opportunities to visit a bathhouse or sauna - both the lack of free time and the long distances to the nearest public institution interfere.
Let's try to figure out whether such an option as a sauna at home in the bathroom is possible, what legal documents are required and whether it is possible to make a home steam room with your own hands.
Selection of premises and project
First you need to choose a place and draw up a project for a sauna in the apartment.
You can combine a bathroom and a small corridor leading to the kitchen. In the resulting room, you can already think about how to build a sauna in the bathroom with your own hands. To save space, you can install a shower cabin with a sauna in your apartment. You can also install a sauna in a closet or on a balcony using infrared heaters. It is worth noting that a bath on the balcony will avoid reducing the living space in the apartment. When calculating the size of the sauna depending on the number of people, you should remember that at least 2 m³ of space is required per person. The ceiling height in the sauna must be at least 2 m.
If you are creating a mini sauna in an apartment with your own hands, rather than purchasing a ready-made one, you can leave the floor the same - tiles will do. You will need a room at least 1.8m x 2m to accommodate the bed. This mini-sauna for an apartment is a very practical and convenient solution.
Officially, it is not prohibited to build saunas in apartments, but only in new buildings. It is not allowed to place the steam room in basements and living spaces, this is due to fire safety. If the apartment is being remodeled for a sauna, then it must be registered legally.
How to make your own sauna for your apartment
So, you have received permission to install a sauna in your apartment and now you can move on to making your dream come true. The next step is choosing a design: factory-made, custom-made or completely homemade. If you decide to make a sauna with your own hands from scratch, then you will have to face some difficulties.
Mini sauna in a city bathroom
Creating a sauna project
Perhaps, to create a sauna in your apartment, first of all you need to get not even permission to install it, but to make a project indicating the dimensions and designation of communications and equipment used. You can make sketches and drawings yourself or take ready-made ones from the Internet. It is worth taking into account that the ceiling height of the mini-sauna must be at least 2,000 mm.
Sauna project
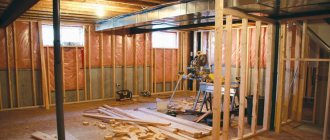
Preparatory work
Before you start creating a mini-sauna in your apartment, you need to carry out a number of preparatory work. You will need to remove the old finish and clean the walls down to the brick or concrete base. The same goes for walls and ceilings.
| Illustration | Description of action |
| The walls of the room where the mini-sauna will be installed must be cleared of tiles, paint or wallpaper down to the concrete or brick base | |
| We do the same with the floor. | |
| We level the walls and plaster them | |
| We provide high-quality waterproofing and concrete screed on the floor |
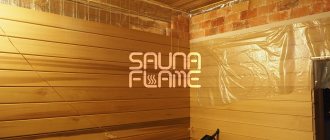
Creation of a frame, heat and vapor barrier
After the walls, floor and ceiling are prepared, you can begin to create a frame structure, sheathing permanent surfaces, insulation and laying communications.
| Illustration | Description of action |
| From wooden beams with a cross-section of 50×50 mm we make partitions and sheathing of walls, floors and ceilings. We lay all the necessary communications. The pitch between the bars is at least 500 mm | |
| We lay insulation (mineral wool or its analogues) between the wall beams and partition posts. | |
| We install the insulation between the ceiling beams, fixing it using a furniture stapler | |
| In the same way we insulate the floor on which wooden logs with adjustable supports are mounted | |
| We sew the insulation with foil material for better thermal insulation |
Important! The ceiling in a home mini-sauna should be made separately and not come into contact with the floor slab in the room.
Electrical wiring and ventilation system
In accordance with the requirements for saunas and baths, it is necessary to provide a good forced ventilation system for normal air exchange. It will ensure the flow of oxygen into the steam room, regulate the temperature and humidity conditions, and also promote better ventilation of the cabin and, accordingly, the preservation of the wood. For ventilation, you can make a special grille with blinds in the door or make inlet (next to the heater) and outlet valves (under the ceiling).
The installation of a ventilation system in the sauna is mandatory
Since the mini-sauna uses fairly powerful electric heaters, you need to take the wiring seriously. It should be made of heat-resistant power cable with a cross-section of 4-8 mm², hidden under the cabin trim. The wire from the heater must be connected to the distribution panel, equipped with a residual current device, and the equipment must be grounded. Only waterproof sockets, switches and lamps should be used inside the sauna cabin.
When installing a sauna cabin, it is necessary to draw a separate line of power cable from the switchboard
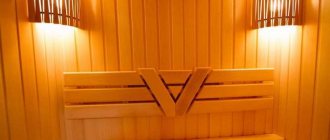
Interior and exterior of the cabin
So, the base of the cabin has been made and heat and vapor barrier work has been carried out. Now you can begin interior and exterior finishing of the cabin, as well as making a shelf, installing a heater and lighting. For the interior lining of the mini-sauna cabin, it is necessary to use only natural hardwood, and not to cover it with any varnish, since the material must breathe. Exterior finishing can be made of different types of wood and protective and decorative coating is allowed. For interior cladding, you can use linden, alder, aspen or abashi (African oak). However, you cannot mix several different breeds.
| Illustration | Description of action |
| In one of the corners, using self-tapping screws, we fasten the first plank of wooden lining. Before screwing in the self-tapping screw, you need to pre-drill a hole so that you don’t split the material when fixing it. | |
| Having installed 3-4 planks, check the vertical position with a building level | |
| It is necessary to install special metal locks between the slats | |
| After covering the walls with clapboard, we decorate the corners with a special wooden plinth | |
| We also do the same with the joints between the walls and the ceiling. |
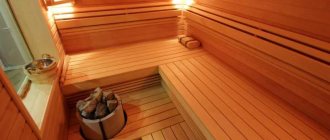
Shelf structure
Since the height of the cabin of a home mini-sauna is rarely more than 2,100 mm, the bottom shelf should be at a level of 600-700 mm from the floor. The top shelf is located at a height of no more than 1,000 mm.
| Illustration | Description of action |
| First, we assemble the frame of the upper shelf with a length corresponding to the width of the steam room and a depth of 450-600 mm. We attach it to 3 walls of the cabin | |
| We attach vertical support posts to the base of the top shelf | |
| We attach a horizontal beam for the lower shelf to the supports | |
| Vertical supports are equipped with adjustable legs, which can be tightened if necessary to achieve ideal horizontal position. | |
| Checking the design with a level | |
| At the bottom, we also attach a horizontal bottom beam to the supports, under which, if necessary, we place wooden planks | |
| We assemble the frame of the lower shelf and attach it to the walls and support beams of the upper shelf | |
| Checking the diagonal of the structure | |
| Cutting boards for making seat and back panels | |
| We install two boards on the frame, place wooden dies of the same thickness between them, the walls and supports. We place three connecting plates under the boards and attach them to the future shield using a furniture stapler | |
| This way we completely assemble the seat or backrest | |
| We turn the shield over and secure the structure with self-tapping screws. In a similar way, we make the required number of wooden panels of the required width and attach them to the frame | |
| It turns out to be such a beautiful design |
Lighting and heating system
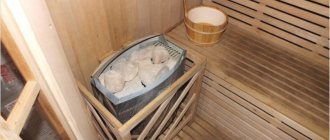
Home saunas do not use solid fuel or gas heating devices, so the choice is limited: an electric heater, IR emitters or a steam generator. There is a wide range of heating equipment for sale for saunas and baths. The installation site of the heating device must be lined with natural stone. For a small sauna, equipment with a power of 3-4 kW will be sufficient. It is strictly not recommended to use homemade heating devices to heat the sauna - only factory-made and certified ones.
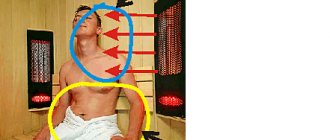
Infrared emitters are also very popular, especially recently. They do not heat the air, but act directly on the human body and promote more intense sweating.
Electric heater
IR emitters in the sauna
Steam generator
After installing the heater, you can begin installing lighting fixtures, thermometers, sensors, ventilation grilles and valves. They are fixed to the cabin casing using self-tapping screws. For the sauna it is necessary to use only waterproof sockets, switches and lamps. To avoid burns, it is recommended to protect lighting fixtures with wooden lampshades or decorative screens.
Lamps in the sauna must be equipped with lampshades or screens
Mini sauna control panel
Waterproof sockets
Door to the sauna
The creation of a home mini-sauna with your own hands is completed by a door canopy. You can install a traditional structure made of natural wood, but it will be quite expensive. But it is not recommended to use doors made of MDF, since high temperature and humidity will cause them to move. Glass doors with a silicone seal, which is practically invisible, are very popular.
The sauna door should not be equipped with mechanical locks; magnetic latches can be installed. The outer handle can be made of any material, but the inner handle can only be made of natural wood.
A wooden door is stronger, more durable and holds heat better, but they are expensive
Glass door to a home mini-sauna
For the door to the sauna, it is better to choose a handle made of natural wood.
We invite you to watch another video that shows how to set up a mini-sauna in your apartment
Materials for thermal insulation
The heater power in a small sauna is small, so high-quality thermal insulation of the walls and ceiling is needed. This will make it possible to maintain the appropriate temperature conditions with low energy consumption.
Attention: when purchasing insulation, you must abandon polystyrene foam and its various modifications. This material may melt when heated and produce harmful smoke.
For insulation, it is advisable to choose mineral wool insulation; it is not susceptible to temperature effects, and in terms of thermal properties it is not much inferior to polystyrene foam. The insulation is placed between the cladding slats, which are mounted on the walls and ceiling every 0.5 m. If the insulation is in contact with the brick, then polyethylene film should be used for vapor barrier.
If you use boards with thermal insulation rather than boards as cladding, then the walls do not need to be insulated. The shields consist of natural cork, which is soldered using its own resin. They are characterized by environmental friendliness and also have good moisture resistance.
The material must be mounted to a frame made of timber.
Legal subtleties and recommendations
Relatively recently, the idea of installing a sauna in an apartment had to be abandoned. However, today, if a number of requirements are met, this idea can be brought to life. So, to install a mini-sauna in an apartment, a number of the following conventions should be observed:
- Heating of the air in the sauna is possible only from the stove installed by the manufacturer. It provides automatic switches when the temperature reaches +130°C, as well as in the case of continuous eight-hour operation.
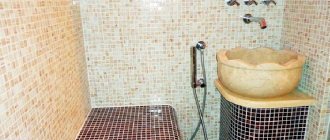
- To spray water in the sauna, install a perforated pipe or deluge. Connections to sewerage and water supply should only be made outside the sauna.
- The area of the room must be at least 24 m2.
- The wood used must be specially treated to protect it from fire and rot.
- It is prohibited to install a sauna in a residential area.
In order to approve a sauna in an apartment project, it is necessary to bypass such services as the housing inspection, fire service, homeowners' association, sanitary inspection service, etc. In different regions of the country, the number of authorities passed may differ, so in each individual case everything should be clarified in advance.
Corner bathhouse with veranda
There are corner bathhouse buildings with a veranda. This angular layout opens up the possibility of creating a veranda; it can more fully provide protection from adverse weather influences.
- Allows you to increase the functionality of the bathhouse, in particular in the autumn and winter seasons.
- Due to the density of available light, greenhouses are often installed on verandas.
- There is also a triangular type of corner bath.
The structure has the shape of a triangle only on the plan or in the top view, but in fact this option is great for constructing a veranda along with the main rooms of the bathhouse.
Types of mini-saunas for a city apartment
The sauna in the apartment should most likely not be full-size, but miniature. We will now briefly tell you about the features of the four most common types of mini-saunas. Moreover, an interesting fact is that such a miniature sauna can even be purchased ready-made.
With electric heater
Construction of a sauna in your apartment usually results in the refurbishment of the bathroom, since this requires modernization of communications. Consequently, this event is inevitably accompanied by the collection of permits. However, installation can be greatly simplified by connecting using flexible hoses. In this case, running around to approval authorities can be avoided. All responsibility in this case falls on the manufacturing company.
The stove for the bath is chosen like this...
Phytobarrel
If there is a shortage of free space, a compact phyto-barrel is an excellent alternative to the classic option. This mini-sauna in the bathroom can be installed in any free corner. The area it occupies is about 1 m2. It never exceeds human height in height. The power of the heating device used in it is about 2 kW.
The most common models include barrels made of cedar wood and equipped with their own steam generator.
Although this mini-sauna is quite compact and easy to use, its installation should still be entrusted to the company from which it was purchased.
The phytobarrel is easily controlled using a special remote control. Some models have special devices that make the procedure even more enjoyable. This is, for example, a balm sprayer.
Portable sauna
Saunas of this type consist of a frame covered with fabric. The operating principle of a portable sauna is very similar to a phyto-barrel. The head in it is not exposed to heat. This device is quite cheap, lightweight and very attractively compact.
The main advantage of a portable sauna is its ease of use. The only thing needed for it to work is an outlet.
Read more about camping saunas here!
Infrared sauna
Based on the experience of recent years, we can say that this type of sauna is the optimal solution for indoor use. It, like an important steam room, is capable of removing excess fluid and toxins from the body and is capable of stimulating the functioning of all organs.
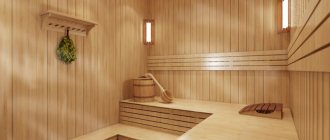
Finnish sauna
If there is enough space in the apartment, you can also think about installing a Finnish sauna. She can receive several people in one session. The steam in it is dry, it heats up to 90 - 100°C. This point is its main difference from the saunas listed above.
Turkish steam room
Hammam in our country is still exotic. Its arrangement is not possible in every apartment. In standard 2-3-room apartments it is out of the question. Now, if the housing area is large, if it is two-tiered, if there is a separate entrance, then you can think about a hammam.
The room in which this steam room will be located must be completely separate from other rooms, it must have a good exhaust hood, sewage system, hot and cold water supply.
Hammam is a good option for spacious cottages housing 2-4 families.
Do you want to know how a Russian bath, a hammam and a Finnish sauna differ from each other? Click here and you will find out!
Construction, corner bathhouse 10×7
Such a building makes it possible to accommodate a large company, and also allows you to place a compact swimming pool or plunge pool on its territory with all communications and equipment for maintenance. The internal area is 44 m2.
Here is the volume of each separate room:
- Terrace – 16 m2;
- Recreation room – 9.5 m2;
- Steam room – 7.1 m2;
- Washing compartment with a font, volume 2.5 m2 - 7 m2;
- Bathroom – 2.1 m2;
- Tambour with details of the technical room - 2.2 m2.
This layout involves the design of a corner bathhouse with a terrace. The construction of a terrace gives visitors the opportunity to sit outdoors and also protect themselves from bad weather, including the rays of the scorching sun.
The decent area of this area allows you to build a barbecue oven - this will perfectly enliven the interior of the platform, and also make it possible to cook dishes over an open fire.
Frame construction
To build a home sauna in an apartment with your own hands, it is best to use panels. They are connected without glue using a tongue-and-groove system, which makes it easy to assemble and disassemble the sauna if necessary.
The sauna room has been measured. Then the frame is made from ordinary timber. A height of 2 m will be sufficient. The frame is covered with clapboard and foil insulation is laid with the reflective side facing out. The frame bars must first be pressed tightly against the wall and strapped at 5 levels.
To do this, mark them on the foil in the form of horizontal lines. The first three lines are drawn from the floor at a distance of 3 cm, 60 cm, 1 m. Another one will be at a distance of 5 cm from the ceiling, and the last line will be drawn exactly halfway between it and the third. The result should be 5 horizontal lines.
Holes are made through the insulation and exactly along the lines at a distance of 50-70 cm from each other, into which wooden plugs or plastic dowels are inserted. The sauna frame is attached through drilled holes.
The next step is to prepare the shield. It should be sanded thoroughly with sandpaper. Then it is installed on three sides of the frame. A strip of rubber is laid between the boards, and they are connected using furniture corners, which are then covered with baseboards.
Now you can install the face shield, which will be located in the doorway. Then you should fix the ceiling. After this, a cable is laid for lighting the sauna. The joints between the shield and the wall along the perimeter of the face shield are covered with platband.
For insulation it is better to choose mineral wool. The foil should be secured by placing the edges of the strips next to each other, and the joints should be sealed with aluminized tape. The insulation is placed on the ceiling in several layers.
The lining should be placed horizontally. This technique visually expands the steam room for an apartment. Another important point: the sauna ceiling should only be its own.
Dimensions and device
Installing a wood-burning stove in an apartment is very difficult. Therefore, most often an electric stove is used for heating. Special stones are selected for it - Scandinavian diabase, volcanic peridotite, gabbro-diabase, polished basite, basalt, etc.
The power of the heater is selected based on the size of the cabin. For an apartment sauna designed for two people, 3-4 kW and a power source of 220 V are sufficient. A separate wire is allocated for the stove, isolated from other electrical network objects.
In some types you can create dry and wet steam. The required air humidity is regulated by pouring water on the hot stones. The internal temperature is controlled on the control panel.
The cabin walls are made of wood with heat and vapor barrier layers between the main wall.
In addition to the stove-heater, inside the cabin there are shelves in 2 or 3 levels, benches, headrests, supports for the back and legs. They are made from wood with low thermal conductivity: linden, pine, spruce, aspen. Mandatory accessories: moisture-proof lamps, thermometers, tubs and ladles.
Finished cabins are sold disassembled and come in different sizes. In small-sized single-double models, you can simply sit on a shelf. In the more spacious booths measuring 2X1.6 m and 2X2 m, it is possible for two people to lie on the shelf at once. Standard height is about 2 m.
According to the law, in apartment buildings you can install a sauna with an area of no more than 2x2 meters.
Electric stove - sauna heater
To heat a mini sauna, the easiest way is to install an electric heater.
The power of the stove depends on the size of the sauna. The power of the electric furnace is selected at the rate of 1-1.5 kW
.
per 1 m2
of sauna area.
For a mini sauna measuring 2x2 m
.
An electric heater with a power of 4-6 kW
. Such a stove can be connected without any problems to the panel at the input of a regular single-phase electrical network of an apartment or house.
The higher the power of the stove, the faster the sauna will heat up. The power of the stove is considered sufficient if the air in the sauna heats up to a temperature of 80 ° C in 20-30 minutes.
An electric sauna stove is usually equipped with a thermostat, which automatically maintains the set temperature in the sauna.
The sauna stove is placed on the floor or on the wall, always near the door
. This arrangement of the oven ensures that the cold air entering through the door is captured by the flow of hot air from the oven, quickly mixed and warmed up. It is convenient to clean the sauna if the stove is mounted on the wall, at a small height from the floor.
It is recommended that the level of the stones in the stove be at the level of the feet of the person sitting on the top shelf. To place the stove at the required height, sometimes it is necessary to build a pit in the floor.
Some furnace designs require guards to be installed around them to protect people from accidentally touching hot parts. It is also necessary to comply with the requirements of the factory fire safety instructions.
The sauna heater stove has a compartment where stones are loaded. The heated stones are watered with water, which turns into steam, increasing the humidity in the sauna.
For laying in the oven, stones with a fraction of 40-80 mm are used. certain minerals, for example, diabase, jadeite, soapstone, etc. Using random stones is dangerous.
Hot stones can crack and fly apart when watered on them. There should not be too many stones, because then the inertia of the furnace increases and, as a result, energy consumption increases.
Experts have calculated that a medium-sized home sauna (200x160 cm
) for one session of bath procedures,
kW*hour
of electricity
for heating . Moreover, most of this energy remains in the house, heating it. For comparison, it takes 1.5 kWh
kWh
to bathe in the bathroom . Most of the energy spent on heating water flows along with the water into the sewer.
For example, one of the domestic manufacturers produces wall-mounted electric heaters under the SteamSib brand. The electric heater is designed to heat and maintain a set temperature in a steam room and generate steam from the stones.
The wall-mounted electric heater “SteamSib” is commercially available in three modifications: with a power of 3.4 kW, 4.4 kW, and 5.4 kW. Dimensions of the electric heater (HxWxD) 506x446x290 mm.
Heating is controlled using a remote control panel. The control panel consists of a control unit and a temperature sensor. The control unit is mounted outside the steam room and connected to the electric heater and temperature sensor mounted inside. The control unit sets the heating level of the steam room and the operating time of the electric heater, and also turns the electric heater on and off.
How to make a sauna in an apartment: home requirements and approval
Conditions
A steam room can only be installed in brick and monolithic buildings. The ceilings between the walls must be reinforced concrete, but not wooden. Installation in one-story and two-story houses is also not allowed. You can only connect an electric oven, which consumes an average of 3 kW per hour, or steam generators.
How to legitimize
You need to obtain permission for the arrangement from several authorities.
- Housing inspection
- Rospotrebnadzor Department
- SES
- Fire service
Choosing wood for a sauna
Linden, aspen and abashi are best suited for decorating a sauna in an apartment. You can only use one type of wood; you should not mix them. The owners of the future sauna decide on their own which wood to choose, and its characteristics should be taken into account.
The following types of wood are suitable for saunas:
- Scandinavian pine. It has a pink tint, almost no knots, and has an interesting pattern of annual rings. Over time, such wood darkens and shows signs of aging.
- Alder has plenty of density, a light pinkish-brown hue and a gorgeous ring pattern. It can be used for exterior decoration of the sauna.
- Hemlock is a wood that does not have resin or knots, its color is pinkish brown, its pattern is in the form of parallel lines.
- Scandinavian spruce is the most affordable among conifers. It has a large number of small knots, the color is light yellow.
- Linden is wood that does not have knots or resins.
- Aspen - does not emit resin and is not subject to rotting. Has a light beige tint.
- Abashi is an African oak tree. The wood is dense, has an even structure and low thermal conductivity, the color is light brown with dark spots.
Advantages of a corner bath
The L-shape projection provides various advantages over traditional layouts, where the shape of the building has straight lines.
- There is an excellent opportunity to use the plot area wisely. Often the corners on the site remain unused to the fullest extent. As soon as the bathhouse is placed in a corner connection, there is a lot of space for different needs.
- When a beautiful tree grows on the site and the hand does not rise to cut it down, and there is not enough space for an ordinary bathhouse, a corner bathhouse will solve such difficulties and also decorate the site. Such a bathhouse is able to bypass a growing tree and provides an excellent exposure.
- If you look closely, standardized baths are practiced around, protruding in a simple rectangle shape. With effort, you can build an atypical beauty who will serve as an example for other people.
- Placing the stove in the center provides opportunities for creating unusual interiors, and the location of the heating is more uniform and efficient.
The idea of two separate entrances makes it possible to implement excellent solutions, for example, to create a separate barbecue area and this under a single roof.
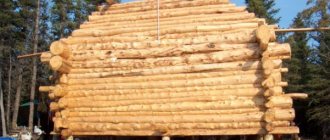
How to properly make a sauna in a cottage with your own hands: step-by-step instructions
Construction must begin by pouring the foundation. It is recommended to make a strip foundation for the sauna. It will need to be buried at least 75 cm. The width of the structure should be approximately 26–30 cm, the height of the part above the ground should be 20–25 cm. Small holes should be made in the basement half for air ventilation. This will protect the product from dampness and high humidity.
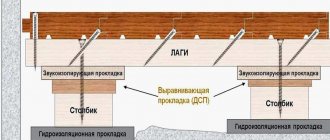
Next comes the installation of the floor.
The sauna subfloor consists of several layers
The structure can be made of boards, but they do not need to be varnished. Another option is to use tiles, under which a heating system can be installed.
A heated floor system in a sauna is practically necessary
The disadvantage is that such a floor slips. However, a special wooden grate will solve this problem.
A drainage system must be provided.
Construction of a frame on a summer cottage
If you plan to build a sauna from wooden beams, then you need to make a five-level piping. You will need to follow these steps:
- A plan for fixing the beam should be made.
Various options for fixing the timber are possible
- When the fastening option is selected, you can proceed to fixing the parts.
- You need to drill holes for the timber using a hammer drill.
- Frame bars must be fixed using special wood plugs, screws or dowels.
- The ceiling frame should be mounted from wide-width boards parallel to each other and the walls of the building.
The ceiling frame of the sauna is mounted from boards
- In a frame structure, you need to prepare a place for the door. A horizontal jumper must be mounted above this place.
A horizontal lintel above the doorway is required
- Install thermal insulation material. It is recommended to use mineral wool as it is ideal for areas with high temperatures.
- At this stage, it is necessary to lay moisture-proofing material. The walls should be covered with special foil, the mirror part of which turns inward.
- The joints of the foil must be secured with aluminum tape.
The walls of the sauna need not only to be insulated, but also protected from moisture.
Wall cladding inside the sauna
If the ventilation is not designed correctly, then in the future dampness may appear in the building and fungus may form. Overheating is also possible, which can lead to a fire.
For proper ventilation, it is important to provide inlet and exhaust openings.
Proper placement of holes is very important for air circulation
The size of the ventilation hole can be calculated. For every 1 m3 of steam room you need a hole with an area of 24 cm2.
Ventilation vents should be positioned as follows:
- One of them is at a distance of 30 cm from the floor in the area of the stove. It is needed to ensure air flow into the combustion chamber.
- The other is located on the opposite wall at a distance of 30 cm from the ceiling.
The dimensions of the vent depend on the area of the steam room
The air that enters through the first hole will pass close to the stove, heat up and rise to the ceiling. Fresh air will flow through the top hole, which can replace the stagnant air on the top shelf.
The use of fans for forced circulation is not allowed, as this may cause burns.
The wiring in the sauna is installed taking into account high electrical safety measures. It is allowed to use heat-resistant wire with double insulation. The electrician must calculate the required power of the electrical network.
All lighting fixtures must be equipped with sealed hoods. They should be installed on walls or under the ceiling.
The correct placement of lights in the sauna is very important for its safety.
Lighting fixtures should not be placed above the stove.
At the next stage, you need to build the sheathing and sheathe the walls. The sequence of actions is as follows:
- Before covering it is necessary to install a horizontal sheathing. It is recommended to use 3x4 cm bars. The optimal distance between elements is 40 cm.
To cover the walls, installation of horizontal sheathing is required.
- To fix the benches you need a transverse frame.
- Next, you need to cover the walls with clapboard. The material is fixed with nails.
You can fasten the lining with nails
- The caps of the fasteners should not be open, since in case of strong heating they can easily get burned. You can solve the problem by covering them with special covers.
Video: technology for arranging ventilation in a steam room
Door and hardware installation
The size must be selected based on the prepared opening. The height from the bottom of the door to the floor base should be at least 12–15 cm. There should be no locks or latches. Only magnetic mounts can be used.
For the sauna you can use magnetic door latches
Equipment can be installed only after finishing. If the structure is located in a separate building, then you can install a real stove. However, if you plan to use a heater, you must first install it, and then move on to finishing.
We need to make a fence for the stove. Ideal for this are boards that were used to make benches. The distance from the slats to the stove should be at least 5 cm. The height of the fence can be greater than the heater by a maximum of 4–5 cm.
It is recommended to fence the stove
What stones to lay
It is important to choose the right stones. Their shape and quality affect the level of comfort. The stone should be even, smooth and round.
The choice of stones for the sauna is very important
Cobblestones with cracks and gouged areas are not suitable.
First of all, large stones are laid out on the heater. There are smaller pebbles on them. They should be washed thoroughly with water and dried every 6 months. Suitable for sauna:
- jade;
- diabase;
- soapstone;
- porphyrite
You can use any of them.
Video: how to equip a sauna in an apartment with your own hands
Installation features
Industrial plastic dowels should be used to secure the bars. Wooden plugs may become loose in the future due to continuous temperature changes.
To avoid problems with fixing the ceiling, the supporting beam must be installed vertically, and the cladding boards must be fastened horizontally. In this case, the sheathed frame acquires the necessary rigidity and perfectly holds the shelves.
To prevent moisture from penetrating behind the cladding, boards should be installed with an overlap. The finishing of horizontal wall cladding is done from bottom to top.
Important: it is worthwhile to install a vapor barrier between the cladding and the thermal insulation; for this you can use aluminum foil.
It is advisable to maintain a gap of about 4 mm between the foil and the sheathing, thanks to which the wood will not get wet due to condensation.
It would be better to place the shelf above the bathtub and fix it on hinges so that the structure can be lifted. The height of the shelf must be designed so that family members, when sitting, do not rest their heads on the ceiling.
Caution: when performing work, you need to make sure that the heads of the nails are sunk into the wood, otherwise they may cause local burns to the body.
Construction of SPA, saunas and hammams
The bathhouse has long been an excellent healer, an antidepressant, a place where you can relax calmly, receiving a lot of pleasant emotions and recharging with the energy of warmth. Superpar.pro employees will find a quick solution and help each client who contacts him to choose the optimal conditions and the appropriate option.
Main types
The company offers to build from scratch on a turnkey basis:
Construction of a sauna is the most popular choice among customers; there are many ready-made designs, sketches for cottages, houses, industrial enterprises, even small-sized housing - small apartments;
The construction of a hammam-Turkish bath, the use of complex materials during installation makes the construction process more labor-intensive; laying mosaics, tiles, and marble requires care;
Construction of a Spa complex - a ready-made room for relaxation, treatment, recreation with a full supply of equipment, surroundings, furniture; the work is carried out not only by the builders, they are also assisted by designers - their coordination and joint cooperation make it possible to bring to life the most complex and unusual objects.
How to calculate the area of a sauna
There are no strict requirements for accurately calculating the size of the steam room itself. It is important to organize proper air flow and ventilation. If you live in an old housing stock, then the dimensions of the bath corner should be 1 m³ per person. This limitation arises due to the fact that in such houses the ventilation system simply cannot cope with the increased load for servicing the sauna.
Important! No less strict rules apply regarding the materials from which the lining of the steam room itself should be made. The wood must be natural.
It must be impregnated with special compounds against fungus and mold. Best suited for these purposes are: aspen, linden, oak, in other words, all deciduous trees. In addition, the premises must be equipped with a fire alarm and fire extinguishing system.
This is what the fire extinguishing system looks like inside the cabin
Advice! To obtain all permits, you will need to contact the BTI.
After receiving BTI approval, you must contact:
- fire service;
- management company or HOA;
- obtain permission from the housing inspection and SES;
- and also obtain approval from the architectural and construction supervision inspection.
Selection of oven
The apartment does not use a wood or coal stove, this is due to fire safety measures. You can also install an electric one, since in this case it will be a little easier to make a bathhouse in an apartment: you don’t need to build a chimney and you don’t need to stock up on fuel. In addition, it will quickly warm up the room.
You should buy a stove not just to heat the house, but one that is intended for a bath, that is, for rooms with high humidity. The spiral in such furnaces must have a special coating. The power of the electric furnace should be enough to heat a steam room measuring 6x2, the voltage will be 220 V. A frame is made of bars for the furnace, it is necessary to eliminate the possibility of getting burned on it.
You can also organize an infrared sauna in your apartment with your own hands. In this case, the heaters do not heat the air, and the heat rays act directly on the person. How to install them correctly is indicated in the instructions. It is important to provide an air gap in the walls of the sauna for ventilation.
Practicality of a corner bath
The main uniqueness of corner baths is their non-standard configuration. The construction of a bathhouse according to the classical type assumes the presence of a steam room orthogonal to the rest rooms.
Let's consider the main advantages:
- The stove, located in the middle of the bathhouse building, makes it possible to heat all rooms at once. With this location of the stove, heat loss is reduced. This will be especially appreciated in winter;
- Corner-type baths were invented mainly to save space on the site. By doing this they do not break the integrity of the picture of the site;
- The design of such a bathhouse can be used in difficult plots, where due to such a structure it is possible to go around a huge tree or communications;
- A structure with a triangular shape or angle looks unusual and stylish;
- It is possible to create 2 entrances - this in turn makes visiting the bathhouse more convenient.
Sauna equipment
In any store that sells sauna materials and items, you can buy everything you need, such as beds or remote controls. Here you can find a fully assembled apartment sauna. In this case, the problem is how to install the finished structure in the existing space. For now, you can make a sauna in your apartment with your own hands according to your own design.
The cable laid inside the steam room must be passed through a thermostatic hose, which will protect the wiring from high temperatures. The power cable must be routed separately from the panel. No other electrical appliances should be connected here. Electricity consumption will be approximately the same as when operating a washing machine.
A very important aspect: all switches should be located only outside the steam room. To ensure safety, in addition to all of the above, it is necessary to install lamps with moisture- and heat-resistant glass. You can buy them in almost any store.
Cons of a corner bath
Plans for corner steam rooms also have disadvantages:
- Compared to the classic type of structure, these baths have a 15-17% higher consumption of raw materials;
- For a person inexperienced in creating projects, it is more difficult to calculate everything, and for a builder with no experience it will be more difficult to make a strong structure for the junction of two internal corners. If we talk about roofing, then creating a strong rafter set in a vertical arrangement will not be easy without the necessary experience;
- Two external doors are a convenience, but you need to pay attention to measures to save heat in the bathhouse. In this case, you will need to use high-quality doors, and this will be more expensive, or you can install entrance groups, which is troublesome and costly;
- The central location of the furnace is the large pole. However, additional costs will be required. In order for such a stove to justify itself, and also to operate efficiently, it is necessary to build an elongated combustion tunnel. To implement such structures, you will need the services of a furnace master with sufficient qualifications and a good selection of refractory bricks. Metal stoves, welded or cast, will be expensive products.