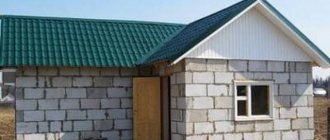
Among the owners of a suburban area, the question of what material to choose to create a steam room from affordable products and at the same time with decent characteristics does not lose its relevance. After all, for many, the usual timber and logs turn out to be too expensive, so a cheaper alternative is a cheaper foam block. Such a bathhouse made of foam blocks has many advantages:
- environmentally friendly;
- easy to erect;
- when heated, does not emit harmful substances to human health;
- has high sound insulation;
- breathable and has a pleasant microclimate;
- does not shrink and retains heat.
In addition, baths made of foam blocks are fire-resistant, which is important. And even if it is small, but made in accordance with all the features and technologies for the phased construction of a bathhouse from foam blocks, the result will be a reliable, convenient and fairly durable structure. If you have doubts whether it is possible to build a bathhouse made of foam blocks on your site, taking into account its size, type of soil, communication capabilities, etc., weigh all the pros and cons, reviews of the owners of a bathhouse made of foam blocks.
We’ll talk about what a foam block bathhouse will be like 10 years later, but now read the step-by-step instructions for a foam block bathhouse to avoid mistakes.
The feasibility of using foam blocks
Baths made from this material are actually usually very inexpensive. In addition, foam blocks have almost all the same advantages as wood: they allow air to pass through (“breathe”), are very easy to cut, and are not too heavy. Their advantage, compared to timber and logs, is that they do not burn at all and do not rot. The disadvantages of walls made of this material include the fact that it is capable of absorbing moisture, while gradually collapsing. Therefore, projects for bathhouses made of foam blocks must be developed taking into account the characteristics of this material, in particular its hygroscopicity.
According to SNiP standards, it is prohibited to build baths from foamed cement. However, these rules were invented quite a long time ago. Since then, a huge number of new, modern materials with truly unique properties have appeared on the market. Foam concrete also belongs to them. In addition, SNiP standards were developed mainly in relation to public baths. Of course, in this case the rules must be very strict. A small country bathhouse made of foam blocks can become a very convenient and quite durable structure. But of course, only if all rules and construction technologies are observed.
What types of blocks are suitable?
Block baths began to be built relatively recently, but experienced craftsmen have already left feedback on which blocks are best to use for the construction of the structure. Foam concrete blocks have different sizes and different densities - the strength of the material depends on this indicator. The more air that was used to create the foam during the production of the blocks, the less dense they will be.
Foam concrete blocks with a density of D600-D800 are suitable for the construction of a bathhouse. Blocks of this brand are perfect for building a sauna due to their good strength and thermal insulation. They will become the optimal raw material for the construction of load-bearing walls of the structure.
From the requirements for materials for a bath it follows that the raw materials must be reliable and withstand the effects of heat from the inside, and also not absorb moisture. Since foam concrete has the ability to absorb moisture, at the construction stage before finishing it must be treated with a water repellent.
Blocks of the D900-D1200 brand will be irrelevant here, as they require additional high-quality thermal insulation. Grade D1300-D1600 will be redundant due to its excessive strength: such material is used for multi-story construction. The most popular stone size is 600x200x300 mm.
Advantages of a foam block bath
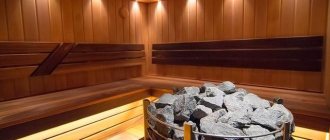
In addition to being cheap and having a rather pleasant microclimate, the advantages of such structures include environmental safety. When heated, foam blocks do not emit any harmful substances. In addition, they retain heat very well, meaning you will have to heat the bathhouse no more than once on a wash day. Since the foam block is not flammable, you do not have to comply with any special standards when installing the heater.
And of course, the undoubted advantage of this material is its ease of installation. Assembling a bathhouse from a log or timber is a rather labor-intensive task and at the same time technologically complex. Not everyone has experience in constructing such structures in our time. Probably any owner of a suburban area can lay out block walls.
Bathhouse designs made from foam blocks can be anything, that is, the owners of the site have the opportunity to choose the layout of this structure at their discretion. The material is easy to cut even with a regular hacksaw.
Disadvantages of foam block baths
The disadvantages of a bathhouse made of foam blocks are, first of all, dampness and destruction of the walls; in particular, saturating the blocks with water is dangerous in the winter. In a heated bath, vapors easily penetrate into the porous material. After the steam room cools, the water freezes and, expanding, simply breaks the concrete. Therefore, when building a bathhouse from foam blocks, special measures should be taken to waterproof the walls. In addition, the building will also have to be insulated. In this case, the walls will take longer to cool, and therefore, even if water gets into the material, it may have time to dry before freezing. In addition, much less condensation collects on insulated walls.
Experienced owners of suburban areas also recommend installing ventilation in such bathhouses. This will prevent stagnation of damp air, therefore extending the life of the walls.
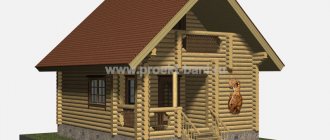
Of course, all these tricks: waterproofing, insulation, ventilation - will cost the owner of the bathhouse a pretty penny. Therefore, structures for this purpose made of foam blocks are usually built only in steppe regions, that is, where it is difficult to obtain wood or it is very expensive. In forested areas of the country, it may be more advisable to build a wooden bathhouse. Most likely, it will not cost much more than paving stones.
Bathhouse made of foam blocks: price
The cost of such a structure will depend, of course, primarily on the layout and size. A wall foam block 60x30x20 costs about 2,500 rubles per cubic meter. A small bathhouse measuring 3x4 meters with one partition and a ceiling height of 2 m will require a little more than 6 m3. That is, the construction of the actual walls will cost about 16-20 thousand rubles. This will require about 5 m3 of mineral wool. It will cost about another 8 thousand rubles. About 2000 rubles will be spent on the glue solution. Thus, the walls of a small bathhouse made of foam blocks, at a rough estimate, will cost about 30 thousand rubles. Of course, to this amount you will need to add the cost of the foundation, lumber for the floor, ceiling and roof, waterproofing and lining.
A large 6x4 bathhouse made of foam block will, of course, cost more. It has recently become very fashionable to build attics on such structures. This is, of course, very convenient and allows you to save space on the site, but of course, it will additionally increase the cost of the structure. The walls and partitions of a standard 6x4 m bathhouse will require about 11 m3 of blocks.
Sheathing material
This process can be done with your own hands without the involvement of specialists.
In order to calculate the required amount of lining, you need:
Let's calculate a bathhouse measuring 4x4 meters, with a ceiling height of 3 meters. We will trim and sheathe all the walls and ceiling; Let's assume that the bathhouse has two compartments - a 3x4 meter steam room and a 1x4 meter dressing room; Next, you need to calculate the area of the steam room lining.
Calculation of ceiling area: 3x4=12 m2. Calculation of wall area No. 1: 4x4 = 16 m2. Calculation of the area of a short wall: 3x3 = 9 m2; We calculate the total area of all compartments: 12 (ceiling) +16 (wall No. 1) +9 (wall No. 2) +3 (wall No. 3) +3 (wall No. 4) = 42 m2;Next, we carry out calculations for the dressing room.
Ceiling area: 1x4=4 m2. Area of two walls No. 1: 4x3=12 m2. 12x2=24 m2.
Wall area No. 2: 1x3 = 3 m2. 3x2=6 m2. Total area: 4 + 24 + 6 = 34 m2; The total finishing area is 42 + 34 = 76 square meters; Then we count the window and door openings, their area, then add about 15-20 percent for trimming the material.
Construction of foundation and walls
Building a bathhouse from foam blocks is a simple procedure. Such a structure is erected in approximately the same way as a brick one. The difference is that the seams in the masonry of foam blocks are very thin, and special glue is used as a solution to hold the blocks together. When building even a small bathhouse from this material, it is advisable to reinforce the walls. To do this, in every fourth row, metal rods are placed in gutters cut out with a grinder. An armored belt must also be placed on top of the masonry.
It is recommended to make the foundation for a bathhouse made of foam blocks strip and quite powerful. All foam materials are fragile. And therefore, even with small movements of the soil, walls made of them can crack. For the same reason, blocks should be laid as evenly as possible, using piers, plumb lines and a level.
Aesthetic aspect
According to reviews from the owners of foam block baths, they were satisfied with the choice they made. Wood is always held in high esteem, but not everyone can afford it. Therefore, more and more summer residents prefer cellular concrete. But there are a few tips that should not be neglected:
- An internal vapor barrier is required. It is better to use aluminum foil.
- The final interior decoration can be made from lining.
- It is advisable to clad external walls with ventilated facades - vinyl and basement siding, blockhouse, brick.
- It is recommended to provide natural ventilation in the room.
- The first row of masonry walls is placed on a cement-sand mortar, all other rows are placed on a special glue for foam blocks.
Bathhouse floors made of foam block
To prevent the walls from being saturated with water from below from the ground, it is worth installing special floors in such a structure. They need to be made concrete and slightly inclined towards the center. In this case, a receiving tray and a plastic drain are installed in the middle of the bath. The pipes should be laid underground below the freezing level and extended to the septic tank.
In order to extend the service life of concrete floors, they should be covered with tiled rough tiles. The base itself should be treated with penetrating waterproofing before laying it. In the future, special wooden gratings are usually installed on top of the tiles. After taking water procedures, they can be taken outside and dried.
Foundation waterproofing
This operation must be performed. In this case, you will get a durable bathhouse made of foam blocks. Reviews from owners about such buildings are not bad, but only if they are waterproofed according to all the rules. For the foundation of a bathhouse, both vertical and horizontal waterproofing are usually used. When installing the tape at the bottom of the pit, be sure to pour a sufficiently thick layer of sand. After the foundation concrete has gained sufficient strength, its top is glued with two layers of roofing material.
The walls of the base of the bathhouse must be protected from moisture both outside and inside. In this case, you can also use roofing felt. Penetrating agents are also considered a very good solution for waterproofing the foundation of a bathhouse. Sometimes the base walls are coated with bitumen mastic in two layers.
Construction of the foundation for the building
The selected site for construction is thoroughly cleaned of debris and all organic components: grass, leaves, branches, roots. The site is leveled. After pouring the foundation, the fertile soil inside the future premises is removed.
Selecting and pouring the foundation
The choice of the type of foundation for the construction of a bathhouse is a key condition for the strength of the future building. A foundation defect will destroy the building within a few years. The base should not crack, warp or crumble. Close occurrence of groundwater, a strong slope of the site or loose soil will require the creation of a grillage or monolithic foundation. If you have ordinary dense soil, you can get by with a strip foundation that is not very deep. Deep digging will be required for looser soil. The foundation must be buried below the freezing point of the soil in the presence of sandy and clayey soils. In winter, the areas around buildings are not cleared of snow - snow cover reduces the depth of freezing.
Ready foundation foam blocks are laid using a crane or other special equipment, then the speed of construction will increase by an order of magnitude. Such installation is possible if there are access roads to the site.
The width of the bathhouse foundation is selected taking into account the width of the building block - it should be a little wider. In our case - 300 mm. The depth should be at least 80 cm, taking into account the laying of a sand and gravel cushion. A trench is dug 50 cm wide to install formwork and spacers. The foundation rises 15-20 cm above the level of the site. The resulting height - 80 cm of concrete - is sufficient for a lightweight building made of foam concrete.
The construction of the basement is divided into stages:
- For the trench we make markings using cast-offs. Nails are driven into a board 60 cm wide at a distance of 50 cm. The board is attached to a post, which is driven into the ground beyond the intended foundation. We make at least 8 such cast-offs. A cord is pulled between them on the nails. This results in a clearly marked outline of the foundation. Instead of a board, simple metal pins are used. If necessary, the cord can be removed.
- We dig a trench. Large lumps are removed entirely. The stones will be useful for constructing a stove.
- We fill the bottom of the trench with sand or a sand-gravel mixture 20–30 cm thick. Wet sand will do. The mixture is compacted tightly and watered.
- We make formwork from boards or plywood. Thickness and strength are adjustable using spacers.
- We knit a frame for concrete reinforcement from reinforcement with a thickness of 12 mm. The frame mesh is at least 15 cm.
- Fill the trench with ready-made concrete (grade M200, M250). Concrete is made from a sand-gravel mixture and cement in the ratio: sand 3 parts, gravel 5 parts, cement 1 part. The filling process is continuous. Breaks of up to 3 hours are allowed.
- Air is removed from the concrete using a vibrator or a regular pin.
- The finished foundation is covered with a film to protect it from sunlight and precipitation. Every 2 - 3 hours the concrete is moistened. We remove the formwork on the 3rd day.
There are no ventilation holes. If the foundation is very deep, it is necessary to equip a hole for the sewer pipe.
Sewerage installation and base waterproofing
Work resumes after the formwork is removed. We remove the fertile layer of soil and install a sewer drain with a wastewater receiver - a plastic or metal pipe. The pipe must have a slope for natural drainage of water. We fill the base of the bathhouse with a 10-centimeter layer of sand, and on top - a layer of gravel or expanded clay 15 cm thick. We thoroughly compact the soil. Then we lay a metal grid for reinforcement. We make the screed: fill the prepared surface with concrete 15 cm thick.
Outside the foundation, a similar waterproofing pad at least half a meter wide is made and a cement blind area is laid. We make a monolithic base for the stove.
Waterproofing walls
To protect the enclosing structures of the bathhouse from moisture, it is best to use foil vapor barriers. You can take special isospan or penofol. Today on the market there are foil materials designed specifically for baths. The waterproofing is secured to the wall with beams. The joints should be additionally nailed and taped on top with metallized tape. The lining is subsequently attached to the beams.
The ceiling of the bathhouse is usually made of boards. You can protect it from moisture by using impregnating waterproofing designed specifically for wood. A bathhouse with a foam block attic is very comfortable. However, when choosing just such a project, you should keep in mind that in this case, most likely, the roof will also have to be waterproofed from the inside. In the attics of baths, the microclimate is usually quite humid.
What is required for bath ceilings
To figure out how to properly make a ceiling in a bathhouse, let’s focus on the requirements for surface coating.
The difference between a bathhouse and residential and work premises is constant temperature changes with high humidity. To create a comfortable microclimate, temperatures can rise to 80 degrees, and in a steam room up to 100. Air humidity is also high and reaches 98%. Therefore, when choosing a coating for cladding such a room, you should take into account all the nuances.
The correct ceiling in a bathhouse must meet certain requirements and perform the following tasks:
- eliminate heat loss inside the washing and steam compartments;
- retain wet vapors, preventing them from reaching wooden floors;
- No harmful substances should be released or accumulate inside the premises;
- the material must be non-flammable;
- long service life under conditions of high humidity and sudden temperature fluctuations.
The listed requirements must be taken into account if you are going to make the ceiling in the bathhouse with your own hands.
When choosing a material for the interior cladding of a space, special attention should be paid to fire safety, reliability and environmental friendliness
Ceiling cladding for steam room
It is better to make the ceiling in the bathhouse from wood. It is better to choose deciduous trees such as linden, alder or aspen.
Coniferous species are not recommended for use in steam rooms. Under the influence of high temperatures, the coniferous surface can release resin. Resin dripping onto the skin causes severe burns.
The wood for the ceiling in the bathhouse with your own hands must be clean, dry and not infected with fungus and other microorganisms. If you ignore these requirements, then during operation the coating will begin to deteriorate and release harmful substances.
Bath insulation
Next, let's look at how to insulate a bathhouse made of foam blocks. A structure made of this material can be insulated from the cold using both expanded polystyrene and mineral wool. The latter material is considered more preferable. The fact is that polystyrene foam does not allow air to pass through very well. When using it, the walls of the bathhouse will not “breathe”. Insulation should be carried out exclusively from the outside. The fact is that when sheathing from the inside, the so-called dew point moves inside the walls, and they begin to become damp.
How is a bathhouse made of foam blocks insulated? Reviews from owners about such structures are only good if this operation is carried out correctly. Foam block wall insulation technology usually includes the following steps:
- The walls are covered with timber lathing.
- Insulation is installed between its elements. Cotton wool can be installed simply by surprise. Expanded polystyrene should be additionally secured with mushroom dowels.
- The frame with insulation is covered with waterproofing material.
- External cladding is being installed. It can be a lining, a block house, etc. Foam block baths covered with façade vinyl siding that imitates stone look very nice.
You can also cover the walls of the bathhouse with very dense mineral wool with additional fastenings - “fungi”, and then finish it using decorative plaster.
Mauerlat
Before you begin attaching the Mauerlat, it is necessary to make a reinforcing belt so that the foam concrete blocks do not fall relative to each other. The reinforcing belt allows all loads that appear during roof installation to be distributed evenly.
To create a reinforcing belt:
- formwork is located around the perimeter of the building;
- the frame is made using thin (about 10 mm) reinforcement;
- Threaded studs with a diameter of 1.4 cm are installed in increments of no more than 1 m;
- the blocks are filled with concrete grade M-200 (you need to purchase a factory mixture, and not prepare it yourself);
- the concrete mixture should dry for about a week;
- After the concrete mixture has dried, the formwork is removed.
Before attaching the Mauerlat, the wood must be treated with antiseptics and fire retardant impregnation, and also dried after treatment. In addition, it is recommended to treat the wood with a waterproofing material, and liquid materials are used for this (for example, bitumen or polymer waterproofing). If you have to use damp wood, you need to install an adjusting anchor nut to adjust the position of the material every three to five years until it dries completely.
To attach the Mauerlat:
holes are drilled along the length of the dowels into which fasteners are inserted; the anchor is installed all the way; the harpoon is inserted into the concrete, while the teeth are carefully pressed into the depth of the concrete. This method of attaching the Mauerlat is considered the best
Its only disadvantages include its high cost: a set of an anchor and dowel with a harpoon costs more than 3,000 rubles, however, when it comes to the durability and reliability of the building, it is better to overpay a little
This method of attaching the Mauerlat is considered the best. Its only disadvantages include its high cost: a set of an anchor and dowel with a harpoon costs more than 3,000 rubles, however, when it comes to the durability and reliability of the building, it is better to overpay a little.
How to arrange ventilation in a bathhouse
Thus, you now know how to build a bathhouse from foam blocks, as well as insulate and waterproof it. Next, let's figure out how to make ventilation in this structure. The foam block bathhouse must be ventilated. Ventilation in the bathhouse is arranged as follows:
- In the immediate vicinity of the stove, at a height of no more than 30 cm from the floor, a supply hole is made in the wall. Sometimes it is also done in the foundation of a bathhouse. In the latter case, a hole (with a valve) should be made in the floor.
- An exhaust hole is hollowed out in the opposite wall at the top. A valve is installed on it. If the opposite wall does not face the street, the exhaust hole should be made in the same wall as the supply hole, but on top and in the opposite corner. In the latter case, an exhaust fan should be used to ensure good air flow.
Bathhouse made of foam blocks: reviews from owners
The owners of suburban areas have a very good opinion about buildings of this type. The owners of bathhouses made of foam blocks note, first of all, that they retain heat very well. In addition, such buildings do not require any special care: treatment with anti-rot compounds, caulking, etc.
Of course, foam block baths have earned good reviews due to their low cost. Almost anyone can build such a structure on their site. If you line the inside of a foam block bathhouse with linden clapboard, it will smell like a real wooden one. The same applies to the benefits of taking water procedures. In addition, in a bathhouse made of foam blocks, judging by the reviews of the owners, the smell of dampness never appears. The outside of such a bathhouse can be covered with a block house, and then it will look quite traditional.
As you can see, if all the required technologies are strictly followed, a very good bathhouse can be built from foam blocks. Reviews from owners about such structures are mostly good. But only if ventilation is provided in the bathhouse, and its walls are well insulated and waterproofed.
Reinforcement
Making a foundation for a bathhouse is impossible without reinforcement. For strengthening, choose reinforcement with a cross-section of 12 millimeters (for laying longitudinally) and 6-8 millimeters (for laying vertically and perpendicularly). To perform reinforcement, you need to prepare: wire, steel rods, an angle grinder, a tape measure, a welding machine (if you plan to weld the frame rather than knit it).
The structure is made up of 4 or more rods lying in three planes (longitudinal, perpendicular, vertical). The finished frame rises above the ground by at least 5 centimeters, the corners are further reinforced. The work is completed correctly if the cut of the armored belt turns out to be either a square or a rectangle.
Stages of creating a reinforcement frame for a bath: