It seems that almost every man has encountered at least once in his life a nut that did not want to be turned off. She sits in her place, no matter how you spin around her. You run around, literally dance with tambourines, and, you know, she laughs. As if it had taken root. Sound familiar? In fact, a very common situation. The cause is common rust. And rust, as we know, is formed from contact of metal with moisture.
Rust seems to connect the nut to the bolt at the molecular level. Sometimes the bolt breaks due to the applied effort, but the nut does not come off. How to get out of this situation?
Second way
It is possible that you will have to deal with a ball valve with a slightly modified design. For this reason, its filling is extracted differently. First of all, remove the shield. It is made of plastic and has a yellow color. The seals in such designs are black. Dirt and mineral deposits often remain on the shield. They should be carefully cleaned off. After dismantling the plastic shield, take out a ball with slots. You should pull it up. When you remove it from the system, inspect it carefully. There should be no scratches or abrasions on it. If these flaws exist, then it is more advisable to replace the ball with a new one. Next you need to deal with the three rubber o-rings. They are located inside the housing. It is recommended to replace worn parts. Assembly is performed in reverse order.
Main causes of malfunctions
The kitchen faucet, as well as in the bathroom, is actively used by households many times a day. Not everyone treats it properly. For example, the flywheel is often spun in sudden movements with excessive use of force. This leads to the rubber gasket being pressed through, and then to failure of the device.
It is also susceptible to the penetration of abrasive materials (sand or other hard small particles), which settle on the surfaces and make it difficult to rotate, and in the worst case, lead to the destruction of the ceramic ring.
Sticky crane axle box
Most often, single-lever kitchen faucets break. This is due to the fact that they are under pressure with redoubled force. Such actions lead to the fact that the brass part is crushed, and it will not be easy to repair such a crane axle box.
There are three options to solve the problem:
- Replace the mixer with a new one;
- Replace the broken element;
- Repair the failed part.
Methods and repair work
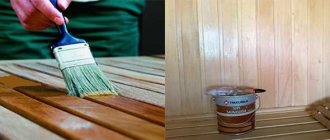
Kitchen and bathroom faucets are made of brass, which does not rust. But it, just like other metals from which other parts can be made, turns sour as a result of interaction with scale, dirt and other substances. To get rid of rust and easily unscrew a stuck faucet nut, use the following methods:
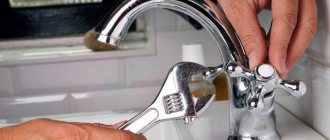
Try to unscrew it first with open-end wrenches, socket wrenches, and socket wrenches, then with an adjustable wrench. If it does not lend itself, change the force of influence upward by increasing the length of the wrench with a piece of pipe. When exposed to force, the edges of the nut are erased. It becomes round. Some faucet models initially use such elements.
When there are no edges, the key spins and cannot engage. In this case, a socket head is welded to the nut and unscrewed using a wrench. Or make notches with a chisel and a hammer.
Sometimes heating helps. Temperature causes the material to expand. Various heat sources are used. A blowtorch is suitable for these purposes. But with strong heating, the plastic parts of the mixer will melt. A hot air hair dryer creates a gentle temperature.
After heating, try to unscrew it by first tapping the nut and bolt. When tapped, rust and scale disintegrate. Unscrew using the rocking method: first point the key clockwise, then counterclockwise. Rust breaks down as the key moves in different directions.
In the bathroom, when replacing the cartridge of a single-lever mixer, first remove the handle (gander) of the mixer and the spout. To do this, unscrew the bolt on the body. Under the handle there is a decorative part that covers the main large nut. The decorative spherical nut is unscrewed by hand. But sometimes she also gets attached to the body. Therefore, pour solvent or acetic acid under it. You can use a syringe and inject liquid under the part in a thin stream. Wait until the plaque dissolves. Tap the edges using a wooden block. After this, put on a hex socket wrench that fits around all the edges. Unscrew using the rocking method.
There is a large nut under the decorative part. It secures the cartridge in lever mixers. Typically, the large nut is made of brass. The yellow color makes it stand out from the rest of the faucet elements. The large nut has 6 internal threads.
If the goal is to preserve the mixer, you need to act carefully without damaging the integrity of the nut. To unscrew, use a hex head, but it is better to use a tubular socket wrench of the required size
Use penetrating liquids or vinegar before unscrewing. Dampen the cloth with vinegar and wait several hours for the liquid to penetrate deep into the area. Then put on a socket wrench and a wrench and carefully unscrew it in a counterclockwise jerk.
To destroy rust on metal products, chemicals are used:
- acid solutions;
- WP-40 product;
- rust solvents.
Solutions of acetic, hydrochloric, sulfuric, orthophosphoric acids, interacting with rust, partially eat it up and make it loose. The popular product WP-40 contains white spirit, highly volatile gasoline, and mineral oil. They also use gasoline, kerosene, and alcohol to remove rust on the fasteners.
When doing plumbing repair work, a chisel or hammer is often used to destroy rusted nuts under the sink.
The help of chemicals in unscrewing a rusty nut is clearly presented in the following video.
Do-it-yourself faucet repair (single-lever and two-valve)
You are: Kanalizaciya-Stroy >> Internal sewerage >> Faucet Add to bookmarks Printable version
A leaking faucet in the kitchen or bathroom can cause a lot of hassle, including increased utility bills. If the damage is minor, then you can repair the mixer yourself. This will save time and money spent on plumbing services.
Single lever mixer
The most common type. It is a simple design where the locking mechanism is a ball or disk. Depending on this, there are such cranes :
The handle used to regulate the pressure and temperature of the water is called a flag. Therefore, the second name for such a mixer is flag.
Single lever mixer design
The most common problem that owners of such a faucet encounter is that when the handle is raised, water flows out of it. This is a sign of a broken locking mechanism. Let's look at how to repair a faucet with a broken cartridge step by step:
- The decorative cover is removed first. It is a flat small disk with red and blue markings. It is needed to visually determine the movement of the mixer when the water temperature changes;
- The flag is installed on the body using a screw connection.
The screw is located immediately under the decorative strip. Depending on the faucet model, it has a different shape - flat, cross, etc. The flag is carefully removed from the base; Removing a flag from a screw - If the faucet is old, then the screw is most likely rusty. In this state it will not be possible to unscrew it. The only thing left to do is remove the handle by force. At the same time, a plastic nozzle will also be removed from the base, which is responsible for the direction of movement and the rigidity of the flag’s movement. Remember that with such repairs there is no guarantee of 100% success;
- The second decorative attachment is removed next. It acts as a cover and is installed on top of the body. It is installed using a ring nut, which in normal condition is easily unscrewed. Let's assume that the nut is rusty and cannot be unscrewed. Then the thread is simply torn off with a pipe tap or by hand. It has no constructive purpose and performs exclusively a decorative function;
- Next, use an adjustable wrench to remove the ring nut;
- The nut contains the cartridge.
There are several protrusions on its surface - two or more. They perform the function of fixation - it is important not to damage them; Nut with cartridge - When the cartridge is removed from the mixer, you can tell from it whether it is suitable for subsequent work or not. If cracks, nicks, roughness are found on the surface of the part, or it does not hold tightly enough, the cartridge is replaced;
- There is another option: in old faucets, corrosion can damage the internal mechanism of the faucet (the place where the cartridge is installed).
Functionally, there are 3 holes for water passage and two or more grooves for installing a cartridge. In this case, repairs are impractical; it will be cheaper and faster to simply replace the mixer; Base fault - After installing a new cartridge, the mixer is assembled in the reverse order.
If the problem is the opposite, that the water flows under too little pressure, the aerator is clogged. An aerator is a metal mesh at the outlet of the faucet. It serves to spray a continuous stream of water into thin streams, filtering solid residues (lime, rust).
Aerator
How to clean the faucet aerator step by step:
- To do this you will need to buy a special product. Many plumbing supply manufacturers also sell all-purpose cleaning mixtures made with lye or other active ingredients. At home, you can also use citric acid and vinegar, descaling agents, and other abrasive cleaning powders to clean the faucet mesh;
- The aerator is attached to the tap with a threaded connection.
It must be carefully unscrewed and removed from the base. If the mesh is tight, do not try to tear it off by force - this will lead to permanent failure of the filter. It is better to lubricate the threads with machine oil and try again; Dismantling the aerator - The dismantled sprayer must be soaked in water with an alkaline solution. Depending on the selected compound, a concentrated solution is prepared. In order to ensure the best dissolution of salts and scale, the water temperature should be 20 degrees and above;
- Remember that powders should only be dissolved in non-metallic containers. For example, these are glass jars or plastic basins;
- 20 minutes will be enough for complete cleaning. Periodically, the container needs to be shaken to better break down calcium and other contaminants.
Sometimes, instead of specialized compounds, even a simple dishwashing detergent is used. But it only works in hot water. Similarly, you will also get rid of scale and sediment on the shower aerator using hydrogen peroxide or ammonia alcohol.
on this topic:
What do the experts advise?
Often, beginners do not know which way to unscrew the faucet. Since the usual thread is right-handed, you need to twist to the left, namely counterclockwise. Very often, when starting repairs, a home craftsman notices that the faucet is rusty. How to unscrew it in this case? According to experienced craftsmen, in order for the nuts to come off easily, you need to tap them lightly. It is best to do this with a rubber mallet or mallet. This method is mechanical. How else to unscrew a rusty faucet? In addition to a hammer, some craftsmen also use diesel fuel or kerosene. It is enough to apply a few drops to the rusted threaded connection.
Some home craftsmen remove scale using table vinegar. Judging by numerous consumer reviews, the substance will take effect within half an hour. Of course, if there are few deposits. The nut may start to turn after 10 minutes or after several hours. Also for this purpose, specialized stores sell a universal professional product, namely WD-40 impregnation. After working with chemicals, it is advisable to rinse the parts thoroughly in warm water. Judging by the reviews, the thermal method is considered quite effective. You will need a construction or household hair dryer. To prevent rubber parts from melting, you need to work at low power. The essence of this method is that steel and brass have different expansion coefficients. Steel expands under heat faster than brass, so you will soon be able to turn an element made from it. Some craftsmen boil the dismantled mixer for a couple of hours in a soda solution. It also, judging by the reviews, dissolves tumors quite well.
Using hot water or burner
If you cannot unscrew the top part of the faucet yourself using a wrench, you can carefully wrap the part of the plumbing fixture with a cloth, which is poured with hot water on top. A burner is a worthy replacement for boiling water, but such equipment should be used very carefully to prevent melting of the tap or fasteners. The result of heating is the expansion of the metal, making the connection easy to unscrew using a tool.
Combined split type couplings (American)
They are products for joining plastic and metal pipes. Moreover, the design of such couplings allows for subsequent separation of the joined sections without their deformation. American cables are very convenient to use for connecting consumers that require periodic maintenance (heating radiators, electric water heaters, etc.).
The process of connecting and disconnecting in such couplings is carried out through a threaded connection on the metal section of the coupling (using a key). Moreover, just like the MRV and MRN couplings, the “Americans” can also be equipped with various types of threads (internal and external).
The technical characteristics of dismountable couplings are +95⁰С and 2.0 MPa.
The standard range of diameters of American collapsible couplings is represented by the following values:
20×0.5; 20x0.75; 20x1; 25x0.5; 25x0.75; 25x1; 32x0.75; 32x1; 32x1.25; 40x1.25; 50x1.5; 63x2; 75x2.5; 90x3; 110x4,
where the first value is the diameter of the workpiece (for soldering to a polypropylene pipe), the second value is the nominal value of the external or internal pipe thread in inches.
Replacing the mixer: flexible hose or metal-plastic pipes
When purchasing a new faucet model, it is important to make sure that flexible hoses are included in the kit. They must be long enough
Those flexible hoses that come with the mixer usually have a length of 300 mm, which may not be enough.
And if the origin of the faucet is unknown, then the quality of the hoses themselves may also disappoint. In particular, we are talking about braiding, thread strength and nuts.
When choosing flexible hoses for a mixer, you need to consider the following nuances:
The length of the two fittings should be different so that when assembling their hexagons do not interfere with each other, and the assembly itself does not foretell difficulties.
The hose thread must match the external or internal thread of the water pipe. This requirement includes a male or female threaded part. The latter is more in demand and has a half-inch nut.
The length of the hose should be optimal - with a margin and not too long. The last option is unacceptable because the hose vibrates and jerks when the pressure changes. Due to such movements, the internal rubber hose rubs against the metal braid, wears out and leaks.
Among flexible hoses, corrugated ones are the most reliable. Their cost is an order of magnitude higher, and installation is more difficult. However, these disadvantages are compensated by excellent rigidity, which is important for maintaining bending.
In addition to flexible hoses, metal-plastic pipes can be used to supply water. This approach will require purchasing:
- Metal-plastic pipes;
- Fittings;
- Fittings.
The last two elements usually come in one set, which simplifies their purchase and the task of how to change a faucet in the kitchen with your own hands if you need to use metal-plastic pipes.
And although it is difficult to connect the mixer to the water main in this way, it is more reliable than connecting with flexible hoses.
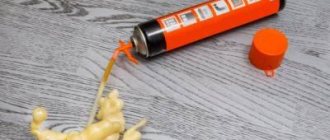
Use of solvent
After unscrewing the top nut and removing the handle, it is recommended to pour in any rust solvent, which can be WD-40, kerosene or diesel fuel. Then one of the hammers should be installed on one side of the nut, and with the other, apply several blows to the opposite part of the fastener, and then change the position of the tool.
Tapping should be replaced by refilling the solvent, and then unscrew the nut with a suitable size spanner. If necessary, all of the above activities will need to be repeated.
Working with rusted parts, including taps, is very difficult, so replacing or repairing them will require some tricks and simple but effective methods to make unscrewing easier.
Gentlemen, help! At the dacha, the well is an inch pipe. A hand pump is screwed onto the pipe. The pump has not been removed for several years. Now it is broken and needs to be replaced. However, the thread is rusty and the pump cannot be unscrewed by any force. Tell me if there are any techniques and technologies to unscrew a rusted threaded connection. Thank you
Try soaking the joint in WD-40. Sold at any auto parts store.
+1 is better than LM-40
Exposure to fire (a blowtorch, or even a candle) for several minutes, and a longer wrench should help.
Tap, heat, WD-40 or kerosene
Pepsi-Cola or Sprite. Seriously. I unscrewed one old faucet.
a blowtorch in your hands and heat until the paint or tow in the thread burns, then sprinkle with liquid oil (I use transformer oil) or better yet, make a compress out of it at night.
When I worked at a drilling rig, I learned how to unscrew the threaded coupling on a drill string pipe (the diameters are different, up to 500 mm, they are tightened at the factory on a special machine, with a force, as the driller told me - 3-5 tons). You hit with a sledgehammer, but so as not to flatten , with sense and understanding, preferably around, until it doesn’t work by hand. When I unscrewed the 180 (I don’t remember exactly) coupling for the first time, I was surprised for a long time - it’s necessary, with a simple sledgehammer you can unscrew the Counterweight to the opposite side and hit it in a circle with a hammer, the main thing is not the force of the impact, but the shaking of the threaded part. Otherwise, heating is not always suitable, sometimes it’s simply impossible.
the neighbors will be happy. The lower floors will be especially lucky, and whoever turns on the water first will then be lucky. full meshes on the faucets will be
2Alex___dr oh, well then you can use a sledgehammer
Nope, you can’t use a sledgehammer on an inch pipe, I was talking about the 180th. And the inch one is only the head, it’s a bone! (With)
I bought a compact burner at a hunting store with a replaceable small bologna, it’s very convenient and costs pennies
orinbasar It won't warm up. I was dismantling a 25-year-old 1″ riser with a long steel coupling - I couldn’t tear it off with any effort. Rothenberger heated it with a small burner until the end of the tank, then together with his father (120 kg + 93 of mine) they jumped on the “3rd number” with a pipe - zero emotions. Only the key (the powerful Leningrad key) was bent. I had to cut it.
in my humble opinion
The main thing is to pull the nut off, you don’t need to pull it, you need a jerk and lm)
The main thing was to tear off the long (100mm) steel coupling. The locknut is nonsense.
Yes. Teach me more
Vinegar and soda - a folk remedy
These food products may well defeat rust, making it possible to unscrew the old nut. To implement this method, you will need to clean the connection with an iron brush, removing rust and dirt. Then you need to draw acetic acid into a medical syringe and moisten the connection on all sides. In this situation, you need to use safety glasses to prevent the acid from getting into your eyes while working.
Then you need to leave the connection alone for 2 hours. During this time, the acid should eat away the rust. After the waiting period has expired, you can unscrew the rusted part. In this case, it is enough to simply move the nut along the thread at least a little. If the process stops here, you can repeat the treatment with acetic acid again.
After the connection is untwisted, the parts must be washed in a soda solution. The solution is prepared at the rate of a tablespoon of soda per 1 glass of water. If parts with vinegar residues get into this solution, hissing will occur. This soaking procedure should be repeated several times until the reaction stops occurring. After this, the parts can be safely considered free of rust. They can be coated with lubricant and reused later.
How to twist and what to twist - detailed instructions
For those who are unfamiliar with the design of a ball valve, I suggest studying the drawing:
As can be seen in the diagram, a ball valve is an extremely simple design. The shutter ball blocks the flow of water, blocking the cross section. The rotation of the ball occurs due to the torsion of the rod, which is inserted into the groove. Nuts, bushings and seals prevent water leakage.
Thus, it becomes clear that the pen is the “tip of the iceberg”. Acidification occurs inside the structure. You need to disassemble it a little in order to act directly on the jammed elements
But it’s important not to overdo it
What to do if the tap is jammed (how to open or close):
- The first step is to remove the handle. Unscrew the fastening nut and remove the handle (butterfly) from the rod.
- We try to twist the rod with pliers. No need to use brute force. We twist it a little in different directions.
- If the rod does not fit, look for the clamping nut. In the picture it is number 3. We loosen it a little, literally half a turn, no more.
- After this, the oil seal will straighten a little, and water may begin to leak. It's not scary.
- We wrap the pliers around the rod again and slightly twist it in different directions.
- After a certain time it will begin to give in. I spent about 3 minutes developing it.
- Tighten the clamping nut back the same half turn. Screw on the handle.
- The tap can now be opened or closed. It will work as it should.
It’s worth warning right away: if the ball edge is cheap, Chinese (made of silumin, with a thin jacket), then attempts to develop it will lead to a flood. It will simply burst, and a stream of water will rush in all directions. It's not very pleasant, especially if it's a stream of hot water.
Using hot water or burner
If you cannot unscrew the top part of the faucet yourself using a wrench, you can carefully wrap the part of the plumbing fixture with a cloth, which is poured with hot water on top. A burner is a worthy replacement for boiling water, but such equipment should be used very carefully to prevent melting of the tap or fasteners. The result of heating is the expansion of the metal, making the connection easy to unscrew using a tool.
Crane axle boxes
Differences
To understand how to change the faucet axle box in a mixer, or even better, repair it, you need to understand what it consists of and how it works, that is, how the water flow is regulated with its help.
The entire repair kit is divided into moving and fixed parts, where the first includes a retaining ring or bracket, a rod with a fork, a silencer and an upper ceramic plate with a hole. The fixed parts include the body itself, the lower ceramic plate with a hole and the rubber ring for sealing. (See also the article Flexible connection for mixer: features.)
You have probably already noticed that the holes in the ceramics are not located in the center and it is this factor that allows you to regulate the flow of water. That is, when the holes coincide, the full passage opens, but when the top plate rotates around its axis, the holes gradually shift relative to each other, which reduces the passage until it is completely closed. The rubber seal does not allow water to penetrate to the sides, but it flattens over time and then the question arises of how to change the valve axle box in the mixer
The rubber seal does not allow water to penetrate to the sides, but it flattens over time and then the question arises of how to change the valve axle box in the mixer.
In the case when when closing and opening the valve you need to make many turns (from 5 to 10), this indicates that there is a shut-off valve with a worm mechanism. Despite the fact that replacing the faucet in a mixer of this type is done almost identically with the ceramic version, its structure is nevertheless somewhat different.
In this case, the rod serves as a piston, which is raised and lowered by a worm gear, but in order to prevent water from flowing through this unit, there is a fat chamber there.
Occasionally, the cause of failure of such a mechanism is wear of the “worm” thread, but in most cases, this is wear of the rubber gasket on the piston, so replacing the faucet axle box in the mixer is not necessary here - just change the gasket (valve).
Repair work
First, we need to remove the valve, as you can unscrew the faucet on the mixer only after dismantling it (it gets in the way). To do this, use a knife or screwdriver to pry up the decorative plug in the center of the wing and remove it; under the bottom there is a bolt that needs to be unscrewed and then we will remove the valve
If you have handles, then such a bolt is usually located under the lever on the handle body (it is also closed with a plug).
Now we need to remove the lock nut by unscrewing it counterclockwise, but this must be done carefully so as not to scratch the body. Often there may be another decorative nut above the locknut, which in most cases can be unscrewed by hand. Now you can simply pull out the shut-off valve, but sometimes there is still a retaining ring there for additional fastening - dismantle it, since it will be possible to remove the valve axle box from the mixer only after this.
Now you can simply pull out the shut-off valve, but sometimes there is still a retaining ring there for additional fastening - dismantle it, since it will be possible to remove the valve axle box from the mixer only after this.
Now you can simply go to the store with the locking mechanism removed and buy the same one; fortunately, its price is low, but you can save yourself the purchase if you disassemble and repair it. To do this, remove the retaining ring from the rod and use its rod to push the ceramic pair out of the body along with the gasket. If there is plaque on the body, then you will need to hit the end of the rod with a screwdriver or pliers.
- In order to eliminate the leak, we need to increase the thickness of the flattened ring, but since this is impossible, we will simply increase the length of the inner axlebox kit. To do this, look at the photo above - there you can see where to stick two or three layers of electrical tape to increase the thickness of the top ceramic plate. In addition, you can place a homemade washer made of copper wire under the rubber o-ring, as if increasing the thickness of the gasket. (See also the article How to choose a sink: features.)
- Replacing the rubber valve in a crane box with a worm gear will not cause any problems at all. To do this, unscrew the bolt and washer and change the valve (you can even use a homemade one made of thick rubber).
How to extend product life
The main enemy of all parts in the tap is hard and contaminated water. To extend the service life of the axle box and all kitchen equipment that has heating elements, you need to install a filter. Even rough cleaning will get rid of mechanical and metal impurities and significantly purify the water. The stem will remain clean and the tap will be easy to unscrew.
Careful handling of taps, regular cleaning and lubrication of components and locking mechanisms will significantly extend the service life of mixers with ceramic axle boxes.
Sources:
- https://stroy-podskazka.ru/vannaya/smesiteli/otkrutit-gajku/
- https://sovet-ingenera.com/santeh/kran/kak-otkrutit-gajku-na-smesitele.html
- https://jurnalstroy.ru/kak-otkrutit-kran-buksu-esli-ona-prikipela-chetyre-proverennyx-metoda.html
- https://melt-spb.ru/dlya-otopleniya/kak-otkrutit-staryj-kran.html
- https://santatrade.ru/kak-otvernut-prikipevshiy-kran-s-truby/
- https://arhitec-spb.ru/vannaya/kak-otkrutit-prikipevshuyu-gajku-na-smesitele.html
- https://stroyvolga.ru/%D0%BA%D0%B0%D0%BA-%D0%BE%D1%82%D0%BA%D1%80%D1%83%D1%82%D0%B8% D1%82%D1%8C-%D0%BF%D1%80%D0%B8%D0%BA%D0%B8%D0%BF%D0%B5%D0%B2%D1%88%D1%83%D1 %8E-%D0%B3%D0%B0%D0%B9%D0%BA%D1%83-%D0%BD%D0%B0/
- https://OchumelyieRuchki.ru/remont/kak-otkryt-prikipevshij-kran-na-trube.html
- 1
How to unscrew a stuck bolt in a faucet
Today we will look at how to unscrew the valve axle box if it is stuck and what tools are needed for the job. The valve box is part of the shut-off valves and serves to regulate the water supply.
Faucets with one or two taps have brass fittings. This metal does not corrode, but over time, a stuck threaded connection is not so easy to unscrew.
Some owners, if the axlebox valve does not unscrew, take a large wrench and try to make every effort. This action may not always help. Brittle brass can crumble and present new repair problems, or even lead to a complete replacement of the faucet.
Repair work
Installing new parts on the mixer
If the leakage is caused by wear of the oil seal, you can simply try tightening the clamping nut. If water continues to flow, it is necessary to unscrew the nut and remove the stuffing box. A couple of turns of the stuffing box are tightly wrapped around the rod and pressed with a sleeve. Finally, all that remains is to tighten the clamping nut and test the tap.
But we still have part of the thread left on the rod from the drilled head of the clamping bolt. It is unscrewed with pliers, grasping the edge protruding from the rod.
Also in this situation, you can try using a thin drill to drill out the remaining bolts and cut a new thread with a tap.
If the repair does not bring positive results and the faucet continues to leak, the faucet axle box will have to be replaced with a new one. To do this, grasp the edge of the bolt with an open-end or adjustable wrench and unscrew it counterclockwise. Then, in reverse order, install all the parts of the mixer in place.
You may be interested in information about the types and internal structure of crane axle boxes.
Read about how to replace the faucet axle in a mixer here.
We also bring to your attention an article on how to repair a ceramic faucet axle box.
Dismantling a stuck crane axle box
If the crane cannot be repaired because the crane axle box is strongly stuck to the body, you have to use additional tricks:
Grabbing the edges of the bolt with a pipe wrench
- The “licked” edges of the bolt can be firmly grasped with a pipe wrench. Using the rocking method, you should try to tear the bolt out of place. But the main thing is not to overdo it, otherwise you can break the thread and break the mixer.
- The use of chemicals will help loosen the threaded connection.
WD-40, vinegar, Sillit detergent and other acid-containing solutions work well. If surface lubrication does not help, then you can fashion a small container from plasticine around the bolt and pour one of these solutions into it. The depth of the container should ensure complete coverage of the axle box with the solution. - The thermal method will help move the threads out of place. Use a hair dryer to heat the threaded part of the mixer body until the bolt begins to unscrew by hand.
Please note: using an open flame to warm up will speed up the result, but the plastic parts in the mixer will melt and the shiny coating will burn off the surface of the body. This cutter can be used instead of a drill
This cutter can be used instead of a drill
- 90% of Chinese faucets are made of wrought alloy. Lightly tapping around the thread with a hammer will loosen the coating and the bolt will rotate along the thread.
- When all methods have been tried, the last solution remains: removing the valve axle box by drilling. To do this, use a hacksaw to cut off the protruding part of the bolt and use a drill of a suitable diameter to drill out the part remaining in the mixer body. Instead of a drill, a milling cutter of a similar size will do. After drilling, you will have to cut a new thread in the mixer body. It makes sense to carry out such complex repairs for expensive and high-quality faucets. If you had a cheap faucet installed, it will be easier and cheaper to replace it with a new one.
How to repair a crane axle box, watch the video:
- How to change the axle box valve in a mixer - rules for removal and replacement. Press! The faucet is an integral element of any hot and cold water mixer, which is a water flow regulator. How to change it...
- How to repair a mixer tap: features, troubleshooting, do-it-yourself instructions. Today we will look at how to repair a mixer tap with your own hands. A mixer is a plumbing fixture used to regulate…
- How to repair a faucet in the bathroom: design, malfunctions, instructions for work in stages Despite the fact that nowadays you can very easily repair any equipment in workshops or call a specialist to your home, and he will fix it for you...
Advice from professionals and expected difficulties
Plumbing equipment requires constant inspection. If the valve head is firmly stuck, and the problem needs to be solved immediately, then you will need to intervene with your own hands. This is especially true in cases where the services of a specialist are unaffordable or late.
Below are tips that, if followed, will help make the job easier when doing it yourself:
- If it is possible to shut off the water in the house for a long time, then it is better to go purchase a new part only after dismantling the old one, taking the latter as a sample. Consultants in the store will help you choose a similar spare part or its suitable analogue.
- The modern plumbing market offers repair kits for grand axle boxes made of rubber and ceramics. Plumbers note that with prolonged use of a water tap, the entire shut-off mechanism becomes unusable. This makes it more convenient to buy a new device entirely.
Water tap disassembled
- Some valves are equipped with latches. They must be removed.
- A large selection of Chinese parts requires keys of various sizes.
- Using an open flame can not only make repairs faster, but can also put the plastic parts of the faucet at risk of melting. Please note that the shiny surface of the case can also warm you up.
- Before removing a stuck-on grand axle box, you should completely dismantle the water tap and boil it in a solution with the addition of 2 tablespoons of soda for about 20 minutes. Then you need to dry the fastening connection in the form of a thread and try to unscrew the part.
- Before carrying out work with your own hands, you need to get acquainted with the model design of the grand axle box.
Demolition of a grand axle box is a complex task that can be difficult to do. However, studying the design mechanism, methods of performing work, and following the recommendations of experts will help solve even the most difficult problem.
Rectangular bathtub Riho Lusso 180×90 BA7700500000000 RUB 53,636
Rectangular bathtub Riho Miami 150×70 BB5800500000000 RUB 26,956
Rectangular bathtub Riho Still Square 170×75 BR0200500000000 RUB 55,200
Rectangular bathtub Riho Taurus 170×80 BC0700500000000 RUB 44,068
Rectangular bathtub Riho Virgo 170×75 BZ0700500000000 RUR 42,320
Preparation and necessary tools
Before starting work, turn off the water to the mixer. Usually the riser in the apartment is turned off. But sometimes you have to turn off the water in the entire house. Therefore, they select the necessary tools in advance in order to quickly carry out repairs and not cause inconvenience to neighbors. To unscrew the nut on the mixer, use the following tools:
- adjustable wrench;
- set of spanners;
- heads with a knob;
- socket wrench;
- pliers and screwdrivers (flat and figured).
Each of these tools can be indispensable when unscrewing the faucet clamp nut. Most often, rusted parts cannot be easily unscrewed.
The kitchen sink faucet is mounted on a nut under the sink. Not a very convenient place for working with large tools. If the clamping nut under the sink is very rusty, first clean its surface with a metal brush.
It is not always possible to easily unscrew a soured nut securing a kitchen sink faucet. You can use a box wrench of the desired size or use a tubular socket wrench. A knob is inserted into its hole. This connection will help to unscrew even a stuck nut.
Socket wrenches are convenient for use in tight spaces under the sink. These are stainless steel hexagons with sizes from 10 to 40 mm.
If you tap the nut before attempting to unscrew it, you may break the rusty bond between the nut and the bolt. Then the process will go without much effort.
Using an adjustable wrench or open-end wrenches can damage the integrity of the edges of the nut. It becomes round, as if erased. Such a rusted nut is cut off with a grinder or a hand saw if it is inconvenient to use a large tool under the sink.
Tool you will need
To carry out the work you will need a suitable tool. It is advisable to prepare it in advance in order to reduce the time interval of restoration work during which the house remains without water. Preparing the necessary tools in advance will make it possible to make repairs calmly and without fuss. Tool kit Mandatory, a spare part must be available. This is necessary if it turns out that the outdated component cannot be repaired
But in the same way you can quickly install a new one in its place. To immediately repair any breakdowns that occur, you will need the following tools: pliers; adjustable or pipe wrench; open-end or ring wrenches for edges of various sizes; flat, shaped screwdrivers; electric drill with a cutter and drills for metal. Please pay attention! The wide range of spare parts from China on the market very often leads to the fact that when you least expect it, there is a mismatch between keys and materials from the Middle Kingdom. Thanks to this, it is better to be on the safe side by having a set of keys of various sizes nearby.
Preparation work
Before starting the dismantling process, you need to close the water supply to the riser, and then find out the reason why the water drips spontaneously. Sometimes this may be due to wear on the valve seal. Leaking water tap If it turns out that the valve head is still leaking, then you need to proceed specifically to the procedure for disassembling the valve. On the side of the lever, remove the cap, carefully prying it off with a knife, trying not to damage its coating. If the handle is continuous, without a plug, then simply unscrew it. Afterwards, you should remove the plastic rings and the valves themselves. To do this, you need to unscrew the bolt fastenings with a flat screwdriver. But sometimes the question arises: what to do if the faucet lever does not scroll? With this method, it is recommended to pour vinegar on the side that is inside the fittings or coat it with a WD-40 solution, which can be purchased at any automotive store. This simple procedure will soften hardened deposits within a few hours. After this, the valve should be easily dismantled, and then proceed to the next step.
How to remove a kitchen faucet from a sink if it is rusty
Is your kitchen faucet rusty and won't work? There is a simple solution... Today we will talk about how to design a modern and practical kitchen. The question of how to remove a kitchen faucet from a sink if it is rusty will be discussed in this material in the most complete and detailed manner. To make an informed decision in this regard, you should read this manual carefully. Is the faucet cracked? Most likely the only way out is to carefully remove the corresponding nut using a socket wrench. It is worth noting that before this it is necessary to dismantle the flexible wiring.
Initially, you must exercise maximum foresight while designing your kitchen. This is not at all as difficult as it might seem at first glance. All we want to highlight with this article is the fact that your kitchen remains one of those rooms where you really need to achieve the perfect balance between aesthetics and functionality.
This balance should be effectively demonstrated by every aspect of your kitchen space - right from the cabinets to the faucets. Kitchen taps have, in fact, remained one of the most problematic areas in the kitchen for decades. The types of kitchen faucets used today are similar in many ways. It happens that it is not possible to remove the tap from above. How to remove a kitchen faucet from a sink if it is rusty? The plan is roughly as follows:
1. Apply wd-40
2. Wait about 20 minutes 3. Remove the supply hoses 3. You need to put something between the wall and the nut itself to unlock it 4. Now the tap can be turned from above
You should know that investing in a kitchen faucet is a long-term and valuable investment. The crane should always be used to its maximum – in every sense of the word. Additionally, you should choose a faucet that matches the rest of your kitchen space and design.
Where to start? The first step is to determine the type of kitchen taps that you would like to install in your kitchen first. The design of the faucets should, without a doubt, complement the design of the entire kitchen (classic, modern, transitional, etc.). Ideally, a kitchen faucet should match the decor of the entire home, not just the kitchen. Needless to say, once you start searching for the right faucets for your kitchen, you are bound to come across different types of faucets - such as monobloc faucets, ball faucets, and so on. Before you get overwhelmed by the choice that modern stores provide, let's say for sure that reading this faucet selection guide will only serve you well. So, let's move on - how to remove the kitchen faucet from the sink if it is rusty. More on this later.
Features of the device, principle of operation
In modern life, several types of taps are used. Their design and dismantling rules vary.
Worm
The design, which had become outdated, served people faithfully for more than a century. Main components:
- Frame. Cast from steel or bronze and milled. There is a threaded inlet pipe located at the bottom. A thread is cut on top to screw in the valve axle.
- On the left you can see the spout through which water flows into the sink.
- Crane axle box. The most complex unit, consisting of several parts. Inside it, a rod moves up and down along the thread. There is a rubber gasket attached to the bottom that blocks the flow of water.
A handle in the form of a washer or steering wheel is fixed on top. By rotating the handle, you can move the rod up or down, opening and closing the water. To fully open, you have to make two to four turns of the handle.
Two separate axle boxes are installed in the mixer - for hot and cold water.
Such devices have two supply pipes.
Ball
This is a more modern design, it is much more convenient to use.
Instead of a brass axle box and a rubber gasket, a plastic cartridge is placed in the body. This mixer has two inlet pipes - for hot and cold water. A ceramic ball with slots is mounted inside the cartridge. Windows are also made in the building. When closed they do not match. The ball is connected through a control rod to a handle that moves in three directions.
As the ball rotates, its slots align with the windows and open up more or less water flow. The higher the handle rises, the more the windows fit together and the greater the water pressure. The position of the handle relative to the middle (left or right) determines the proportion in which hot and cold water are mixed. Thus, with a single movement of one hand, you can set both the desired pressure and water temperature. Such structures are equipped with an aerator that enriches the water with air.
Such a mixer costs significantly more than a worm mixer. The cartridge costs tens of times more than the gasket. But the service life of the cartridge is also tens of times longer than that of the gasket.
How to prepare for changing your faucet
Prepare your tools and turn off the water. Make sure that the rotary plugs that shut off the water supply in the bathroom or kitchen are in good working order. To do this, after turning off the water supply, open the tap and carefully watch the meter.
What happens when a dog licks his face
How to behave if you are surrounded by boors
How to find your soulmate: tips for women and men
It shouldn't spin. You cannot change or remove the faucet without turning off the water. There may be water left in the pipes; prepare a bucket or basin. During operation, the taps must be in the open position.
If you turn off a bathroom faucet, close the drain to avoid clogging with small construction debris.
List of tools for faucet removal:
- Adjustable wrench. If the faucet needs to be removed from the countertop, you will need 2 adjustable wrenches. You can use a set of keys 10, 11 and 22, 24.
- Comfortable work gloves with a waterproof and non-slip coating. Working with gloves is more effective than with bare hands due to better grip. Don't neglect work gloves.
- A hacksaw for metal is for extreme cases.
- Plumbing universal lubricant WD-40. This lubricant is called “liquid key” for its high penetrating ability and easy dissolution of limescale, rusty deposits, and paint layers.
- New flexible hose - liner. A standard hose, 30 cm long, is not always suitable. When replacing a faucet, it is better to change it along with the flexible hose.
- FUM tape. Required when re-tightening the nuts.
- Spare faucet - in case of breakage of shut-off valves.
If you are replacing a faucet, it will come with hardware. Make sure the new fasteners fit your plumbing fixtures. Check the availability of all necessary fastening components in advance
Pay attention to the nut and bolt type fasteners. Or in common parlance “dad - mom”
The nuts on the fasteners must match the bolts and vice versa.
Drilling is a radical method
If, after trying all the above methods, the axle box valve still does not unscrew, you will need to perform complete dismantling with drilling a hole . For this:
- A hacksaw is used to cut off the external part of the crane box.
- Take a drill or cutter of a suitable diameter, which is used to drill out the inner part. This must be done with great care so as not to damage the mixer itself. Ceramic plates are broken out with a screwdriver. Drilling out the crane axle box
Breaking out ceramic elements with a screwdriver. The edge remaining inside is unscrewed using two pliers or “pincers”: one tool is inserted into the hole, the second one is used to perform rotational movements. To prevent damage, you must hold the base of the mixer with your hand. Pliers are inserted into the hole
Unscrewing using an adjustable wrench or pliers
Best answers
Wicked:
Either break the “lamb”, or take hold of it with an adjustable wrench and unscrew (counterclockwise) the entire knob, buy another one along with the “lamb”. Well, if I understood you correctly.
Nikolay Mogilko:
drill out the bolt or at least its head
K-GOLEM:
only experienced managers or merchandisers can cope with this problem... :)))
dZen:
You can use a household drill to cut a new slot. Or just drill it out.
Alexey from Russia:
If the valve is no longer needed, cut it off with a grinder. There is an option to unscrew the valve itself from the mixer. but first turn off the water completely - both cold and hot.
Grandfather Au:
I would post a photo, otherwise how do we know. Spray white onto the bolt for half an hour. If it’s copper-plated, they should turn away
researcher:
It’s easier to find a man than to master repair technology. Just don’t say that it was the husband who wrote this, because this is not a husband, but a boy!!!!
Alexander:
You can’t even imagine what kind of nightmare faucet your imagination conjures up regarding your question. The valve from the faucet is unscrewed with an adjustable wrench and is not attached to it with any bolts. The head of the bolt is a wrench and does not have a slot for a screwdriver. If you can’t remove the valve from behind the flywheel, break it, drill out a screw, etc., whatever you like best. If anything, a set of new flywheels for the mixer is not that expensive.
uncle Ivan:
Send me a photo in a personal message, then we can suggest something. Valves and mixers are now different, and it’s so easy to tell. As I understand it, you need to first remove the wing and then unscrew the axle box.
Preparing the place for the mixer
When installing a mixer, you should pay attention to some building codes that regulate the installation parameters of such devices. The main classification is carried out depending on the purpose of the crane and its installation location. The installation standards for mixers look like this:
The standards for installing mixers look like this:
- A faucet used simultaneously for a bathtub and a washbasin must be located at a level greater than 1 m from the level of the floor covering;
- Faucets that are installed on the bathtub must be located at least 80 cm from the floor level;
- When installing the mixer on the washbasin, the distance from the side of the plumbing should be more than 20 cm;
- The faucet installed in the shower must be located at a height of more than 120 cm from the floor level.
In addition to the specified parameters, you also need to take into account the location of the crane in space - this directly affects the installation features. For example, if the plan involves replacing an old faucet, then it must first be removed, and then a new product must be installed in the same place. In the case of a major overhaul involving the replacement of sections of the water supply system, it is necessary to design the future structure in advance and place the water outlets in the right places.
When installing the fittings on which the mixer will subsequently be installed, you need to ensure that the distance between the cold and hot pipes is exactly 15 cm. In addition, these pipes must be located in the same horizontal plane relative to each other. You should not leave long fitting leads - it is best to place them at the same level with the cladding of the room or deepen them a few millimeters. In any case, when the preparation is completed, you can proceed directly to the installation of the mixer.
How to open a rusty entrance lock
1. Pour a small amount of diesel fuel into the mechanism. Another fluid to pour into the keyhole is brake fluid. As practice shows, the effect of its use is an order of magnitude better than that of diesel fuel.
2. Option for those who want to get the best effect in less time. The hardware store sells a special rust remover. For example, “Desoxyl-1”, “SDM” or Syntilor Ruggine.
3. Try to pour aerosol liquid into the mechanism. The most popular ones usually use WD-40 or Liqui Moly Multi-Funktions-Spray. Don't expect quick results. If after several hours the liquid has no effect, duplicate your actions. To get the best effect, you can lightly tap the locking mechanism with a hammer.
4. A more democratic option, which is used to open a corroded padlock. You need to drip grease or motor oil into the keyhole and at the junction of the shackle with the body. After an hour, they should thoroughly saturate the parts inside, which will make it easy to open the lock.
5. To open a padlock, an aggressive method such as cutting is often used. To do this, use a grinder. Then weld the shackle in its original place using electric welding. If everything is done professionally, then there will be practically no traces left on the locking device from the implementation of this manipulation.
Important! If you cannot open a rusty lock in winter conditions, try warming it up first. In addition to rust, there may be ice inside the mechanism, which will prevent the key from getting inside.. https://www.youtube.com/embed/-6UItM90l0s
How to turn off the water yourself?
For these purposes, shut-off valves (faucet, valve, gate valve) are provided. It is installed directly at the water supply inlet in an apartment, house, or other residential premises.
But since the maintenance of the main line is entirely carried out by specialized organizations, which have enough mechanics even without me, I won’t delve deeply into this issue, but will only touch on the area of the apartment and the valves installed in the basement of an apartment building that shut off the water supply to the risers. And what to do if they are not working properly.
Let’s say your plumbing equipment has a malfunction (a thread leaks, the toilet tank doesn’t hold, the hose on the faucet has burst, or the faucet doesn’t completely turn off the water, or it’s buzzing, etc.), before you do anything, you need to completely turn off the water supply to the system and only after this to do the job.
I strongly advise against doing anything under pressure.
Except in cases of emergency.
bronze valve
First of all, we close the taps at the inlet, they should be installed in every apartment, if you have never paid attention to this and don’t know if they exist, then look at the water pipes from the risers (risers are pipes passing through your floor from bottom to top), to the nearest point of water collection on your comb (a comb is water pipes located horizontally throughout your apartment and supplying water to all appliances). It is in this place that the taps should be installed; they are installed when installing the water supply system for emergency shutdown, if necessary.
Close them by rotating the thumb clockwise. After this, check on the mixer whether the water is turned off. If yes, then feel free to do what you need.
A little off topic, but I think this knowledge will not hurt, so I will dwell on this issue in more detail:
It doesn’t matter what material the valve is made of, it consists of a body and axlebox valve
cast iron valve
Most often, its malfunction is the absence of a gasket, or it is cracked or torn. But it happens that the “mirror” also has scratches, or holes or pores.
“Mirror” is a surface located inside the housing, to which the rubber gasket is pressed when the axle box valve rod is rotated clockwise.
So, if there is no way to turn off the water supply at the comb, that is, you have closed the taps, but it still flows from the mixer, or there are no taps at all, then you need to turn off the water already in the basement, on your riser, either valves or taps are installed there too. You close them and check yours on a comb.
You unscrew the valve and change the gasket, or all of it if it is not working. Details of this process can be found in the article valve repair (video tutorial).
And don’t forget to inspect the “mirror” for damage.
If there are no shut-off valves in the apartment, I strongly recommend installing them.
Here you can read which cranes are reliable in operation. In apartment buildings, it is problematic to get into the basement; for some time now only mechanics servicing housing and communal services have access there, this is due to preventive measures against a terrorist attack, and homeless people, so as not to climb. So, if the basement is closed, then you will have to contact the REU at your place of residence.
Keep in mind that in order for them to turn off the water, you will have to pay a certain amount to the cashier, or you can negotiate directly with the plumber. The water will be closed and opened at the agreed time.
If this option does not suit you and you have access to the basement, then read on
In the basement you can encounter the same problem - the water does not turn off. We shut off the fittings on the risers, but from the mixer the pressure is still the same. I mean strong pressure.
You need to make sure that these risers are yours.
Wiring in basements can be complicated, and it is not always easy to determine which ones supply water to your apartment. There is a very simple but effective way: ask the apartment to tap evenly on one of the risers and use the sound to guide you in the basement.
But here I’ll draw your attention: tap only lightly, so as not to clog the water supply system; the inside of the pipes are heavily covered with rust, which, if subjected to strong impacts, can easily lead to clogged valves, faucets, or toilet tanks, and these are additional “headaches.”
If water leaks slightly from the faucet, and there are waste dumps in the basement, you can use them and let a small stream of water flow into the basement while working in the apartment; this is absolutely harmless and is often used by the mechanics themselves. But again, unless the trickle is big.
That's it, you can go up to the apartment and do your planned work.
Let's consider another option:
You are sure that the risers are yours and the water is not blocked. This means that the fittings on the risers are faulty. In this case, it is necessary to close the water supply valve to the house, then check the valves on the risers as quickly as possible and open the water supply to the house. Then you do your work in the apartment.
Okay, nothing scares you, and everything is at hand for inspecting valves on risers. Read on.
Closing the central valve
cast iron valve
https://www.youtube.com/watch?v=IZPL6Bl6S6E
When you twist its rod clockwise, you will understand that the water is closing by the subsiding noise in the pipe.
Now attention:
It happens very often that you seem to have screwed it all the way, but the water in the pipe is noisy, tighten the valve steering wheel with a gas wrench. It's also noisy. Unscrew it back and close it again.
You may have to perform this action up to four to five times. This is due to the fact that there is a build-up of rust on the valve mirror. And if you open and close it several times, it will be torn off, and in the end the water will be closed.
If this does not help, and there is noise of water in the pipe, then the last option remains: tighten the rod, tap on it from above with the same gas wrench, open and close again. That’s it.
Now the water should turn off, but if all the above actions did not help you, then there is only one option - to submit an application to the REU to turn off the water. A locksmith will come and inspect or replace the valve on your home.
There is, of course, another option, but it is not for the amateur. Here it will be necessary to block the fittings either for several houses or for a block. But it’s better not to go here.
And the last very important point, ATTENTION:
Turn off the water, complete the job, turn on the water in two stages. You open the valve slightly, hear the noise of the system filling, wait for it to stop, and then open it completely.
You do this to prevent the system from clogging. If opened abruptly, there is a high probability that the pipes inside will become clogged with loose scale, and even if the valve on the comb or the toilet tank becomes clogged, this is “don’t go to grandma’s.”
I think I have outlined everything in detail, if something is not clear, you are welcome to add it to the comments section.
I'll end this question here. And here you can watch a video of how I install the water pipe wiring. After watching it and reading my book “How to replace a water pipe yourself?”, it’s easy to cope with this job.
The book is free, download through the form at the very bottom of the page. To be convinced of the benefits of this knowledge and to have, so to speak, motivation for action, call the organization involved in the installation and ask about the cost of such work.
I think the choice will become obvious.
Follow this link for a detailed article with a video: “How to wind a thread tightly.”
Want to know more about plumbing and related equipment? Below I post links to free courses corresponding to the name, click on the one you are interested in and enter your email address. After going through a simple registration procedure, download and study.
60 of the most incredible and unusual questions when installing water supply and sewerage systems The warmth of your home is in your hands - here, about various technologies of heating systems.
That's all for me, I recommend that guests subscribe to receive new articles, the form will open by scrolling down the page. Good luck with the installation, best regards Andrey.
Source: https://santehskript.ru/kak-samomu-perekryt-vodu/
Installation Rules
By its nature, air tends upward, which is also observed in heating pipes. And if it gets into a confined space, that is, when the exit is only through the lower position of the pipe or radiator, it will not go anywhere and forms an air lock. Such a plug may simply take up part of the radiator, and it will not heat up well.
Therefore, Mayevsky cranes are installed based on the following principles:
- For each radiator of the heating system in the upper extreme corner opposite the water supply point.
- At the top point of the expansion tank.
- At the top of the heating system at end points or dead ends.
Mayevsky taps are used to supply the heating system during its installation. The shut-off screw in all taps must be tightened until it stops. The tap itself is installed by wrapping a sealing gasket around the threads to prevent leakage. The most important thing is that the valve must be installed in a place where there is easy access to it for carrying out work to vent the system.
Leaks
How to change a faucet in a sink? The algorithm of actions depends on what kind of breakdown occurred. Let's consider repair options for a leak in a faucet with two valves, as well as from under the flywheel.
- When there is a leak from the gander. Such a breakdown can occur for several reasons. The first includes valve gasket failure due to wear, loss of integrity, deformation, or hardening. For example, integrity failure occurs due to the fact that the gasket is exposed to the sharp edges of the valve seat. The second reason is wear of the valve and seat, which occurs in all mixers with a long service life. So, it occurs as a result of mechanical action of water or corrosion.
- Leakage from under the flywheel. The cause of the failure is the valve gasket or the flywheel rod seal. Poorly sealed flywheel due to the O-ring being loose or deformed. The gasket leaks if it falls off the pin.
As for ball and cartridge faucets, leaks occur when debris or grains of sand get into the valve mechanism. We are talking about the space between the seat and the ball in ball valves. But cartridge faucets begin to leak if debris gets between the shutter disks.
That is, before you look for how to change the faucet in the sink, make sure that this is where the problem lies.
Faucets that are designed for showers can leak for other reasons.
- In the open position, water flows through both the shower and the gander. The cause of this breakdown is the switch. The type of failure depends on the mechanism of the crane itself. This may be a lack of water pressure to switch tightly from shower to spout, or wear of the guide elements in barrel and eccentric switches, or debris getting into the plates and retainers in ball switches, or wear of gaskets in spool devices.
- Leakage directly through the switch button due to damage to the o-ring.
To put it simply, the cause of any leakage or decrease in water flow from any mixers is considered to be clogging of the gander installed at the end of a special device, it is called an aerator. The latter also becomes dirty due to high water hardness, salt deposits that clog the aerator mesh, as well as the opening of the shower head. Scales and salts can cause clogging of the faucets themselves, which also affects the power of the jet. Such malfunctions do not require changing the entire mixer; it is enough to replace some part, and the owner of the apartment himself can handle this.
If fistulas or cracks appear in the valve body, then faulty devices will have to be replaced, even if they are made together with the tap.
By the way, touchless faucets can also break down, become clogged with dirt, the screens can become clogged with salts, and the internal shutter mechanisms wear out. Here you will have to call a specialist for help, and not try to remove the mixer yourself.
Mixer installation technology
Of course, before installation you need to do a lot of preparatory work. These include selecting and purchasing a suitable faucet, unpacking it, and purchasing or preparing the tools needed for the job. In addition, it is imperative to understand the structure of the mixer and the technology for its installation. Let's talk about everything in order.
Standard valve taps have two valves that control the flow of hot and cold flow into the mixing chamber. In addition, the mixer contains a locking washer, seal, gaskets, axle box, coupling with guides and seat. All these details are completely irrelevant to the user - the device is supplied assembled, so you don’t have to assemble them yourself.
Recommendations for selecting nuts
If you need to find a nut separately due to loss or damage to the complete one, then you should remember a few simple rules:
| The best selection option is based on the sample | Of course, if you have an old element, then purchasing a new one instead is much easier. It is enough to compare two products and make sure that they have similar parameters and are interchangeable. But you don’t always have a sample at hand, so you can take with you the faucet part that requires a fastening element |
| Explore quality | If there is no sample, then it is necessary to take measurements very carefully and carefully, and when choosing, select the option that is made better: there are no burrs on the thread, it is rolled evenly and accurately, there are no stains or cavities on the surface. Every little thing matters, since it can be used to judge how well the element is made |
| Consider the type of tap cover | Putting a bronze nut on a chrome-plated structure, or vice versa, is not the best solution, as it does not look very attractive. Of course, this point does not apply to cases where the fastening is hidden and simply will not be visible; in such a situation, any color will do |
The cartridge clamping nut in lever designs is hidden behind a decorative ring, so its color is not of fundamental importance
Choosing a bathroom faucet
The need to install or replace a faucet may arise for a number of reasons - for example, during a major renovation of a room, as a result of a breakdown of an old faucet, or if you want to simply change it by installing a different model. In any case, if the matter does not involve a complete renovation of the room, which requires a whole range of repair and finishing work, installing a faucet will be a fairly simple task.
The first step is to purchase a new faucet. The difference between a mixer and traditional taps is that it is not necessary to make separate connections from the cold and hot water supply. In addition to convenience, faucets also have good visual qualities - you just need to choose the model that best suits the style of the room.
In plumbing stores you can find a lot of different models of faucets in a wide range of prices, and the selection process is largely complicated by this variety. To narrow down your search, you need to decide exactly what requirements apply to a particular model and base your choice on them.
Depending on the installation method, there are three main types of mixers:
- Horizontal, which are mounted on horizontal surfaces;
- Vertical, located in a vertical plane;
- Built-in, which are installed directly into the wall.
Horizontal type faucets are usually mounted on the edge of a bathtub or sink. Vertical products are attached directly to the wall at the point where the pipes exit. Built-in faucets are practically never found in private construction due to the complexity of installation and impracticality, so considering them is almost pointless.
The design of mixers may differ, depending on which the following types of devices are distinguished:
- Two-valve;
- Lever;
- Thermostats;
- Contactless.
The first option is the most popular among users. The design of a two-valve mixer includes two valves, one of which is designed to regulate the flow of hot water, and the other is responsible for cold water. The design also provides for the presence of seals, which can be made of rubber or ceramics.
Stuck valve.
They love as a friend, they love as the only close feeling of the soul. They love you for... They accept you, of course. I buy jars with a ring if I suddenly have to, with a key for an hour. arrow - my key is such that it cannot be adjusted in the other direction PATRIOT#2018.05.11 23:380User responses:.. in such cases, you need to shoot all sorts of large pieces - still lifes, for patches, or ask DiRecTor#2018.05.12 01: 480User responses: Do not include turnips in the diet. :o) This is the principle of unscrewing and tightening! Open against, twist clockwise. I agree that a left-handed person opens canned food differently...) shahrukhkhan#2018.05.12 10:480User replies: Windows flew...1 Belarus 2 Czech Republic 3Narway 4Ukraine 5Italy...after sex, are you asking ******? I specifically went to the kitchen, the electric opener also works counterclockwise.. Doktor_Elcan#2018.05.12 18:530 User replies: Think for yourself, some people love dogs more, some cats. For example, I love dogs. My parents have been with me all my life. In general, I am “two-handed”, in the sense of half-left-handed, half-right-handed, but I always open jars counterclockwise, and my husband only opens them clockwise and doesn’t understand how it’s possible otherwise)) lucky#2018.05.13 10:090 User replies: with long active use her attic flies off. If you are right-handed, then it is convenient to go counterclockwise. I'm left-handed, so it's clockwise. That's your whole hypothesis! TAPXyH#2018.05.13 20:430 User replies: Legal marriage is regulated by the family code. It turns out that EFIR_BOY#2018.05.13 23:180 was not thought about counterclockwise. but now I remembered that it was clockwise. sweeps#2018.05.14 02:370 User replies: For meat, beans, khinkali, khashlama, sauce (we make it ourselves) with tomato, we eat fresh. Everything is fucked up... Work for nothing... I sit for half a day remembering... How did I live before this day))))? ELMAYE0#2018.05.14 12:310 User replies: It would be logical to take a tablet, in fact, if you just want to play or watch a movie.. Probably Explay A_M_I_Q_O#2018.05.14 13:050 User replies: At a time when you are being bullied! A bottle opener and a simple knife. It depends on which hand - left or right
NONDA#2018.05.15 21:200 I do this... llulla#2018.05.15 22:300User responses: It all depends on your presentation! Present yourself as a self-sufficient happy woman, and, no matter, married... and I don’t understand the granny... Only a left-handed person can open clockwise TeReMoK#2018.05.16 03:210 User replies: Nina Richi “Even from 20 answers it is clear that only a man can open clockwise (right-handed) - for me, for example, this is convenient and logical).” Show me a video of the process of opening a can clockwise with a right-handed device like this
I promise to like, subscribe and even repost.
Today, faucets of various designs are installed in apartments, including ball-type taps. They are more reliable than simple gasket faucets, but they do break down from time to time. It is quite possible to repair a ball valve with your own hands, although the design of such a mixer is noticeably different from the usual design of a valve with rubber gaskets.