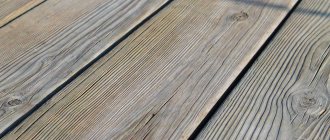
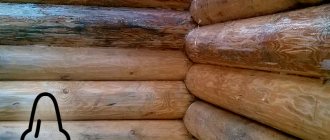
Knots are an inevitable defect of a wooden surface. Wood is a living material and can also “get sick” and “age” during use. Defects such as growths, staining, and burls are used as decorative elements.
Healthy knots decorate the surface, adding texture. Rotten knots only spoil the appearance of the wood, making it look sloppy. In addition, the strength of such a material is greatly reduced. Sealing knots is a mandatory stage of its processing.
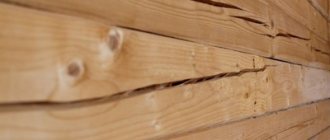
The main reasons for the formation of cracks in the floor
If cracks appear after laying the wooden covering, it means that the work technology was violated, during which the material dried out and a gap formed.
The formation of cracks is also promoted by:
- Activity of rodents and insects that dig holes through the wood . This reason is the most common, since in order to save money, many people ignore the need to seal the underground space. The cracks in the concrete are open gates, which pests will definitely take advantage of and turn the wooden floor into dust.
- Increased humidity and improper care of the floor - if the ventilation system in the room is broken and high levels of humidity remain, the wood will certainly absorb it. Swelling of the fibers inevitably leads to the development of microscopic bacteria that will destroy the floor.
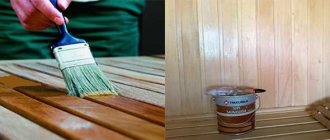
- Lack of protective coating - when the floor is not exposed to paint and varnish products, the wood wears out faster, and any temperature changes or mechanical damage can cause cracks and large holes to form.
The sooner the problem is identified and action taken, the greater the chance of maintaining the integrity of the wooden floor. Where there are cracks, there will always be insects, mice, rats and other parasites, the proximity of which is unacceptable for humans.
Preparation for repair
Regardless of what material is used to seal cracks, it will only hold if preparatory procedures are carried out, namely:
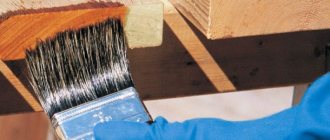
- Removing dirt from crevices - you need to take a stiff brush with long bristles and walk along the crevice several times. This will help remove the damaged layer of wood, dust, dirt and bacteria that are present there. A vacuum cleaner, which is convenient for handling even the smallest cracks, will help remove fine dust.
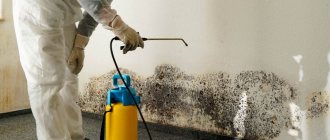
- Disinfection - it is important that bacteria do not grow in the crevice, which will subsequently cause rotting of the wood. For this purpose, the floor at the site where the material is applied is treated with any antiseptic. Chlorhexidine and copper sulfate have proven themselves well. After treatment, you need to allow several hours to dry completely.
- Expanding the gap - if, when removing dirt, the wood begins to crumble, it is necessary to remove the entire loose layer until strong and durable fibers appear. Otherwise, the material will not have the necessary adhesion to the wood, and cracks will appear again.
During work, it is recommended to ensure that the floor has a minimum load and maximum evenness of the surface being treated. All heavy furnishings should be removed from the room during the renovation.
Expert opinion
Levin Dmitry Konstantinovich
If the cracks are large and holes are formed during their processing, the option of replacing individual boards with new ones is considered. Worn wood not only fails to perform its basic functions, but is also difficult to repair.
Review of manufacturers
European and Russian brands produce universal putties and wood products:
- Tikkurila . The company offers a large selection of ready-to-use products that can be diluted with water. Can be used without additional paint. Some putties give a shade of mahogany, oak, pine or beech.
- Eurotex . The brand’s compositions perfectly eliminate minor defects and are suitable for subsequent painting. They dry quickly and adhere firmly to the surface, creating a matte layer.
- "Belinka". The putties are made in 6 “woody” shades, dry quickly and are easy to use. They have virtually no odor and are well suited for treating large areas.
- "Rainbow". The product has high mechanical strength and minimal shrinkage. Dries in 3-4 hours at temperatures up to 22 degrees.
- "Bolars." Finishing putties are used for external and internal work in the temperature range from -40 to +60. One of the best frost resistance indicators on the market.
When choosing a putty for wood processing, one is guided by the tasks that it must solve and the operating conditions of the object. You need to give preference to well-known brands, buy products in places where they can present certificates for them.
The best options for sealing cracks in the floor
Before starting work, you need to carefully inspect the entire floor, and start repairs from larger crevices, moving from the window to the exit.
Wood glue and sawdust
The sequence of actions is as follows:
- Fine wood sawdust is poured into a deep container and poured with boiling water so that the water is 1 cm above the layer of material. Leave to swell for 2-3 hours.
- Mix the sawdust, pouring in carpentry glue in portions. The result should be a viscous, viscous mass.
- The floor surface is cleaned of dirt and dust, disinfected, and dried.
- Using a narrow spatula, apply the prepared mixture into the cracks, distributing the material as deeply as possible.
- Excess material is placed on top of the crevice, a spatula is pressed tightly to the floor surface and forcefully passed along the crevice. Excess material is removed.
- Leave for several days to dry completely. Air heaters help speed up the process.
- Sand the surface using a grinding machine or sandpaper.
- Prepare the surface for painting.
If sawdust is not available, granular fuel pellets can be used as a substitute. This material is steamed with boiling water in the same way, after which it is mixed with glue.
| Advantages | Flaws |
| Cheapness and availability | Not suitable for filling cracks wider than 3cm |
| Easy to use | |
| Dries quickly | |
| Good grip on wood | |
| Does not collapse after painting |
If wood glue is not available, you can use PVA glue, which has no worse adhesion to the wooden surface.
Sawdust and cement
The mixture is well suited for sealing deep cracks, especially in dilapidated floors that are prone to natural decay.
The sequence of actions is as follows:
- The cement is diluted with warm water and mixed well until it becomes a liquid mass.
- Add 1 part of PVA glue and mix again until smooth.
- Dry sawdust is introduced, which quickly absorbs moisture from the formed mass.
- Let stand until thickened, stirring constantly.
- A soft plastic mixture similar to plasticine is formed.
- Place it in the crack and go over it with a spatula.
- Allow to dry and sand.
Expert opinion
Levin Dmitry Konstantinovich
To preserve the color of the floor covering, you need to add a little food coloring to the mixture, then the paste will not stand out and will be well camouflaged under the paint.
After the sealed gap has dried (at least 24 hours), the floor is painted. The pre-treated area is primed to ensure better adhesion between the two surfaces.
| Advantages | Flaws |
| Easy and convenient to work with, does not spread | The mass dries quickly, so you need to work it out as quickly as possible |
| The floor will not crack after painting | |
| Withstands loads |
Thin slats and glue
If the gap is wide enough, but it is not possible to replace the entire damaged board, you can repair the hole using a batten.
For this:
- The crevice is cleaned of old wood and disinfected.
- Measure the parameters of the hole, selecting the appropriate rod.
- Generously lubricate the rail with PVA glue or wood glue, and also lubricate the edges of the gap.
- Place the rail in the desired place, then use a rubber hammer to carefully drive it into the crevice.
- For reliability, you can apply a thin layer of glue on top.
- Allow to dry thoroughly, after which the surface is sanded.
If small gaps remain during the work, they are filled with wood putty or any of the above products based on sawdust and glue.
| Advantages | Flaws |
| You can quickly cover large gaps without changing boards | The need for measurements |
| Sands well, creating a smooth surface | |
| Does not cause cracking when painted |
If the width of the crevice is more than 5 cm, then the lath will not save. On the contrary, when there is a load at a specific point, there is a possibility that part of the floor will fail. It is necessary to replace the boards directly, selecting them according to the dimensions of the damaged area.
Wood putty
If there are small gaps that have formed between the boards over time, it makes sense to use putty. The liquid mixture penetrates well into shallow crevices and fills the space. When dry, it forms a smooth surface, which can later be painted.
The sequence of actions is as follows:
- The cracks are cleaned, debris is removed, disinfected and dried.
- The putty is diluted with water to form a thick paste (if it is sold in powder form).
- Using a spatula, apply to all areas of the crevices, leveling the surface.
- Allow to dry for 2-3 days, sand with sandpaper, prime, paint.
| Advantages | Flaws |
| Good grip | You need to work quickly with putty, as it hardens. |
| High strength | |
| Filling deep crevices without having to widen or remove any wood | |
| After painting it does not stand out from the entire floor surface |
Putty can be used to seal joint spaces well, but if there are large gaps, it will not help. During the operation of the floor, there is a possibility that subsidence will form at the sealing site.
Rubber cord
This method is ideal in cases where the gap is not wide but deep enough.
Perform the following actions:
- Take a silicone cord and apply it to the crevice.
- Using a chisel, carefully lay it deep into the crack.
- The top is sealed with wood putty, sawdust with glue or homemade paste.
Next, the surface dries, sanded and painted in the usual way.
| Advantages | Flaws |
| Saving consumables | |
| Putty does not fall under the floor | |
| The floors stop creaking | |
| By adjusting the thickness of the cord, you can seal fairly large and deep cracks |
If there is a need to lay the cord in several rows, then it is better to put them on glue. This way the structure will last longer, and when it vibrates it will not come out.
Polyurethane foam
The product is a foam-like substance that can fill large and small cracks in floors that cannot be reached using other methods. Foam has proven itself well when working with dilapidated floors, strengthening weak points.
To work you will need:
- The polyurethane foam with the thinnest nozzle is carefully opened and the first few balls are blown onto the substrate.
- Carefully insert the nozzle of the nozzle into the prepared and cleaned gap, resting on the lowest point.
- Slowly squeeze out the foam, allowing it to distribute itself throughout the crevice.
- Any excess that appears on the floor surface is removed using a spatula. Allow to dry thoroughly.
- Before painting, be sure to sand the sealing area and prime it.
Expert opinion
Levin Dmitry Konstantinovich
It is important to do the work slowly, as the foam will come out under strong pressure and will not reach the desired location.
| Advantages | Flaws |
| Dries quickly | Easily damaged by insects and rodents |
| Fills all internal cracks | |
| Strengthens wood | |
| Sands and paints well |
Acrylic sealant
The product helps seal small cracks in floors, creating an even finish and filling holes in the wood. Its dense structure does not allow insects to sneak out from under the floor, destroying the surface. In some cases, this product is better than foam, but acrylic caulk is not suitable for deep and wide cracks.
The sequence of actions is as follows:
- The gap is cleaned, disinfected and dried.
- Carefully place the tip of the nozzle to the edge of the crack, squeezing out the sealant little by little.
- They go over the entire area of the lower part of the gap, after which they fill the upper part.
- Excess is carefully removed before it hardens.
- Allow to dry for 3-5 hours, sand and paint.
It is not recommended to use silicone sealant to repair wood floors. Its properties are no worse than acrylic, but it is poorly sanded and cannot be further painted.
Making putty at home
You can make your own putty using PVA glue and chalk.
You can make your own wood putty. However, experts do not recommend doing this, since some types of wood are sensitive to chemicals. Homemade formulations can ruin them.
Popular recipes:
- With PVA glue . Mix equal parts PVA and crushed chalk. You can use some fine sawdust to fill cracks.
- With chalk . In the recipe, chalk is used as the main component. Acrylic varnish to match the wood is carefully added to it until a thick paste is obtained. Add a little sawdust to improve application.
- Complicated recipe . The main one is 300 g of flaxseed oil. To it add 70 g of oleoresin oil, 30 g of gelatin, 40 g of perlite powder, 30 g of casein, 22 g of borax, 28 g of ammonia 18% and 350 g of water. First, mix the oils and perlite powder, then add water. When the mixture becomes homogeneous, pour in the remaining ingredients and heat to 90 degrees.
Valera
The voice of the construction guru
Ask a Question
When using homemade putties, you can get unpredictable results. Before use, all homemade recipes are tested on a cleaned and primed piece of wood that requires puttying. It needs to be allowed to dry completely.
Expert advice
In order for the process of sealing cracks to be as successful as possible, you must:
- Assess the scale of the damage - if possible, it is better to replace the board or part of it with a new piece of wood, since major damage will sooner or later lead to active rot and collapse of the entire floor.
- Choose the most suitable sealing method - if the gap is narrow and shallow, then wood putty is sufficient. There is no point in using foam or cord that is suitable for filling deep and wide crevices.
- Be sure to prepare the gap before sealing, without ignoring the disinfection step . It helps suppress the activity of pathogenic bacteria that destroy wood and lead to the formation of large cracks.
- Paint over the sealed areas - regardless of the chosen product, the surface must be opened with varnish or paint. This is necessary to protect the surface from possible premature cracking.
- Do not rush to complete the work in one day - haste is the main enemy. A gap that is poorly dried after treatment does not provide the necessary adhesion between two surfaces, which guarantees the futility of the work performed.
Have you ever had to seal cracks in the floor?
It happened, it didn't happen