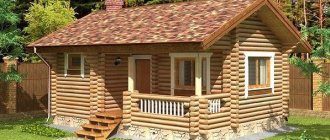
A private bathhouse built on a country plot is an excellent place to strengthen the body and have a pleasant leisure time. In some cases, owners decide to expand the usable area of the building by erecting a functional building. In addition, it is quite possible to build a high-quality addition to the bathhouse; the main thing is to decide on a suitable design and material.
How to make an extension to a bathhouse yourself
There is a lot of information everywhere about how to attach a bathhouse to a house, but no less interesting are the ways of adding useful space to the bathhouse itself.
For example, there are often cases when the owner of a summer cottage or a country house, to save money, builds a small bathhouse, and only after a certain time he realizes that the structure is too cramped. And if it is possible to attach a bathhouse to the house, will it be possible to expand the existing washing compartment and steam room to the required size?
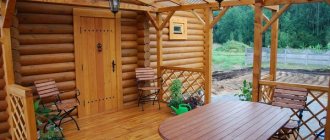
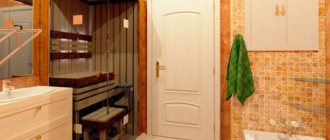
Bathhouse with attached dressing room
The above situation is not new and occurs everywhere. Considering the topicality and relevance of the issue, compatriots have tried many ways to make the bathhouse more spacious.
Among these methods there are very simple solutions, such as a bathhouse with an attached gazebo made of polycarbonate sheets. You can also find projects in which the extension is built from the same materials as the main building.
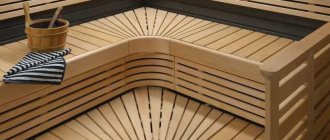
In the photo there is a terrace attached to a bathhouse made of timber
Perhaps a gazebo attached to a bathhouse is the most common situation, since such a structure can be erected with your own hands without much effort. To do this, you do not need to dismantle the wall to which the gazebo will adjoin, since the extension will be a separate object, despite its location in close proximity to the bathhouse.
As a project, you can use a drawing of any gazebo that suits your taste. But one of the sides, which will be adjacent to the main building, will have to be made blind.
In the photo, a gazebo attached to a bathhouse with your own hands
Briefly about the main thing
You should carefully consider the layout of the bathhouse and its general condition, since it may not be possible to make an extension with your own hands due to the location of the steam room or sagging base.
The extension to the bathhouse can be closed or open. Each has its own features, such as weather protection or appearance.
Most often, wood is used as a material for an extension to a sauna due to its technical qualities and appearance, but any suitable material, for example, brick or stone, can be used to build a veranda.
Ratings 0
Installation of the gazebo frame
While the foundation hardens, without wasting time, mark the frame elements, saw them and process them with an electric planer. Remember, in order to set the angle of inclination of the roof slopes, the front vertical posts must be higher than the rear ones. For example, if you want a ceiling of 2.3 m, then at the peak the roof should have a height of 3 m. When the foundation hardens, begin assembly in the following order:
- Remove the formwork from the posts and install waterproofing on them. To do this, cut 30x30 cm squares from roofing felt and place them on each support in two layers. You can coat the heads with bitumen.
- Install the bottom frame trim. To do this, the ends of the beam are processed so that they are fastened according to the tongue-and-groove principle and tightened with metal staples.
Align the vertical posts of the frame so as to set the angle of inclination of the gazebo roof. There should be six of them, like the foundation pillars. While there is no top trim, strengthen them with temporary struts so that the racks stand strictly vertical.
Secure the tops of the posts with strapping. It is performed in the same way as the bottom one. If it is more convenient for you to use metal corners for fastening, use them. Make sure that the rectangular shape of the gazebo is maintained; measure the corners with a building level. Mount the floor joists on boards in increments of 80-100 cm. Please note that the greater the distance between them, the thicker the boards should be. Once the joists are in place, move on to laying the floor. To do this, you can use a special tongue-and-groove deck board, however, its price is quite high. To save money, lay a regular edged board processed with a plane.
Install the railings from the timber, attaching its corners to the vertical posts. If the project drawing calls for cladding of part of the openings, we do that too. Decorative cladding made of slats with gaps looks very impressive: it will protect from the sun and leave a feeling of free space.
At this point, the assembly of the frame is completed, it is time to build the roof.
Bottom harness
It is worth noting that in the case of building an open gazebo or veranda, it is necessary to ensure the outflow of water. To do this, determine the direction of water outflow and piping or make logs with a slight slope
It is important to install floor joists perpendicular to the water flow, because floors should be laid in the direction of the slope
After installing the trim, you can begin installing the joists and flooring. Depending on the type of extension, a solid floor board, bath or deck board (planed on 4 sides with rolled corners for water drainage), deck board made of wood or wood-polymer composites can be used. When using tiles or porcelain stoneware as a finishing coating, chipboard or fiber cement boards are used.
Peculiarities
Combining a bathhouse with a barbecue gazebo under one roof will help protect you from weather surprises. When choosing a bathhouse design, you need to take into account the presence of several design options.
Example Project 1
The bathhouse and the gazebo in the form of a large terrace are located on the same foundation under a common roof; this design solution assumes an even distribution of the load-bearing load over the entire structure. The foundation is made of strip or pile to the same depth along the entire perimeter of the structure.
Sample Project 2
The second design scheme is a bathhouse on a strip foundation with an attached gazebo under a canopy. The canopy beams are supported on one of the walls of the bathhouse. The roof of the canopy rests on racks with a pile foundation. The two parts of the structure have different load-bearing loads and operate separately.
Sample Project 3
A complex of structures consisting of two separate buildings: a bathhouse and a barbecue gazebo. In this option, two separate foundations and two separate roofs are erected, connected by a covered walkway. For example, there is already a bathhouse on the site, but you need to make a covered gazebo for barbecue. Then we choose the second option and complete the canopy. The easiest way is to make it lean-to; you can build such an extension yourself if you have basic construction skills. The third option will require additional space for construction and will have a higher estimated cost than adding a shed.
By combining these two objects - a recreation area with a barbecue and a bathhouse, several problems are solved at once.
- Practical benefit - communications are laid to one piece of land - paths, water supply, electricity will serve two objects. This reduces material and earthwork costs.
- Comfort of maintenance and use - the presence of a permanent structure of the bathhouse will allow it to be used in the cold season, when the time spent in the fresh air is reduced.
- Decorative effect - a set of facilities for relaxation and bathing procedures, decorated in the same style, will become a beautiful accent of the site.
When combining a barbecue area with a bathhouse, you must follow the instructions for observing fire safety rules.
- An outdoor stove or brazier is equipped with a chimney, and a protective wall is built from the wind, which will ensure even burning.
- It is not advisable to make the size of the gazebo or canopy less than 4.5 meters wide; this is necessary to ensure free access to the brazier and the absence of smoke in the area of the table and seating areas.
- An important requirement is to install a barbecue in the part of the terrace farthest from the door to the bathhouse, so that the entrance to the dressing room is not obstructed.
The landscape view from the open gazebo is of great importance. To select the most advantageous view point, they walk around the entire territory and examine the surrounding landscape. Sitting on a chair after a bath, it’s nice to see not the wall of your neighbor’s barn or a fence, but a beautiful flower bed, pond or orchard. Therefore, landscape designers advise placing a bathhouse and a barbecue gazebo on elevated or flat places, from where pleasant views open up. A lowland or depression on a site is not the best choice for a recreation complex.
Do-it-yourself frame bath: step-by-step instructions
Currently, it is difficult to imagine a summer cottage without a bathhouse on it. Taking a steam bath in a warm bathhouse is a real Russian tradition, with its roots going back centuries. A bathhouse can be built not only in a country house, but also in the city: the availability of a plot is an excellent opportunity to implement this initiative. Moreover, a frame bath is a modern high-tech design that does not require large expenses.
You can build a frame bathhouse with your own hands, without the help of specialist craftsmen. This type of construction is the fastest and most affordable: a frame bathhouse requires several times less materials than structures made of timber or logs of similar dimensions.
Where to start building a frame bath?
First of all, you need to decide on the location of the bathhouse. It may be an extension to the house, or it may be separate from it. Before starting to lay the foundation for a future bathhouse, it is necessary to determine the type of soil on the site and plan the construction itself: the number of floors and rooms, dimensions, interior.
Before building a bathhouse, a plan must be drawn up, where it is necessary to take into account the specifics of the structure and estimate the volume and duration of work. The plan should indicate all elements of the ventilation system, chimney, roof features and other important aspects. You can also attach a veranda or terrace to the bathhouse.
In order for the bathhouse to be comfortable and able to accommodate several people at the same time, its dimensions must be appropriate. The most optimal option for a steam room is 240x200x220 centimeters.
At the discretion of builders or customers, the bathhouse can be equipped with a billiard room, a relaxation room or an additional steam room.
The plan for the future bathhouse should be drawn up as accurately as possible and taking into account the smallest details - this way the construction process itself will be much simpler. The bathhouse project can be ordered from specialists. They will do everything competently and clearly, which will help avoid major mistakes during construction.
Also, when planning a bathhouse, a table is drawn up to record all the materials necessary for construction, which is correlated with the plan.
Materials required to build a frame bath:
- cement for pouring the foundation;
- sand;
- beams for mounting the frame and ceiling;
- beams;
- insulation material in a roll (mineral wool, ready-made mats, polyethylene, roofing felt, glassine);
- waterproofing film for walls and ceilings;
- lining for internal wall cladding;
- roofing material for the roof.
What foundation to choose for building a frame bath?
Since the frame bath itself is very light, a strip foundation, which is poured directly under the walls along the entire perimeter of the structure, will be sufficient for its construction. A columnar foundation is also a common option, but its installation requires stable soil, otherwise the structure may collapse.
Due to the lightness of the frame bath, the foundation for it is poured according to a fairly simplified scheme.
When the main points are determined, you can begin the construction itself.
- Pouring the foundation.
Step one. The perimeter of the future bathhouse is determined in advance; special pegs are driven into the ground along its edges, within which it is necessary to dig a ditch 60 centimeters deep and 40 centimeters wide.
Step two. The ditch is filled with sand to one third of the depth. The sand is poured from above with water and thoroughly compacted.
Step three. After compacting the first layer, finely chopped red brick or gravel is poured over it.
Step four. A layer of broken brick or gravel is covered with a layer of sand, which should be level with the ground level.
Step five. Formwork is assembled from reinforcement. The entire structure is poured with concrete and insulated on top with a thin layer of roofing felt.
Important! Before building a frame bathhouse, at least a week should pass so that the foundation has the opportunity to properly settle.
- Construction of walls.
Step one. Lumber prepared for a frame bath must be thoroughly dried before starting work. It is not recommended to use birch wood for construction, as it quickly rots. The best option would be linden, aspen or larch. The wood of these species is able to maintain its shape for a long time and has thermal insulation properties, which is very important for a bathhouse.
Step two. After all construction work is completed, the inside of the boards should be coated with an antiseptic solution, and the outside with furniture varnish, in two layers. This procedure must be done around the entire perimeter of the room, avoiding only the steam room and the washing compartment.
Step three. The bottom trim, made of a reliable beam with a cross-section of 10x10 centimeters, must be fixed firmly enough, after which the beams should be properly fastened at the corners with nails. It is recommended to place the racks on metal pins so that during the construction of the walls they cannot change their location and knock down the structure.
Step four. Corner posts must be embedded in concrete.
Advice: The pillars - the basis of the walls of the future bathhouse - should be placed directly under load-bearing walls, corners, stoves - that is, in those places where the load is greatest.
Step five. Along the perimeter of the walls, intermediate racks are installed, made of the same timber as the main structure.
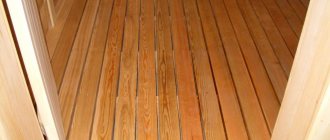
Step six. To make the floor waterproof, it should be laid out with timber made of any wood, with a cross-section of 15x15 centimeters.
Step seven. To cover the bathhouse outside and inside, they use lining, which is affordable and easy to use. To ensure that there are no gaps between the sheets of lining located in a horizontal position, they should be overlapped. This procedure is very scrupulous in nature, but it can protect the walls from excess moisture.
- Let's move on to building the roof.
Step one. It is necessary to take 8 special ceiling beams, sawn to the angle of the rafters. To begin with, you should set up only the outer rafters, and only after that fix a couple more pieces in the center of the future roof. The remaining rafters are connected to the main structure, first on one side of the roof, then on the other (through the ridge).
Step two. After the rafters, vertical posts are installed, and if necessary, an exit to the attic is also made.
Step three. On the rafters located at the edges, beams are cut out, to which the front boards are nailed, after which the battens are attached on top.
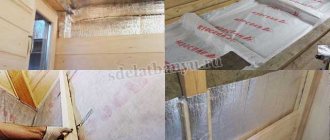
- It is necessary to insulate the walls.
The most common material for this purpose is roll insulation about 50 millimeters thick. In some cases, mineral wool or ready-made mats are used. The insulation is laid between vertical wooden posts, after which slats are nailed to them. For thermal insulation of the room, it is recommended to use polyethylene or glassine.
Advice: it is not recommended to use roofing felt for wall insulation, since under the influence of high temperatures it begins to emit an unpleasant odor.
For floor insulation, it is better to choose expanded clay or other types of backfill, and for the ceiling - polystyrene foam. If the insulation is selected correctly, heat will be lost several times less. Thanks to this, the cost of heating the bath will also be reduced.
After the walls and roof are built, you can begin installing windows and doors in the openings previously left for them. Upon completion of this work, it will be possible to enter the finish line.
The final stage of construction of a frame bath
For a bathhouse to be a pleasure to use, it must not only be comfortable and well designed, but also have a beautiful interior decoration. Therefore, after completing the main work inside the bathhouse, finishing work must be carried out.
First, you should protect the walls and ceiling from the adverse effects of moisture and high temperatures. Coniferous upholstery is perfect for this purpose. Then you can proceed directly to installing the most important part of any sauna - the stove. It must be installed in accordance with all safety requirements. It is recommended to make the wall separating the steam room and the relaxation room from brick - this way it will let in less heat.
To make the walls look more attractive, it is recommended to cover them with clapboard. Linden wood is best suited for this purpose.
What are the main pros and cons of a frame bath?
pros
- Acceptable price. The construction of a frame bathhouse costs several times less than its analogues.
- Ease of construction. You can build a frame bathhouse with your own hands, without the help of specialists.
- Light weight. The frame bath box is quite light, its weight is acceptable for areas with soft soil.
- Short construction time. Building a frame bathhouse is not only easy, but also quick: to take a steam bath in it, you don’t even have to wait until next summer.
Minuses
- Difficult to care for. Insulating materials can become unusable when exposed to moisture and high temperatures, and replacing them will be quite problematic.
- Unsuitable for therapeutic purposes. Due to the fact that the walls of a frame bathhouse do not emit useful substances, bathing procedures in it cannot help with health problems. If there are any, it is recommended to build a different type of bathhouse.
Despite the fact that the advantages of a frame structure are much greater than the disadvantages, you should come to a decision about building a bathhouse of one type or another, focusing only on your own taste and based on your capabilities - both material and physical. The condition of the soil and the location of the future bathhouse are also important.
There is nothing complicated or impossible in the construction of a frame bathhouse. The instructions given in this article will help everyone build the bathhouse of their dreams in a short time, without spending large financial resources.
banyabest.ru>
Glazing of the veranda - subtleties and features
The veranda attached to the bathhouse is rarely built warm, but in any case it has glazing. Windows give the veranda airiness and light. You can glaze the veranda in several ways:
- Full glazing;
- Partial glazing.
Let's look at the features of each type in more detail.
Full glazing
With a fully glazed veranda, the walls consist of almost nothing but large windows. All windows are panoramic, in some cases considered small.
Balcony windows on a fully glazed veranda are installed along the entire perimeter.
The windows are not made to open, but for better ventilation they are made with 1–2 vents. Making full glazing yourself is difficult.
Partial glazing
Partial glazing is a structure in which 120 cm of walls are assembled from lumber or brick, and the rest is glazed. You can glaze using the type of balcony frames, an easy way to do it yourself.
The veranda can be partially glazed or completely open.
Due to the large number of windows, the veranda is always bright until sunset, and it is not necessary to add additional lighting. For large verandas with a guest room, some of the windows are covered with curtains or blinds are installed.
Video description
This video shows an example of building a veranda covered with boards.
In the first case, the walls are made of 1/3 of the main material (wood, brick or stone), and the rest is occupied by the window. With full glazing, panoramic windows are used, which occupy the entire height and area of the wall. Most often they are equipped with opening areas, for example, vents or glass doors to create natural ventilation.
The roof of the veranda usually depends on the shape of the extension and the bathhouse, as well as the material from which the steam room covering is made. If the extension is located under the roof of the sauna, then a common roof should be made. In this case, it is necessary to make a transition between the terrace and the bathhouse so that water does not get into the gap, as well as a separate drainage system for the extension. If the veranda is located perpendicular to the main building, then it is recommended to make a separate roof.
An example of a split roof for a terrace attached to a bathhouse Source remontik.org
Finishing
The finishing of the extension outside and inside can be done with various materials. Since the surfaces are not exposed to aggressive factors, restrictions in the choice of consumables are removed.
Internal
Features of interior decoration:
It is important to prepare the surfaces in advance so that the decorative material does not collapse. It is cheaper to decorate the steam room with pine clapboard. The lining can be combined with ceramic tiles and natural stone.
External
Exterior finishing features:
External decorative finishing is not needed for brick and wood
It is important to coat wooden surfaces with an antiseptic. For foam and gas blocks you can use different finishing materials. Popular options are decorative brick, metal or plastic siding.
Building an extension to a bathhouse is a common way to add useful space. During construction, you can use different materials. The dimensions of the additional premises are selected depending on the amount of free space on the site and financial capabilities.
Reviews
To build the barrel sauna, I used only natural materials, and made the boards myself.
This is much cheaper than if I bought ready-made boards. However, if you are not strapped for cash, you can order the construction of a turnkey barrel sauna. In this case, you won’t have to do anything yourself, specialists will carry out all the work quickly and competently, while all your wishes and requirements regarding size, appearance, finishing, arrangement, possibility of extension, location will be met, in a word, you will decide for yourself which will be your building Avrashkin Yuri, Uralsk
Making an extension: where to start
Before starting construction of a frame extension to the house, decide on its location. On the north or east side it is advisable to place a pantry or utility room, on the south or west - a bedroom or living room (then there will be a lot of light in the room, during the day the sun will warm up the frame extension, so you will save on heating).
If the extension contains a bedroom or living room, then build it on the south side - this way you can save a little on heating
This plan must be submitted to the technical inventory bureau of your locality. Of course, not all homeowners run to BTI to organize a frame extension. But in vain! If checked, the illegal building will most likely be required to be demolished. Do you need such problems?
As practice shows, BTI specialists will not create obstacles and will quickly approve the project (within a maximum of 10 working days).
Permission from the BTI for an extension to the house will be issued within 10 days. Provided that the application meets all established requirements, and the construction meets technical standards
What types of extensions are there and tips for choosing a location?
The main types of extensions can be considered closed and open. The first version is a glazed veranda, in which you can comfortably sit in both winter and summer. Its main advantage is the presence of closed walls, which are often made using double-glazed windows to make them transparent.
This design, in the presence of heating means, makes it possible to arrange a living corner, dining room or recreation area for spending time in the cold season, for example, in winter or late autumn. Also, if you equip a swimming pool in such a design, you will not have to make an ice hole in the pond (if there is one) in order to cool off in the water after the steam room.
The open version of the extension, which is most often called a gazebo or terrace, is usually used for feasts or simply relaxing in the warm season. Due to the fact that the walls are not covered with glass, the room can be covered with snow in a strong wind or flooded with water during rain, but all this can be solved with the help of the right selection of location or thoughtful design.
Open extensionSource stroykauglich.ru
When planning a sauna, you should carefully select the entrance location, since it will be easier to attach a gazebo to the bathhouse with your own hands if there is a lot of free space near the door. It is recommended to make a veranda in the shade of trees, as this will help reduce the heating of the room in the summer.
If you plan to use the steam room in winter, then the exit from the veranda should be located on the south side to reduce the likelihood of the passage being covered with snow during heavy precipitation. Also, if there are bodies of water near the sauna, it is recommended to build an extension not far from it, since you can save on the pool and plunge into cold water after the steam room (for those who like hardening).
In winter, in order to conveniently get from home to the bathhouse, you can make a veranda as a connecting structure between the sauna and living quarters. This construction option is only suitable if the distance from one door to another is no more than 10 m. If it is larger, then the structure may not have a very pleasant appearance and will also be too expensive.
An example of connecting a steam room and a house using a verandaSource archmasters.ru
When thinking through a design plan, you should immediately choose what type of building will be used: open or closed, since many design solutions depend on this. For example, if you plan to use a bathhouse and a veranda in winter, then the roof should be made one. You can also make an extension next to the bathhouse so that they are not connected. This way you can choose a more convenient place for the gazebo, which will not depend on the entrance to the steam room.
Enclosed veranda with partial glazingSource dekormyhome.ru
Methods of use
Even before you start planning all the specifics, think about this question: how will you use your veranda ? The construction and finishing materials, and the project itself, depend on this. Below are options for possible use of the created usable area.
Hallway
Everyone's goals are actually different. Someone doesn’t need a huge veranda at all, he just wants to add a small hallway - so as not to clutter the bathhouse with outer clothing, so that condensation does not form on the door, so that the cold penetrates less inside. These are all understandable and reasonable goals.
Bathhouse plan with a veranda that can be used as an open hallway. Photo by NZSK
Or the budget is limited, and the bathhouse is too cramped. In any case, no one is stopping you from building a veranda the way you like or can afford.
For thermal protection , windows on such a veranda will generally be unnecessary. Or install double-glazed windows to suit your climate. But on the veranda, which only serves as a hallway and a thermal vestibule, you can get by with electric light.
Restroom
It’s a completely different matter when the veranda is planned to be used as a relaxation room. Some people don’t have it at all inside the bathhouse, some have a lot of friends and family, but the rest room is small. In this case, of course, adding a veranda to the bathhouse is a good way out.
Bathhouse with a veranda, which can be used as a relaxation room in the warm season. Photo Modultron
As such, it can be made open or closed, and with the ability to open windows or even wall panels. It all depends on the wallet and the mode of operation of the bathhouse - who often visits the site in winter, of course, will more than once enjoy the closed veranda. And she will be good in the off-season.
In any case, windows or open openings are a way to erase the boundary between indoors and nature. If, of course, there is something to admire.
What is needed on the veranda, which is used as a relaxation room? Of course, furniture. All the furniture that you would put in the interior rest room of the bathhouse, adjusted for whether your extension is open or closed.
Garden furniture is also well suited for verandas of any type. We mean sofas and chairs made of rattan or its imitation, for example.
Kitchen and dining room
Adding a veranda to the bathhouse can solve the problem with a summer kitchen and dining room. But such a project will definitely require more thought, because the kitchen needs water and a stove on which you will cook. Pipes are laid when laying the foundation.
The barbecue area can also be combined with a summer kitchen. This creates a space where you can spend the whole day.
Games and sports
Priorities can be anything. Fans of a healthy lifestyle can use the veranda at the bathhouse to set up a small gym. Fans of active recreation should install a billiards and table tennis table on the veranda.
In principle, if you make an encircling veranda , there may be enough space for everything or almost everything. Or, if the bathhouse is already equipped with a relaxation room with a dining room, then the free space on the veranda can be given over to sports, games or hobbies.
Construction of walls
The best option is when the idea of expanding the recreation area came to you while designing the bathhouse. This helps solve a lot of problems:
- The foundation can be laid along with the foundation of the house. The main advantage is that you will have a monolithic foundation under the bathhouse and extension. This will prevent individual vibrations of the foundations under your gazebo or veranda and the building itself.
- Walling. In most cases, the materials for constructing the veranda are the same as the bathhouse itself. Usually, the construction of an open veranda does not require a lot of material, so it will be possible to purchase it and deliver it to the site along with materials for the main structure. In addition, installing an extension made of some materials to already finished walls can be problematic. For example, when working with a rounded log or profiled beam, it will be difficult to cut into an existing wall. And at the design stage, you can lay a harmonious-looking log house for both objects.
- Roof. At the design stage, it is very simple to lay an extension under a single roof with the rest of the building.
As you can see, the easiest way to attach a veranda or gazebo to a bathhouse is at the design stage. But there is not always a desire to expand the usable area of the bathhouse, or there is simply not enough finance for this. So the solution to the question “How to make a rest room for a bath?” has to be decided much later than the construction of the main structure.
The construction of an extension from logs or timber involves a full-fledged installation of a log house: sealing between the crowns with jute or moss, strengthening the walls in height using wooden dowels.
Construction of a frame room: installation of vertical posts, horizontal lintels in places where door windows are installed, installation of films and insulation, installation of top trim.
After checking the verticality and pitch of the racks, it is necessary to fasten them. There are a lot of options for attaching racks: installation on studs with double threads, the use of dowels with glue and discs with spikes, metal corners and self-tapping screws
For the construction of such structures, it is important to use dry timber, because this will be the “face” of your gazebo, and the material is subject to natural moisture and is subject to deformation and cracking
Construction stages
- Create a project. It is necessary as for another structure. The plan should consist of a list of required materials, the layout of the internal structure of the bathhouse and the transition between the two buildings.
- Pour the foundation in the same way as the main housing.
- Make low doorways with a high threshold to retain heat.
- Waterproof the internal walls with vapor-reflecting foil and cover them with linden clapboard.
- Place the chimney on the other side of the house to prevent smoke from entering it.
Foundation
The foundation for the bathhouse extension is made without the help of professionals. The base can be made separately or combined with the base of the building. The first method is better - it shrinks evenly. The raw materials for the foundation should not differ from the main one. The method of tying two bases is determined by the presence of metal fastening brackets. The foundation of the bathhouse uses reinforced concrete piles and slabs, because its frame is lighter than that of a house.
Connection to the house and construction of the roof
The main point is the transition between buildings; it must be end-to-end. To begin with, the door from the bathhouse, exit to the dressing room, and then directly to the housing. This design retains heat better. If the transition is made as a vestibule, another room will appear, a locker room will be organized in it. It is recommended to use material identical to a brick house for the construction of the structure. The raw materials will affect the shrinkage of the new building, and cracks or crevices will appear; this situation does not threaten the main structure. It is recommended to make the roof single-pitched. The top must be attached to the brick wall and located above the main structure under the roof.
Fire safety
The first priority in building a bathhouse is its fire safety. There is a special device - a spark arrester. Install such a device on top of the pipe. Sold ready-made or made by hand. All wall joints are coated with bitumen mastic and treated with polyurethane foam. This action will help ensure proper shrinkage without damaging the walls of the main building. The dressing room and vestibule are made with windows and a door that open outward. The pipe is insulated inside with foil insulation and outside with asbestos. The raw materials are adapted to high temperatures and are non-toxic. An extension should not be built near the gas pipe to avoid fire during a leak. The completed building must be registered and inspected by the fire service.
Which building style should you choose?
Choosing the most suitable style of gazebo can be difficult. When selecting a project, the following are taken into account:
- Purpose of the building.
- Allotted budget.
- Registration of other buildings on the site.
The material for the gazebo is selected taking into account how long it can last. Brick, concrete and natural stone last much longer, but wood is cheaper and, if properly processed, retains its basic properties over a long period.
Shapes of gazebos for summer cottages
The most important criterion for choosing a project is the shape of the structure. It could be as follows:
- The most common is the square or rectangular option, as they are easy to construct.
- A polygonal shape is chosen if the structure will have a large area.
- The most difficult project to implement involves the creation of a structure of a round or semicircular shape.
Construction of a gazebo with a pitched roof
In the summer, when we are at the dacha, we spend most of our time outdoors: working in the garden, sunbathing, eating, and having noisy gatherings with friends. In order to hide from the sun during the midday heat or protect yourself from inopportunely starting rain, a gazebo is needed on your garden plot. This is a building that serves as a recreation area, which is always ready to open its hospitable arms for the owners and their friends.
Garden centers and construction offers, looking at which you might think that this is by no means a cheap pleasure. However, the real cost of the necessary materials and work is much lower, and the result of independent work cannot be compared with ready-made standard samples. For those who are not averse to saving money and improving their woodworking skills, we have prepared detailed instructions on how to build a gazebo with a pitched roof with your own hands, which can be installed independently or attached to the house.
Rain canopy
This is the simplest version of the extension and the most popular.
- Porch canopy - it protects the door material from rain and snow, and at the same time the porch itself. Flexibility and variety of colors allows you to create a structure of any shape, even curved. Moreover, no special equipment is required to bend sheets - wooden templates of the required diameter are enough. The canopy for the polycarbonate bathhouse performs the same role and is designed in the same style as the main building.
- An extension for a car - if the cottage is used only for weekends, there is simply no need to build a garage. An open area near the house, protected from the sun and rain by a transparent structure, will perfectly serve as a summer box for a car.
- Garden awning – permanent or temporary. It is built in the garden, on any attractive site and plays the role of a gazebo. It differs from the latter in its much greater simplicity of design and the absence of a foundation. You can do this option yourself in a couple of hours.
Options and Benefits
A gazebo attached to a house has a number of advantages.
- Compactness. Typically, such a structure does not take up as much space as a stand-alone building. This is a good solution for small plots of land.
- Multifunctionality. A closed gazebo can serve as a summer kitchen or an additional room for guests.
- Ease of use and ease of maintenance. Due to the fact that the gazebo is located close to the house, it is very convenient to use, because water can be supplied here from the kitchen, and this opens up additional possibilities for using such a room.
- Lower construction costs. Due to the fact that such a structure has one ready-made wall (the wall of the house), construction costs are automatically reduced.
- Easy installation. It is always easier to make an extension than to build an independent building.
A gazebo attached to a house can be designed in several ways.
- Open. Its construction will require very little building material and time. Another question is that such a design practically does not protect from the wind. Therefore, you need to carefully choose which side of the house to make such an extension. Also, the lack of privacy can be compensated by using thick curtains.
- Closed. Construction costs, both physical and material, will be higher in this case, but you can use such a gazebo for a longer period of time than an open one. Sometimes such a room is turned into almost a real room in which you can spend time until late autumn. Thus, additional square meters appear in a country or rural house.
- With barbecue. A gazebo attached to the house can be made in the form of a canopy over a stove or barbecue. For a large company that loves to spend their holidays with barbecues and other pleasures, this will be an attractive place.
And the design of such a “heater” involves the creation of a well-thought-out smoke exhaust system and a special foundation.
Overview of the design of a barrel-shaped bathhouse
Advantages
- Mobility. You can easily roll the barrel sauna from one place to another, even attach it to your car and take it with you on vacation. You can read reviews from people who own such a miracle; many of them constantly take their bathhouse with them when fishing.
- Light weight. A barrel weighs very little, about one and a half thousand kilograms, but only one brick sauna stove weighs almost five tons.
- Warm-up speed. After about twenty minutes, the temperature in your bathhouse will already reach ninety degrees.
- Compactness. The barrel takes up little space, only seven to ten square meters is enough for it, so for small areas this design can be an ideal option .
- Original design. The design of such a bathhouse is pleasing to the eye, and one might even say that it promotes relaxation to some extent. By the way, psychologists have proven that sharp corners put a person in a state of alertness, but rounded corners, on the contrary, promote relaxation.
- Saving. The construction of an ordinary bathhouse requires considerable expenses, while a half-barrel will be cheaper.
- Easy to maintain: less dirt that usually accumulates in corners.
- There is no need to build a foundation.
- Indoor ergonomics: despite the small size of the barrel, six or even seven people can comfortably sit in it .
- The barrel sauna provides the effect of a thermos. This is due to the well-thought-out thermal insulation of the structure and its multi-layer nature. But this is a significant saving of money on fuel and electrical energy. Thanks to the round design of the sauna, fuel consumption is twenty-three to twenty-five percent lower than in a conventional steam room.
Materials for building an extension
The range of building materials for the construction of extensions of various configurations and sizes is quite impressive. Foam concrete, brick, wood, stone and wood concrete can be used in the work. Each material has many advantages.
Foam concrete
Foam concrete blocks are often used for the construction of lightweight extension structures. The material is lightweight, easy to install and affordable. In addition, it does not require additional strengthening of the foundation and can be easily cut with a regular hacksaw. To equip a residential extension from foam concrete blocks, it is necessary to take care of high-quality ventilation, vapor and waterproofing of the structure.
Brick
Durable and reliable material, well suited for constructing an enclosed veranda or gazebo next to a brick or block bathhouse. It is resistant to fire, low temperatures and high humidity. A brick structure requires additional vapor barrier and waterproofing protection.
Stone
A durable and expensive building material that is used for decorative finishing of buildings. A stone bathhouse shrinks slightly (no more than 7%), so it is practical, wear-resistant and reliable. The finished extension will last for decades, but, as in previous options, it requires high-quality organization of thermal insulation, a water barrier and fresh ventilation.
Tree
The most popular and practical material for the construction of various functional extensions. The main advantages of wood are low thermal conductivity, environmental safety, aesthetics and durability. Wooden buildings need reliable protection from increased moisture, fire and rot.
Arbolit
Another name is wood concrete. The basis of the material is wood waste (sawdust, shavings), organic matter (straw and reed stalks) and a binder (cement). The advantages of the material are wear resistance, durability, inertness to temperature fluctuations, low shrinkage and high strength. To improve the external appeal of the building, after completion of construction work, decorative cladding of the facade will be required.
Stylish open gazebos for your home: be closer to nature
The modern home gazebo increasingly resembles a carefully adapted outdoor living room. Minimalism dominates today in such designs as in interiors. Geometric shapes, bright colors and raw textures are broken up by natural materials, mainly stone and wood, which warm the composition.
It is important to note that architects strive to achieve harmony between nature and technology in order to create optimal conditions for relaxation among wildlife, abandoning classic balustrades in favor of open space. The façade of the building is decorated with large-format glazing, which allows for maximum illumination of the interior and blurs the boundary between the living room and the patio, including the attached gazebo.
Terraces are often created on several levels, which allows for an interesting division of areas for different purposes, for example, a grill, a relaxation area or a dining area under the cloud. An alternative to this type of construction is a terrace with stairs near the house.
Choosing a location for the building
The location for the bathhouse should be chosen very carefully, especially when the area is small and the neighbors are very close. If there is such an opportunity, the bathhouse is placed near a natural or artificial reservoir; plunging into cool waters immediately after a hot steam room is a great pleasure.
According to current standards, the following minimum distances to other buildings are required:
- from a residential building – 7-10 m;
- to buildings made of non-combustible material - 6-9 m;
- to wooden outbuildings – 10-13 m;
- to wooden buildings with non-flammable coating - 7-9 m;
- from the roadway – 6-7 m;
- from a neighbor’s fence or boundary – 1-2 m;
- to the neighbor’s house – 15-17 m;
- to the forest – 16 m;
- to the well, well - 10 m;
- to tall trees – 4 m, bushes – 2 m.
It is also important to discuss in advance the location of the future bathhouse in relation to common areas, if any - a swimming pond, a playground, etc. When building on the banks of a river or lake, it is important that waste water does not get there, and that the structure itself stands on solid ground and does not could be damaged during floods
What kind of extensions can there be?
An extension to a bathhouse can have different purposes, and its type depends on what the main bathhouse building consists of. If the original option was a minimal set - a steam room and a dressing room, then there is a need to build a washing room with a shower. The question of how to attach a new dressing room to a bathhouse with your own hands arises when the room can somehow accommodate 2 people, and there is no place to place firewood to maintain the firebox.
The question most often arises is how to attach a veranda to a bathhouse with your own hands or an enclosed recreation room. As a rule, it is the relaxation area that is put off until better times, and therefore it often becomes the target of a bathhouse extension. An interesting and original option: adding a summer kitchen to the bathhouse with your own hands. In principle, this formulation of the problem is quite natural. After all, the bathhouse contains a stove, which is used only when preparing and carrying out the washing procedure. It is quite logical to set the task of using it at other times. Adding a summer kitchen will eliminate downtime of the heat source.
Based on their location relative to the bathhouse, extensions can be divided into several types. They can become a continuation of any bath room with a major reconstruction of the structure, removal of part or all of the old wall. This way you can expand the steam room, dressing room or make a sink. Another option is an extension without violating the integrity of the previously built structure, but with a reliable connection of the extension to the main wall.
Finally, one more method should be noted - the creation of a new room in close proximity to the bathhouse, functionally related to it, but not structurally connected into a single system. Example: a gazebo attached to a bathhouse with your own hands. Such a building is erected at a distance of 0.5-3 m from the bath wall, but serves as a relaxation room.
In addition, extensions may differ in location relative to the entrance. The most common structures are those erected in the form of a vestibule to a bathhouse, i.e. after their construction, a new entrance appears, and the old one is moved deeper. The second type is not connected to the main entrance, and after the construction of the extension, an independent entrance is formed in it. In this case, inside such an additional room there may be a passage to some kind of bath room, or there may be no direct connection with the internal premises.
Characteristics of various types of extensions to the bath complex
The open type of gazebo is constructed in the form of an attached terrace. This form of gazebo is distinguished by the absence of walls on the sides of the structure. The roof of the structure is mounted on support pillars. The disadvantage of this type of extension is its limited use, since such an extension can only be fully used during the warm period. The advantage in this case is the low cost of construction and operation.
Semi-open types of gazebos have zoning of the occupied area. Most often, such a structure has one part closed and the other open. The open part of the gazebo serves as a terrace. Setting up this type of gazebo requires a lot of time and building materials. In addition, it will be necessary to allocate a larger area for the facility. A semi-closed gazebo can be used even in the cold season.
Closed gazebos-pavilions are structures that are completely closed from the outside world. When designing such an object, installation plans are used that allow the maximum amount of light to penetrate into the interior space of the gazebo. For this purpose, large light-transmitting structures are used. A closed gazebo-pavilion, provided that a heating system is installed in it, can be used throughout the year.
Transformable gazebos are the most interesting and functional option among all types of structures. This structure is erected using sliding structures, which are made of aluminum profiles.
The use of sliding structures allows you to create a beautiful panoramic view that opens from such a gazebo. The designs use tempered glass, the advantage of which is the increased strength of the material.
When arranging such a gazebo using structures made of warm aluminum and provided that a heating system is installed in the gazebo, the structure can be used at any time of the year.