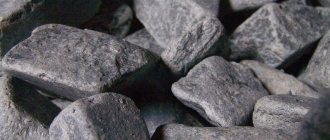
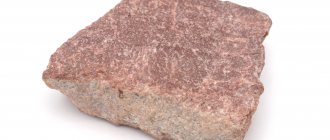
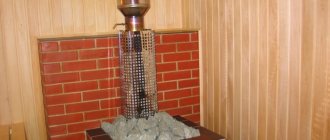
Popular types of stone for finishing a bath:
- Serpentinite (coil) The stone has healing properties: eliminates headaches, relieves nervous tension, stabilizes blood pressure, helps get rid of diseases of the digestive organs and colds;
- Soapstone chlorite (talcomagnesite). Helps improve memory, lifts mood, fights stress, improves immunity. In our work we use production facilities from Finland and Russia;
- Jade. Looks beautiful in the form of a panel. It has an expensive look, impressive in different finishes. The mineral is useful for rheumatism and osteochondrosis, and prevents the appearance of cellulite.
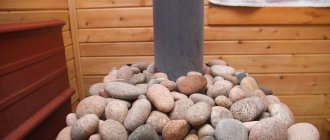
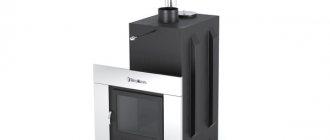
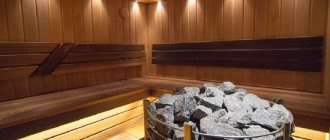
How to properly place stones in a sauna stove
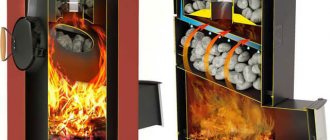
Each individual oven requires a different amount of material. The one used for pipe lining is not included in this list. When the mass of stones is large, the oven takes longer to heat up. If their quantity is small, it will not be possible to obtain the required volume of steam. The optimal mass can only be determined experimentally.
The material is pre-dried, the filling in the chamber should be as dense as possible. The air should fill it by 15%, but no more.
The method for placing cobblestones in the oven is indicated on the original packaging. If they were purchased without containers, then it is worth following some recommendations for laying out stones.
The bottom of the heater chamber is lined with small cobblestones, which have no healing properties. They retain heat well. Such minerals include soapstone, peridotite and basalt.
This layout scheme helps to increase the heat capacity of the steam room and ensure a uniform flow of water.
The top layers should consist of large rocks, such as white quartz or jadeite. It is not recommended to compact stones during laying. The stones in the sauna stove should be placed tightly to each other. If you don’t like the masonry, you can go through it, swap the material and choose a more compact option.
For electric furnaces, minerals of small diameter are used, placed between heating grates at a short distance. Large cobblestones will create additional difficulties during the laying process and will lead to the formation of voids between individual elements. And this, in turn, is fraught with heat losses in the room.
The optimal height for laying stones for the formation of thick steam is 30 cm. This will ensure that water quickly reaches all layers to obtain dry, clean and enveloping steam.
Finishing the furnace area with serpentinite (coil)
Serpentinite belongs to a wide group of layered silicates, which also includes magnesium-iron silicates of polymorphic modification. It is a rock typically characterized by a dark green color and a unique pattern reminiscent of the intricate patterns on the skin of a snake. This is precisely what is associated with the “folk” name of the stone – serpentine.
This rock consists of fine crystalline fibers and has a fairly dense structure. At the same time, the stone cannot be called hard and inflexible (especially in comparison with some other rocks). This explains the fact that serpentinite is often used for finishing and decorative purposes: it can be easily processed and easily polished. The mineral is not transparent, but has a pleasant shine. The pattern of a stone is a purely individual matter, this is due to the chemical composition, so each specific specimen can be strikingly different from the other. Serpentinite almost always has one shade of green or another, although in rare cases it can have a yellow color.
Serpentine deposits are found all over the Earth and are not uncommon in general, but Russia is especially successful in this. Mining of the mineral among the Ural Mountains began in the 18th century. Subsequently, deposits were also discovered in the Caucasus, Yakutia, the Orenburg region and Altai.
The ancient Chinese attributed to serpentinite the same magical and beneficial properties that they attributed to another stone similar in color - jadeite. Medieval alchemists believed that serpentinite could enhance the effects of healing agents and medicines. For this reason, dishes and utensils for doctors and pharmacists were often made from it: bowls, scales, stupas, and more. One of the many nicknames for the serpentine was even “apothecary stone.” Oddly enough, even current lithotherapists (specialists in stone treatment) are of the same opinion, and strongly encourage the use of the coil in combination with conventional medications.
Advantages of finishing with serpentinite
- Thanks to asbestos fibers, the stone does not collapse even with strong heating;
- The coil completely retains its appearance at high temperatures: it does not crack, does not deform and does not lose its aesthetic properties.
Decorative plaster
Plaster for stoves began to be used relatively recently. Indeed, a good stove does not need to be plastered. It is made either of high-quality brick, which in itself looks decorative, or of metal, which also does not need plaster.
In this case, we are not talking about plastering the stove itself, but about creating a protective separating layer of plaster between the walls and the stove. Plaster is quite suitable here.
Finishing the walls in the bathhouse around the stove with decorative plaster is especially often done when the stove is not placed in a steam room.
In this case, the requirements for moisture resistance are much lower.
Finishing the furnace area with soapstone (talcomagnesite)
These two minerals differ slightly in composition: soapstone contains only two components, which logically follow from the name: talc (40-50%) and magnesite (40 to 50%). The first element also includes chlorite (30-35%), while the percentage of magnesite in the composition is only 5-10%, and talc - 40-50%. As a rule, these minerals are smooth to the touch, although in rare cases raised specimens are also found.
Soapstone is a natural rock stone. Its classic color is gray, but depending on impurities, some stones can be white, brown or green. Its surface is matte and pleasant to the touch. Perhaps in connection with this, the mineral is also called “soapstone” and “wen”. The main deposit is based in the small area of Nunnalahti in Finland - this is where the main world reserve of this stone has been accumulated.
The mineral is very malleable, easy to process, but at the same time durable and conducts heat efficiently. All this makes Talkochlorite one of the best modern finishing materials. Due to its heat capacity and thermal conductivity, stone began to be actively used for cladding stoves and fireplaces. The stone is able to calmly and without deformation withstand temperatures up to 1600 °C, while adequately accumulating and distributing heat. In addition, the material is resistant to other chemical influences.
Advantages of soapstone finishing
- Excellent material for insulation;
- It heats up quickly and cools down for a long time, which is an extremely important characteristic for baths and saunas;
- The steam that passes through the stone is saturated with oxygen, which brings additional health benefits;
- Does not contain toxins or toxic impurities;
- It is not subject to corrosion, which is very important when located in bathhouses.
Using tiles
The tiles on the stove in the bathhouse are afraid of thermal expansion, therefore, when performing work, it is important to carefully follow the technological process. The lining of the stove in the bathhouse does not tolerate negligence.
Typically, 7 types of tiles are used for cladding:
- Terracotta is a tile that has not been glazed. It consists of terracotta clay and fireclay, which are mixed in a certain ratio. Such tiles have been known for several centuries. A correctly implemented technological process greatly influences the final quality of the material. This tile can be easily recognized by its characteristic red tint.
- Clinker tiles - clay is the main raw material. The material is obtained by pressing, then it is fired at a temperature of +1200 0 C. The crystal lattice of the clay changes and the tile acquires the properties of ceramics.
- Majolica is very difficult to produce. Previously, only manual labor was used for drawing. Now there are industrial designs. The glaze on the tile is obtained by firing. Properties resemble terracotta tiles.
- Tiles are the most preferred option due to the air gap between the tiles and the oven wall. This layer works as an additional heat insulator, allowing the stove to retain heat near itself even longer.
- Porcelain tiles can also be used for lining a stove. Marble chips added during the production of porcelain stoneware give the material unique decorative properties and high strength. Due to this, porcelain tiles are rapidly gaining popularity.
- Fireclay is able to withstand direct exposure to fire. Fireclay is pressed into blanks and fired at a temperature of +1300 0 C.
- Tile - only a material with a high heat resistance coefficient can withstand temperature loads.
Instructions
Do-it-yourself tiling of a sauna stove is done as follows:
- It is necessary to properly prepare the surface. All traces of old finishes must be removed from the wall. Each seam should be selected at 10-15 mm.
- We dilute a deep penetration primer and add marble chips to it. Carefully prime the surface. Do not forget that the primer must dry (at least 24 hours).
- We stretch and fix the metal mesh using dowels. Such reinforcement will significantly increase the strength of the structure.
- The tiles should not be laid on an uneven surface. We level the wall with plaster. We recommend using stove mortar that is specifically designed for plastering stoves. The plaster must be allowed to dry for 48 hours.
- Apply the facing adhesive evenly to the entire surface of the tile. Carefully cover the surface of the stove and press lightly. The tiles can be leveled in about 10 minutes. Then the glue will set. We check the correctness of the masonry using a level. The glue layer should not exceed 1 cm. To make the seams even, we use special crosses. The thickness of the seam is 2-3 mm.
- When the glue dries, we grout the joints.
Furnace area finishing with jadeite
The name of the stone comes from the Spanish word meaning "kidney". Until the 19th century, this word meant a whole group of stones, including the well-known jade. However, then the chemist Demur carried out differentiation, during which the name “jadeite” was given to a specific rock used in stone processing.
Large jadeite (but of lower quality) is often used in the construction of saunas and baths - it is even called “bathhouse”. Its use is due to the fact that jadeite does not come into contact with water even in extreme heat and promotes the production of steam. In addition, the stone does not deform in any way due to heating and rapid cooling, does not crack or collapse.
Advantages of jadeite finishing
- The stone has increased strength and resistance to high temperatures;
- It practically does not absorb water, and therefore produces thick and pleasant steam;
- In folk medicine and lithotherapy, this stone is considered one of the most useful: many healing properties are attributed to it;
- Can be heated and cooled repeatedly without harming external characteristics;
- Suitable for finishing stoves of any type.
Our company carries out finishing of baths from all types of stone. We offer exclusive solutions imbued with delicate taste and a high level of aesthetics. Call!
Video description
About imitation stone on a sauna stove in the following video:
Metal case
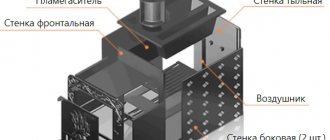
Often a metal casing is used as finishing around the stove in a bathhouse. It is not used by itself, since, although it is a fire-resistant material, it does not insulate heat at all, and is not able to protect nearby wooden walls from overheating. Therefore, a metal casing made of roofing iron or steel is installed only in combination with a heat-insulating layer of material suitable for the conditions of the steam room.
To reliably protect walls from heat, not all materials are suitable. For example, mineral wool, beloved by many, is absolutely not suitable. After the first use of the bath, it will absorb moisture, shrink in volume and cease to perform its functions. Minerite (fiber cement) slabs with a cement-fiber base are suitable in terms of properties. They are made from white or gray cement, are environmentally friendly, and are suitable for thermal protection when heated to 1200°C.
The metal body helps distribute heat Source sdelaikamin.ru
Where are we
- 8
- [email protected]
- Main office:
Moscow, Nakhimovsky prospect, 24, VK Expostroy, hall No. 3, row 11, place 367
Operating mode:
Monday - Saturday from 10 to 20, Sunday from 10 to 19
- Trade pavilion:
Construction fair "MILL" 41 km MKAD, Pavilion NB-33
Operating mode:
Monday - Sunday from 9 to 18
Additional Phone:
8
Tiles
Tiles are a classic solution for finishing stoves. They have cheap production technology and very reliable installation. The external surface, finished with tiles, looks like high-quality, thick tiles.
This appearance will be achieved only if you use tiles without a pattern on the front surface. They do not produce a special decorative effect, since they do not differ much from the usual tiles. The only benefit is in the strength of the fastening, which is why other tiles with a three-dimensional pattern on the front side are more popular.
Tiles are laid in the same way as tiles, but require a significant thickness of the finishing layer. If a portal for a sauna stove is made from them, then part of the wall and floor is covered with tiles. They don’t have to be used on the floor if the stove foundation is raised above the floor by one or two brick rows.
If the tiles have holes for wire, then it must be used.
The diameter of the rods is selected according to the instructions. Larger diameter means higher strength, but the complexity of installation increases.
On average, tiles are the same thickness as one brick.
They can just as well be used to create the same protective layer.
Marking the base
Where to start? And how to ensure even seams? Marking the walls helps with this. It is necessary to determine the starting points of installation. To do this, use a laser or water level. The latter option is preferable if you have a limited budget. It is in no way inferior to the technological version. Plus, in a small area, using a laser does not have any pronounced advantages.
The following recommendations will help you understand where to start and how to work:
- in most cases you need to start from the corners (at least there should be whole elements in the corners);
- with seamless cladding, it is better to lay the stone from the bottom up, and when laying with subsequent jointing (especially when laying porous slabs), it will be more convenient to go from top to bottom - this way the slabs will not become dirty;
- whole slabs - the most visible places; usually these are the top and corners, but you need to look at the situation;
- Usually the bottom row is left for last - it is more convenient to cover the floor with trimming, rather than adjusting the floor covering to the stove stone.
Based on this, the starting points are determined. After this, either lay the first row along the laser mark, or pull the beacon cord (according to the marks).
Methods
There are several solutions on how to beautifully decorate, lay and insulate a stove. Based on the type of lining, two options are considered.
- When lining the furnace on four sides at once, such a scheme will be called a full lining.
- If one of the sides is not involved, then this is a partial layout. The main difference is the controllability of convections.
This question becomes especially relevant for those who want to build a Russian bathhouse. The controllability of convection allows you to regulate the steam; it remains either in the device itself or fills the room. This way the heat is adjusted and controlled.
There are certain options for how to enclose an iron stove with bricks.
- Solid masonry. The efficiency of the device may be low, there are obstacles to convection. Therefore, it is rarely chosen for construction purposes.
- Discharged masonry. The solution is also not often used in the construction industry. The main reason is that the screen efficiency decreases.
- Vents from the top and bottom. This is the most popular solution. Convection becomes more controllable.
Additionally, masonry can be brick, half-brick and quarter-brick. The best option is half-brick masonry, since the thickness and stability of the walls of the structure are freely adjustable.
Tiles
A stove with tiles is a rather labor-intensive process. Technology has simplified things a bit. But until now, the construction of such a furnace takes 4-5 months, if you use the classic version. The laying and lining of the furnace occurs simultaneously. Although, in a simplified version, you can line a finished stove.
Expert opinion Nikolay Davydov Stove maker with 15 years of experience
The drawing can be anything. Usually Russian folk motifs are used. The sizes of tiles are regulated by GOST 3742-47. Permissible deviations should not exceed 1 mm in all directions. Thanks to standardization, the cladding process has been significantly simplified. The most important thing is to choose the right material.
Instructions
You should be guided by the following rules:
- Material of manufacture. Impurities in colored clay will not allow the production of high-quality tiles, so it is not used. In contrast, white clay is an ideal raw material.
- The quality of a product is determined by its ability to absorb water. The more pores in a tile and the larger they are, the less quality the product will be.
- Choose tiles made by pressing.
- The surface of the product should not have a dull appearance and there should be no cracks on it. This happens when a product undergoes only one firing.
For cladding, tiles must be sorted by shade. They will need to be laid in such a way that the transition is not noticeable. The size is adjusted using a rasp and an angle grinder on all sides. Defective tiles should not be thrown away immediately. They can be used later.
The next step is to mark. The thickness of the horizontal seam should not exceed 3 mm, vertical - 1 mm. Now let's move on to installation.
Lay out the first row.
The process is very labor-intensive, but the result is worth it. The first thing to do is to properly prepare the tiles for installation. This will ensure the best result.
The installation order is as follows:
- immerse the tiles in water, waiting until the clay absorbs water;
- the clay in the tiller will increase the heat capacity, so you need to fill it halfway;
- steel brackets allow you to correctly connect the tiles to each other;
- We connect a row of tiles to a row of the stove using wire.
Scheme for fastening the tiles: 1 – lump, 2 – pin, 3 – wire, 4 – staples.
Subsequent rows.
- drill holes in the masonry;
- We use screws and wire as a connecting element;
- We fasten the steel pins using wire;
- we place the tile on the pin and bend the last one;
- the dry solution will fill all the voids between the tiles.
Sauna stove in tiles
When is this required?
There are times when there is no need to protect walls. If the stove is located at a safe distance from the wall from a fire safety point of view, the installation of protective screens and other measures can be neglected. The distance from the walls that is required to reduce the heat from the source varies:
- A stove laid in a quarter of a brick should be located no closer than 35-40 cm from the wall;
- A metal stove without lining should be placed a meter away and no closer;
- A metal one with a lined furnace can be installed 70-75cm from the wall.
However, not every steam room has the opportunity to fulfill these requirements, due to the small area. The layout of steam rooms with an area of 6-8 m² can hardly accommodate the necessary set of items for the steaming procedure. Therefore, the need to insulate walls with special sheathing is relevant.
