Ideas for home interior [36]↑
- 2019-07-17 DIY table lamp-night light
- 2017-10-31 Very cool tables! 15 photos
- 2017-10-31 Budget ideas for furniture made from pallets (pallets), 10 photos
- 2017-10-31 Original do-it-yourself wooden floors, 2 pictures
- 2017-01-08 Hanging shelf made of sawn wood, photo
- 2016-06-06 “Wooden” ideas for the home | Wooden decor, 30 photos
- 2016-06-06 Furniture made from branches - a lot of photos and text
- 2016-04-28 Great ideas for interiors made from wood cuts! 17 photos
- 2016-02-17 Table made of chocks, photo
- 2016-01-26 Designer watch made from several thousand sections of twigs!
- 2016-01-26 Amazing plates made from wood slices, 13 photos
- 2016-01-11 Doors as a work of art | 13 photos of carved doors
- 2015-11-13 Interesting furniture made from branches, plywood and saw cuts
- 2015-11-07 Do-it-yourself wooden bathtub (8 photos)
- 2015-10-27 Homemade products for the house made of natural wood, 4 photos
- 2015-06-23 Do-it-yourself floor made from saw cuts
- 2015-03-30 DIY wooden staircase illuminated with LED strip
- 2014-06-17 DIY installation of a wooden attic ladder in a rustic style. Video
- 2014-02-21 Sculptural wood carving. Making a talisman staff. Sketches
- 2014-02-21 Weaving a cattail mat with your own hands
- 2013-12-03 Unusual furniture made of wood and driftwood. Designer furniture by Konstantin Kuznetsov
- 2013-10-13 Birch decor or what can be made from birch bark
- 2013-08-06 Do-it-yourself wooden railings for stairs
- 2013-03-21 DIY dressing table for the bedroom
- 2013-02-23 DIY wooden TV stand
- 2013-02-21 DIY bamboo floor lamp. Unusual solution
- 2013-02-20 Do-it-yourself wooden panel with lighting on the wall
- 2012-11-26 DIY New Year's decor ideas or what can be made from pine cones?
- 2012-11-11 How to make a stand for a mobile phone with your own hands
- 2012-11-03 How to make a children's corner with a bed with your own hands. Original ideas
- 2012-07-20 Interior in wooden style. Decor with wood cuts
- 2012-03-19 How to make a wooden flower vase with your own hands
- 2012-01-12 DIY decor and crafts from branches. 12 original ideas for the interior
- 2012-01-07 How to make a wooden wall clock with your own hands
- 2012-01-05 How to make a lamp with your own hands. Original ideas for the interior
- 2011-12-26 Ways to use wooden pallets. Interesting ideas for the home
Stalls
Designer furniture for baths
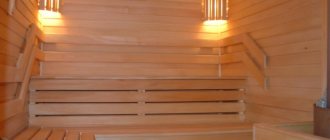
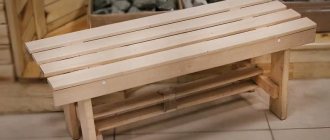
Bench The bench in the bathhouse is made almost according to the same principle as the shelves. It is advisable that there is a decent gap between the boards of the bench. The use of metal elements is almost impossible here. In some cases, benches are attached to a shelf.
For the shop you need to choose:
- seat strips (preferably thin);
- wooden blocks for the frame;
- fastener
The first tool you will need is a grinding machine or sandpaper. It is necessary to work not only with the bench, but also with the shelf. All boards must be perfectly sanded and their edges rounded. Otherwise, you could get hurt by the furniture.
You also need to prepare a hacksaw, plane and hammer.
- The bars are measured. After marking, they are cut.
- A frame is knocked together from the bars.
- Planks are placed on the frame. The distance between them should be at least 1 cm.
It is better to choose wooden nails as fasteners. After the bench is ready, you need to sand all the corners and surface.
To make an average bench you will need 6 pieces of timber 45 cm long, as well as 14 - 15 boards 90 cm long.
A wooden bench for a bath is a glued structure made of a horizontal board, two side posts and a longitudinal connecting beam. With only four main elements, this design provides sufficient strength and ease of installation.
To ensure the rigidity of the product, PVA glue for wood and self-tapping screws are used, which tighten the side posts until they stop at the ends of the longitudinal beam. The side posts and the longitudinal beam mounted on the edge form a frame that ensures the rigidity of the entire structure.
The top board (seat) is connected to the frame using furniture dowels coated with PVA glue. Plastic thrust bearings are attached to the lower supporting ends of the sidewalls, which protect the bench from damage when it is moved along the floor.
All structural elements are coated with moisture-resistant, odorless, water-based acrylic varnish with an antiseptic effect. The treated surface has a semi-matte silky appearance and does not change the natural texture of the wood. You can choose any color of varnish so that the bench matches the interior of the bathhouse and does not stand out like a foreign body.
to content
As mentioned above, if furniture panels are used to make the bench, then all work will be reduced to processing the blanks in accordance with the drawing dimensions. Otherwise, you will have to make them and glue them yourself. Cutting workpieces, of course, should be carried out taking into account finishing allowances of 20-30 mm per side.
We will make wooden laminated boards using a 10x20 mm slats inserted into the longitudinal grooves of adjacent boards. You can make the lath yourself, but for this you need to have the appropriate equipment, for example a thickness planer. It can also be cut out of plywood, but it is better to buy ready-made, especially since it is inexpensive.
The process of making a wooden shield is as follows:
- Two boards are laid on a flat surface parallel to each other with a gap for the cutter to enter and securely secured with clamps. The top surfaces of the boards will serve as the base for the base of the router.
- The side parallel stop with the base from the unprocessed side of the other board is adjusted so that it provides a groove depth of 10 mm. The second option is also possible if you mill with a disk cutter with a bearing. Then the side stops are not needed.
- We mill the groove in several passes. Without changing the position of the cutter, we do the same on another board. If the width of the groove is less than the thickness of the rack, then we mill it with additional passes, first adjusting the output of the router head to the appropriate value.
- We perform the same operations for the remaining pairs of boards.
- After all the grooves are ready, we make a test assembly of the shield. If the results are positive, we proceed to gluing. To do this, we use an ordinary brush, first coating the groove with glue, and then the rail itself.
- First, we glue the lath on one side in each board, and then we glue the protruding edge of the lath into the groove of the adjacent board. Thus, we glue the entire shield and begin to tighten it with clamps or wedges. How to do this is shown in this picture. The main condition is that it is necessary to eliminate the gaps between the boards and ensure the flatness of the glued board.
- To prevent the shield from bending, you can put bars on it, the protruding parts of which are secured to the table with self-tapping screws, or you can put a flat plate with a load on them, for example, buckets of water. We leave everything in this tightened and pressed form until the glue dries.
- Note:
- It is recommended to make a test gluing using waste material. This will allow you to find out the nuances that may arise when gluing the shield, for example, the amount of glue applied.
- When applying glue, do not allow it to dry out prematurely. Excess glue should be removed with a slightly damp cloth, avoiding the appearance of glue stains on the front surfaces of the parts.
- In the same way, you can make a glued board for any furniture in a bathhouse, for example, a tabletop when making a table with your own hands.
The remaining elements of the bench are made from prepared shields. To do this, markings are applied to them corresponding to the drawing of the part, and its outline is cut out with an electric jigsaw, followed by rounding the edges by passing a radius molding cutter on both sides of the part.
to content
Before assembly, all parts must be carefully treated with abrasive sandpaper. How to assemble the bench is shown in the pictures below.
We begin the assembly by sequentially assembling the side posts on a table or other flat surface, connecting them to a longitudinal board-beam with cut ends for the corresponding grooves in the sidewalls. We coat all surfaces of the docking joints with PVA glue, fasten them with self-tapping screws, align them to be perpendicular and parallel, maintaining the required dimensions, and leave them to fully set with glue.
The next step will be to connect the glued sidewalls (frame) with the upper seat board, which we will now simply call the “seat”. But first you will need to drill holes for furniture dowels in the frame and seat. Without special tools and devices, it is quite difficult to accurately mark the centers of all holes. As a rule, this leads to the fact that during assembly the dowels do not fit into the mounting holes. To avoid this, we will do the following:
- We install the frame upside down on the underside of the seat.
- We align the frame relative to the seat according to the drawing dimensions, and trace the entire outline with a pencil (it will be useful to us in the future) and turn the frame over to its original position.
- On the frame we mark the centers for the holes, then we drive thin nails with cut heads into them strictly vertically. The sharp ends of the nails should protrude from the frame by 3-4 mm, that is, they should be like pointed tips of an awl.
- Next, we turn the frame over and, guided by the previously drawn contour, carefully lower it onto the seat and lightly tap it with a block.
- We remove the frame again and see the marks left by the tips of the nails on the seat.
- We remove all the nails on the frame and drill holes according to the marks, first with a ø3 mm drill, and then drill them out to a diameter of 10 mm, apply glue to the dowels and drive them into the holes on the frame.
- All that remains is to install the seat in its place, coating the protruding ends of the dowels with PVA glue. If it turns out that some pins do not fit into the holes, then they will have to be cut a little in length by removing part of the cylindrical part from the desired side.
- We pad the seat all the way and leave everything to dry.
- To further strengthen the bench, you can fasten the sides and seat with galvanized corners on the inside. This will not affect the appearance in any way, since the corners will be hidden from view, and will undoubtedly add strength.
So, the assembly of the bathhouse bench is completed. The last operations left to do are final finishing with abrasive sandpaper and dust removal. After which you can begin varnishing, following the instructions from the manufacturer.
Woodworking tool [19] ↑
- 2016-07-11 How to make a simple sawmill from a chainsaw and two boards
- 2015-11-10 Tools for wood carving – what does a beginner need?
- 2013-11-24 Homemade sawmill from a chainsaw. Device for longitudinal sawing. Video
- 2013-11-19 How to make a circular with your own hands. Video
- 2013-05-27 Drills for wood. Types and description
- 2013-03-24 Devices for storing tools in the garage, workshop
- 2012-08-01 Homemade elevator for a manual router
- 2011-12-28 How to make a clamp with your own hands
- 2011-09-16 Wood cutters for a manual router
- 2011-07-11 Homemade woodworking machine
- 2011-07-04 Manual wood router. DIY router table
- 2011-06-08 How to make a carpentry workbench with your own hands
- 2011-06-06 Homemade wood turning tools
- 2011-06-03 Homemade universal wood cutting machine
- 2011-04-25 Table miter saw for wood
- 2011-04-14 Tabletop sharpening machine. Application possibilities
- 2011-03-24 Wood carving tool
- 2011-03-12 How to make wood cutters with your own hands
- 2011-03-11 Homemade wood lathe
wood cutters
- 2011-06-06 Homemade wood turning tools
- 2011-03-24 Wood carving tool
- 2011-03-12 How to make wood cutters with your own hands
2011-04-18 Tool sharpening. Sharpening machines
wood lathe
- 2011-06-06 Homemade wood turning tools
- 2011-06-03 Homemade universal wood cutting machine
- 2011-03-11 Homemade wood lathe
power tools for wood
- 2013-11-24 Homemade sawmill from a chainsaw. Device for longitudinal sawing. Video
- 2013-11-19 How to make a circular with your own hands. Video
- 2013-05-27 Drills for wood. Types and description
- 2013-03-24 Devices for storing tools in the garage, workshop
- 2012-08-01 Homemade elevator for a manual router
- 2012-02-10 Relief wood carving using a drill. Master class, video
- 2011-09-16 Wood cutters for a manual router
- 2011-07-11 Homemade woodworking machine
- 2011-07-04 Manual wood router. DIY router table
- 2011-04-25 Table miter saw for wood
- 2011-04-14 Tabletop sharpening machine. Application possibilities
Tools and materials
Before carving patterns on wood, make sure you have the necessary tools and materials.
Standard sets of cutters consist of 18 tools, their size varies from 2 mm to 5 cm. The main thing in the tool is the sharpest possible sharpening, which allows you to do without much effort.
Before you learn how to carve figures from wood, make sure you have a suitable tool (set price - from 3,000 rubles)
Flat chisels have the same sharpening angle on each side, while round chisels have a larger bevel on the outside. To sharpen such tools, you will need shaped whetstones and high-quality sharpening stones.
Choosing wood
Before you learn how to carve wood, make sure you have the right material in your hands. For example, boxwood is considered the strongest wood in Europe; it can only be handled by a professional
The success of your creative impulse is largely determined by the correctly selected wood.
If your plans include creating elements that will be located outdoors (window and door frames, cornices), use softwood. Thanks to the resin content, carved creations are protected from rotting.
For carving household utensils, it is recommended to use hardwood, which has a fine-grained structure. This category includes linden, oak and birch.
Harvesting wood
If you are harvesting wood yourself, after drying it is cut. For wind boards, carved platbands and cornices, a board with a thickness of at least 20-25 mm will be required. If after cutting the workpiece has a different thickness, level it using a plane.
Boards prepared for carving are not sanded after planing. Ignoring this recommendation can lead to rapid dulling of the tool due to abrasive stuck in the wood.
Making hooks for hangers in the bathhouse
In rooms with high humidity, hooks should be made of wood. You can make them yourself from scrap materials. Birch cuttings for shovels are suitable as blanks. Features of making hanger hooks:
- Saw off the required number of 50 mm long bars from the handle.
- When determining the number of hooks, proceed from the recommendations that there should be a gap of 110-120 mm between the parts.
- Make semicircular grooves on each block using a router bit or miter saw.
- Sand the ends and corners of the block using a sander.
- At the ends of the bars, make mounting holes with a diameter of 3 mm for self-tapping screws. The holes are necessary so that the block does not crack when screwing in the fasteners.
- To attach the hooks, use self-tapping screws that secure them to the hanger, and PVA glue, which is used to lubricate the end of the handle.
Features of making decorative hooks
Ready-made hooks for bath hangers are commercially available, but if desired, you can make them yourself from available materials.
The simplest option is birch cuttings.
Hooks from cuttings are made as follows:
- The cutting is sawn into the required number of elements, each 5 cm long. In the future, the hooks will be installed on the holder in increments of 10–12 cm, so you should calculate the required number in advance.
- Semicircular grooves are made in each element using a milling cutter or miter saw.
- The end parts and corners of the hooks are carefully polished.
- The ends have holes for fastening with a diameter of up to 3.5 mm. This is necessary in order to prevent deformation or damage to the hook when screwing in the fasteners.
- The hooks are fixed to the holder with self-tapping screws, the ends are additionally treated with an adhesive composition.
Sources
- https://mebel-expert.info/veshalka-v-banju-iz-dereva-svoimi-rukami/
- https://parilochka.com/mebel-dlya-bani/veshalki.html
- https://SdelatBanyu.ru/otdelka-i-interer/veshalka.html
- https://2proraba.com/banya/veshalka-v-banyu-svoimi-rukami.html
- https://tutknow.ru/building/banja-i-sauna/2137-veshalka-v-banyu-svoimi-rukami.html
- https://PostroitBanju.ru/aksessuary-dlya-bani/veshalka-v-banyu-svoimi-rukami-foto-idei-sovety-kak-sdelat-veshalku-dlya-bani-svoimi-rukami.html
Useful work
In schools, on the topic: how to make wooden crafts - they give an assignment. Make a birdhouse out of wood. If you do it carefully, it can turn out like this. First, a platform is built in the form of a square.
It is cut out of plywood. On top of the plywood square, 4 slats are sewn along the edges with screws. Then the frame of the birdhouse is built. From slats. Plywood is sewn onto the constructed frame on all sides.
An opening is cut out from the front for the birds to enter. When all 4 sides of the walls are strengthened, the roof is built. Also made of plywood. Triangle. So that there is a canopy near the roof. Now you can hang the birdhouse on a suitable tree.
Pour some crumbs in there. A birdhouse built from wood is better than others. It is more beautiful and looks aesthetically pleasing. And there are more benefits from such crafts for children. The work requires a lot of concentration and effort.
Step-by-step recommendations for making your own wooden bath shelf
Before you get started, there are a few key points to consider:
- What kind of things is it intended for storing?
- How important is it to use a certain type of wood, such as oak or linden;
- What is the maximum load-bearing capacity it should provide? The strength of the structure and, by the way, its weight will directly depend on its “carrying capacity”;
- Where in the space of the bathhouse it will be located;
- The characteristic features of the interior are determined with which it must be consistent or, as newfangled high-flying designers like to say, “rhyme.”
In defiance of newfangled designers of different heights, we present the “Lyra” bathhouse shelf, which will allow the owner of a bathhouse with such an accessory to be known among his neighbors as a great expert in the field of chamber symphonic music and, possibly, foreign rock. As part of the variation of the same “Horseshoe” shelf, you can constantly adhere to the tradition of preserving valuable bath items under the constant protection of this well-deserved Slavic amulet.
What is necessary:
- Board 500 mm wide, 750 mm long and 25 mm thick for the frame;
- Three strips 750 mm long, 60 mm wide and 25 mm thick, for decorating the internal set;
- Two boards 15 mm thick, 200 wide, and 400 long for use as the load-bearing plane of the shelf in horizontal projection;
- Copper busbar 35 mm high and 1 mm thick for edging;
- A set of hanging fasteners for installation at three points and standard wood screws for fastening elements together, 25 and 35 mm long.
- Jigsaw with blade for curved cutting;
- Compass, ruler, bubble level for marking and assembly;
- A screwdriver or screwdriver with a working part for the specific self-tapping screw used.
The main sequence of work is as follows:
- Using marking tools, the outline of a lyre or horseshoe is drawn along the outer dimensions of 500x750 mm.
- Using a jigsaw, the outline is cut out from the rear sight.
- An internal vertical set is being recruited.
- The horizontal set is outlined by a copper busbar.
- A horizontal set is mounted.
- If the shelf is made in the “Lyra” version, the outer contour is sanded and coated with transparent polyurethane varnish. In this case, tinting a quarter or half a tone darker than the original color of the wood is allowed. In the “Horseshoe” version, the outer contour is painted with decorative acrylic water-soluble paint in the color of natural metal. On the surface of the product you can imitate defects and fasteners in the form of nail heads forged by a village blacksmith.
- Seats for fasteners are marked on the wall, and hanging elements are fixed to the counter parts of the shelf. The product is mounted on a wall with horizontal control using a bubble level.
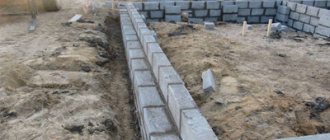
Bathhouse made of foam blocks
An alternative to wood and brick is foam or gas blocks. Today they are becoming increasingly popular among everyone who builds a bathhouse with their own hands. Their main advantage is the speed of building construction. Cons - like bricks.
The laying process goes along with the reinforcement of all rows. The blocks are fixed with glue or cement mortar.
Most often they take blocks of 200x300x600 mm, the price of 1 piece is from 95 rubles. For internal walls and partitions, smaller and thinner blocks are used - 100-120 mm, for only 50 rubles. Calculating the number of blocks is easy. If the wall thickness of the bathhouse is 20 cm, then per 1 sq. m need 5.5 blocks for 95 rubles. This gives an amount of 540 rubles. If the wall thickness is 30 cm, then more blocks will be needed - 8.33 pcs. Expenses per 1 sq. m will be 790 rub. We can conclude that block construction is more economical than brick construction.
But do not forget about the cost of glue for such blocks; approximately 1.5 kg will be required per 1 sq.m. Also, blocks need to be purchased with a reserve.
Choosing a place to build a bathhouse
Building a bathhouse in a country house is a very common solution in our country. Ideally, a place for a bathhouse should be chosen when the site is just beginning to be built up and developed. If the site is small, the bathhouse has to be combined with outbuildings (toilet, summer kitchen). It is also possible to combine a bathhouse with a residential building, but such a project must be developed by a professional.
It is necessary to take into account a number of natural factors: the groundwater level, areas subject to flooding during floods, the proximity of a reservoir, the prevailing direction of wind and precipitation.
You can determine the groundwater level yourself by digging holes about a meter deep in the corners of the proposed building and checking after a few hours to see if water has appeared in them. The choice of foundation type depends on the groundwater level.
- The best place for a bathhouse is an elevation that is not flooded during floods, and the area should be level.
- It is advisable to build a bathhouse near a natural reservoir, but no closer than 15, and if it is not possible to place it on a sufficiently elevated area, then 30 m.
- The windows of the bathhouse should be oriented to the southwest, west, in order to provide more light, the doors should be located on the south side, especially if the building is intended to be used all year round, so that less snow accumulates at the doors.
- It is also advisable to position the door so that as little slanting rain falls on it as possible. If it is problematic to prevent the door from being exposed to precipitation, you will have to build a vestibule to protect it from swelling.
- When planning the location of the bathhouse relative to other buildings, you need to take into account the prevailing wind direction and build the bathhouse on the leeward side.
- Fire safety considerations require maintaining a distance between the bathhouse and other buildings on your own site of at least 8 meters.
- The standards provide for the construction of a bathhouse at a distance of at least 1 m from the boundaries of the site, 15 m from buildings on neighboring sites, as well as from the forest. It is also advisable to build it in a place as far away from the highway as possible.
Features of bath design
At the preparatory stage, the choice of a ready-made project or its independent development is the most important step. The comfort of a building depends on competent design.
In addition, the presence of a project makes it possible to correctly calculate the consumption of necessary building materials and think through all the stages of construction.
When designing yourself, you should take into account several basic rules.
The optimal ceiling height in the room should be about 2 meters to maintain heat and ease of use. It is recommended that the door be oriented in a southerly direction, and window openings should, if possible, face west. To properly distribute heat, the door size should be 180 cm by 60-80 cm. Particular attention should be paid to the air ventilation and water drainage system. It is not recommended to use conifers that can release resin for interior decoration.
When planning the internal layout of rooms and equipment, it is important to combine the functionality of the room and the efficiency of heat distribution. Interesting and useful ideas can be found by looking at the photo of the bathhouse inside.
Washcloths
There is a wide range of sets of bath accessories, which include brushes, washcloths, peeling stones, etc. If you want an original product that satisfies all your preferences, make it yourself.
A washcloth is necessary for body cleansing and wet massage. This procedure is not only pleasant, but also beneficial for the body. Sponges can be of different hardness, sizes and shapes. You need to choose a washcloth based on your personal tastes.
To knit a washcloth from natural materials, choose the wool of goats, sheep or any other farm animals. You can also use linen. The yarn for the washcloth must be thick, since the product itself is subject to mechanical stress, so choose the appropriate size of knitting needles or hook.
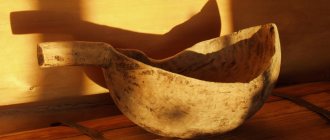
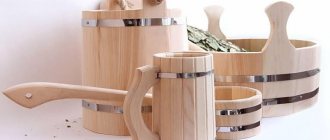
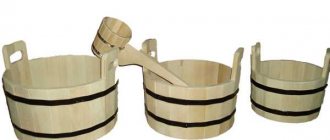
Bucket for bath
A convenient wooden bucket is actively used in the bathhouse for dousing. Of course, you can buy a ready-made bucket, but isn’t it more pleasant to use a product made by yourself? In addition, your guests will definitely appreciate your work.
So, to create a wooden bucket you need the following materials:
- planks made of oak, linden or other material you like, approximately 40 cm in length and 1-1.5 cm in thickness;
- blank for the bottom 2-2.5 cm thick. It is better to choose a diameter of about 25 cm;
- two metal hoops;
- carpentry materials.
First step. First you need to start processing the cross section of the bottom. Grind it down to a depth of 1 cm.
Second step. Make indentations for the bottom on the boards. Their depth should be approximately 0.5 cm and width - 1.2 cm. These recesses will be attached to the bottom of the bucket.
Third step. Use a plane to process the longitudinal edges of the workpieces. After this, connect the boards to each other and secure them with a hoop. The width of the hoop should be 5-7 cm. Under it, after about ten centimeters, fasten the second metal hoop. After making a homemade bucket, make a handle. You can make it from thick rope.
Fourth step. Fill a bucket with water. If water pours out of the cracks, don’t rush to get upset! After some time, the wood will swell, the gaps between the boards will become insignificant, and you will be able to freely use the bucket.
Buckets, troughs and basins are made using the same scheme. A little trick: in order to increase the service life of a wooden product, you need to lubricate it with flax oil or wax.
Body brush
It is better to purchase some devices for the Russian bath, and many devices for the Turkish bath, especially which will become popular in the near future, rather than bother with creating them yourself. Since in the end it may not be exactly what you expected, and it will take a lot of time.
The brush is one of them specifically.
The main function performed by the brush is, of course, massage. Brushes for self-massage are equipped with long handles - with their help you can reach any part of the back.
These devices are made from wood, plastic, and silicone. The bristles themselves can vary in length and degree of hardness. It is advisable that it be made from natural materials, since, as experts say, artificial “lint” cleanses the skin much better.
If your bath procedures are a regular ritual, it is recommended to replace the brushes with new ones at least once every four months.
Figure diagrams
Animal figurines are most often made by beginners. Often the inspiration for starting woodworking comes from cute owls or a majestic lion. Quite often, the first person to be cut out with your own hands may be a clumsy bear. This character is one of the most popular among woodworkers. A fairytale bear can be a great home decoration.
It is worth noting that bear figures are a little easier to make because they can be large. This is very convenient when at first it is still difficult to work out small details. Experienced craftsmen also recommend practicing carving hares. Since the product will require the simplest carving algorithm and you can learn the technique of texturing wool. The last technique is very often needed when cutting out animals.
Wooden figures are easy to create yourself, especially if you do it step by step. Moreover, you can first make a sculpture of an animal according to the simplest scheme. And then choose the same character, only in a more complex version.
Cat, tiger, turtle, fox, raccoon, squirrel and many others are also very popular among woodworkers. Before starting work, it is advisable to monitor the behavior of the selected animal in order to better understand its plasticity and highlight some of its features. To do this, you can watch documentaries, of which there are many on specialized channels.
Among birds, the most popular wooden figures are owls, eagles, and ducks. They are perfect for home decoration. They can also be safely made part of the furniture.
Images of people are also quite often used for wooden figures. It is best for beginning craftsmen to choose fairy-tale characters, for example, Buratino, Ivan Tsarevich and others. Funny gnomes are perfect as a decoration for a personal plot, and for the New Year holidays - a figure of Father Frost or the Snow Maiden.
Rustic Door Hardware
The Russian bathhouse is given its originality by such things as carved wooden handles on the interior doors. This door element looks very unusual, made using a beautiful tree knot or part of its roots. To implement such a project you will need:
- branch or part of a root;
- saw;
- jigsaw;
- wooden cut;
- cutter with attachments;
- sandpaper;
- dowels;
- clamp;
- epoxy adhesive;
- drill;
- varnish
Go along the contour of this shape with a jigsaw, and use a cutter to process the edges of the cut to give the workpiece texture. Clean the side ends with sandpaper. Remove the bark from the knot or root chosen for the handle and try the element on the base. Use a saw to trim the edges so that the ends fit snugly against the surface of the base. Apply epoxy glue to them and press them to the main element, for greater strength, clamping both objects with a clamp.
Drill two holes at both ends of the handle at an angle, and then drive dowels coated with glue into them. Cut off the excess pegs protruding above the surface of the handle. These dowels will help make the structure stronger.
If you don’t want to spend a lot of time making a door handle, you can simply attach an unusual knot to the door. It just needs to be sanded and varnished first. And craftsmen who know how to work with cutters can make beautiful decorative elements with their own hands by applying patterns to the workpiece.
Do-it-yourself carved wood panel: manufacturing stages
Carving a wood panel with your own hands is an interesting and creative process that almost everyone can do. The main thing that novice craftsmen need to learn is the correct choice of pattern. For the first work, it is better to prefer a simple pattern that will be easy to perform.
So, let's look at the main steps:
- First, you should sketch the drawing on paper, and then copy it onto a flat wooden surface of the required size.
- Using a special knife, we begin to cut out the details of the future craft.
- Then we cover the finished product with stain and sand it with sandpaper.
So, with the help of simple manipulations, it is possible to get an original wooden panel that can be hung in any room. Of course, for beginners there are difficulties in cutting out parts, which is why you should give preference to simple and easy patterns. It is also recommended to use a knife with a single-sided sharpening.
So, the wooden panel is ready - it’s time to hang it on the wall and enjoy the result of your creativity.
Styles and photos of the best solutions
The design of the bath should not be bright and pretentious; the emphasis is on a calm and even peaceful atmosphere. First of all, to create comfort, the psychological aspect is taken into account: the steam room room, and the bathhouse in general, does not have a large area, so it can have an emotionally overwhelming effect.
A little brightness can be added to the interior of a modern bathhouse with the help of well-organized lighting and functional decor:
- Hours.
- Thermometer on the wall.
- Pictures.
- Mirrors.
- Venikov.
- Buckets and scoops.
- Textiles.
The design of a sauna and bathhouse differs from the design of residential premises
It doesn’t matter what design style is chosen, the main thing is to ensure functionality and safety. Excessive decor and furnishings are useless here
Here are some design options:
Traditional Russian style involves the use of natural wood finishes. The steam room is equipped with a stove, and in the dressing room they use carved decor and colorful rugs on the floor. In the rest room, the table will be decorated with a tablecloth and a samovar, wicker baskets and boxes.
The chalet style is more restrained. If country and Russian style allow for carved decor, here the emphasis is on the feminine or masculine energy of the interior. In the first case, edged weapons on the walls, guns, trophies, and forged decor are used as decor for the rest room, as if hinting that this bathhouse belongs to a hunter.
The path to the heights of art
Also, for applied purposes, crafts are often created from wooden sticks. These things are usually made for convenience. For example, a bookmark.
A face made of colored paper is glued onto a wooden ice cream stick. And the bookmark is ready.
Wooden sticks are also used in flower pots as tags with numbers or inscriptions. But there is another use. Sometimes a whole house is built from sticks.
If you have a lot of ice cream sticks in stock, building a house out of them is a useful fun for kids. Working with ice cream sticks and matches helps children develop their fingers.
Building a house from these materials is not an easy task. This requires precision movements. Of course, in both cases the house is built using glue. It is built in layers, gradually.
One row of the walls of the house has dried up, another is being completed. And so on to the top of the walls. And then the roof needs to be laid there. It takes a long time to build a house. There are beautiful works of art here. There are people who can make masterpieces out of ordinary things.
Functional crafts for the bathhouse - hangers
Bath decor is designed not only to please the eyes of vacationers with its appearance, but also to serve as a useful item. An example of a decorative element that combines two functions at once is a bath hanger. To make it you will need:
- drill;
- saw;
- a sheet of paper or plywood;
- pencil;
- timber beam;
- sandpaper;
- varnish;
- wooden hooks.
On paper, draw the shape of the future hanger if you do not want a laconic rectangle. For example, it could be an oval, a quadrangle with wavy edges, and so on. If you will be making several identical hangers, then it is recommended to use a sheet of plywood rather than paper. Cut out a template from it, attach it to a wooden board and transfer the outline to its surface.
They are convenient for hanging clothes and towels on. They can be attached to a board or inserted inside the frame of a finished box. In this case, the hanger can even be regarded as an unusual panel, giving the bathhouse originality.
Wood carving masters [11] ↑
- 2017-04-02 Sculpture garden in Melbourne, Australia (21 photos + videos). Master Bruno Torfs
- 2017-02-26 Wood carving. Author – Sergey Morozov
- 2016-12-03 The longest wooden sculpture in the world
- 2016-06-28 Carved wooden paintings by Russian masters
- 2015-12-17 Carved spoons from Giles Newman (10 photos)
- 2014-04-05 Carved sculptures by wood artist Ron Lyport
- 2013-12-03 Unusual furniture made of wood and driftwood. Designer furniture by Konstantin Kuznetsov
- 2013-04-08 Chinese artistic wood carving. Photo
- 2012-04-22 Sculptures of animals from shavings and sawdust by Sergei Bobkov
- 2012-04-20 Fairytale forest of sculptures by Bruno Torfs
- 2012-03-16 Beautiful sculptural wood carvings by Denise Nielsen and George Worthington
Tree selection
Preparing driftwood consists of several stages, but, of course, before that you need to know where to get driftwood for the aquarium. There are two options:
- Buying from a pet store is an easy and affordable way. In the store, an aquarist can purchase already treated wood without germs and risk, but the cost of such an element is high, since manufacturers use expensive species. You can buy wood second-hand, but if the owner does not understand tree species, then an aquarist can easily be deceived by passing off ordinary driftwood as a mangrove tree.
- Build a driftwood yourself - using tips and recommendations on how to make a tree in an aquarium, you can easily decorate a pond with an unusual decoration. For a tank with fish, the following are suitable: apple, grape, oak, aspen, poplar, and willow driftwood. It is not recommended to use coniferous forests.
If you spot a nice stick in nature, you should carefully examine the specimen: rotten, falling apart pieces will not work. The wood must be strong and strong; live branches should not be used.
Watchmaking craftsmanship
Many bath procedures are strictly regulated by time. For example, people with different levels of thermal hardening are allowed to stay in the steam room for no longer than certain periods. Therefore, a bathhouse simply cannot do without a wall clock, which will be clearly visible from anywhere in the rest room (after all, you also need to rest for a certain period).
In an aesthetically designed bathhouse, everything should be beautiful, and the clock is no exception. You can make original “chimes” with your own hands without spending a lot of time and money on their creation. All you need to purchase is a clock mechanism, which is sold at any craft and hobby store.
For example, you can build a wall clock from several square-shaped pieces of wood. In one section you need to drill a hole in order to attach the clock mechanism through it on the back side, and attach the hands on the front side. It is best to assemble a structure of nine elements, fastening them together into one large square of 3 by 3 elements. Glue them together using epoxy glue. Nails will help to mark the hours on such a dial. Arrange them in a circle, using only four numbers: 12, 3, 6 and 9.
Another clock can be made from an old wooden tub. Drill a hole in the center of the bottom and attach a clock mechanism with hands. Create a clock face at your own discretion and hang this design on the wall.
The clock can also be constructed from several wooden slats. For example, for a hexagonal clock you will need 11 slats. Two of them will be located on the back side, and 9 slats of different sizes need to be nailed to them, which will form a hexagonal shape. Drill a hole in the central rail and thread the clock mechanism through. Watch how to do this in a short video.
Organize the dial using nails. Moreover, if you use old and rusty nails, the design of the product will only benefit from this. It will acquire a now fashionable touch of antiquity.
Another simple method for creating a wall clock for a bathhouse with your own hands involves using a cut from a large tree. This craft will look very laconic and at the same time stylish. The numbers on the cut can be burned out with a burner, or you can do without a dial at all.
Decorating bath rooms will require a fair amount of ingenuity and a sense of taste from you, but the result will allow you to be known as a skillful person who was able to create unique crafts from scrap materials with his own hands. Some of the products do not require great skills and even children can be involved in their production to introduce them to an interesting hobby.
Many bathhouse decor options do not require large financial outlays, and they will look as if they cost a fortune.
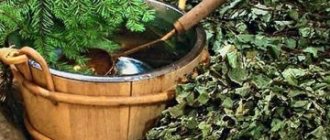
Broom
Of course, a broom is the main attribute in a bathhouse. There is even a saying: A bath broom is older than the Tsar, if the Tsar takes a steam bath!
A broom is, by and large, a special medical instrument. Because it is capable of providing a powerful massage effect, improving blood circulation, increasing blood flow, and saturating the air with aromas. As a result, metabolism accelerates. And in the complex there is a healing and rejuvenating effect.
What are bath brooms made from?
Bath accessories: brooms made from deciduous tree branches
Brooms for the steam room are prepared from branches of deciduous trees: birch, linden, oak, rowan.
Birch broom
Traditional healers consider a broom made from flexible birch branches with elastic leaves to be the best. Because thanks to the aromas inhaled with steam and superficial massage, birch cleanses the skin pores. Broom leaves, when massaged, remove sweat and toxins from the skin. But it is known that the healing of the body begins with its cleansing.
The preparation of branches is usually done 10-15 days after the Trinity Day. At this time, the plant buds contain the maximum amount of flavonoids, resins, and essential oils. Young, recently blossoming leaves are rich in ascorbic and betulorethic acids, phytoncides and saponins. It is these substances that have a healing effect.
Oak broom
An oak broom is a classic bath attribute, especially recommended for oily skin. Because, thanks to the tannins, quercetin, and essential oils contained in the leaves, it helps cleanse the skin, restore its elasticity, and relieve inflammation. The esters released when the broom is steamed have a hypertensive effect.
Young elastic branches with young, medium-sized bright green leaves are prepared for the broom. It is better to take the lower branches, which receive the least amount of sunlight.
Brooms from other hardwoods
Linden brooms are prepared for the steam room. The aroma of linden has a calming effect, banishes insomnia and depression. The feeling of anxiety is relieved and the airways are cleared.
Eucalyptus brooms are less common, because the tree is southern. Eucalyptus leaves contain more than three percent essential oils, which, when inhaled, have a beneficial effect on the cardiovascular system and respiratory system. A properly prepared eucalyptus broom should have bright green leaves.
True experts add several stems of fragrant medicinal herbs to their bath brooms: wormwood, sage, chamomile, oregano, mint.
Coniferous brooms
Bath lovers highly value soft and fragrant fir brooms. Juniper trees are harsh and quite prickly, so only particularly persistent vapers use them.
You can find bamboo whisks in stores. Which can be used for light massage. But, to be honest, it is inferior to a traditional broom: there is no aroma.
Making a shelf for washing
It is best to install the shelf on the wall near the font or next to the shower. It can be used as a place to store bath accessories. It's very easy to do.
- We take two boards and sand them well.
- After this, we connect the boards together perpendicular to each other.
- At the edges of the vertical board we fix metal hooks for attaching the shelf.
Its size can be selected by the master independently. But it is important that the structure is mounted at a safe and comfortable height. You can make a regular shelf, or make an interesting option from thick branches. Therefore, owners can use their imagination and come up with their own unique design.
Securing in tank
If the preparation is done correctly, the wood will stop floating and will immediately sink to the bottom. Then the decorative element is fixed where it is convenient for the aquarist and decorated with greenery. However, sometimes you come across particularly stubborn pieces that refuse to submerge even after prolonged soaking. In this case, the unruly decoration is fixed using the following methods:
- Fishing line - a piece of wood is tied to one edge of the fishing line, and the second edge is weighted with a weight.
- Screws – to secure the wood, a base is made, which is fixed with screws and silicone sealant.
- Weights - in large pieces of wood, a hole is drilled into which heavy objects are placed and filled with silicone sealant.
Having completed the placement, the element is decorated by planting moss and other living vegetation. If desired, you can build a bonsai in an aquarium - a decorative tree - from small processed twigs and greenery.
An aquarium with driftwood will be a wonderful decoration for your indoor space and a cozy home for fish and shellfish. The wooden element will ennoble the container, giving the pond a natural and natural look, and the purchase of this decoration will bring great benefits to pets. The advantages of decorating artificial ponds with wood include the availability and low cost of this decoration, which will appeal to aquarists.
Bath towel - secrets from needlewomen
If you love and can sew, making your own bath towel can be no problem. To do this you will need terry cloth and very little time.
- Sew a wide elastic band on one side (behind the previously sewn around the perimeter);
- Cover this edge with decorative fabric;
- Sew Velcro to “fasten” the towel;
- If desired and necessary, add pockets and other decorative elements to the product - everything here is at the mercy of your imagination.
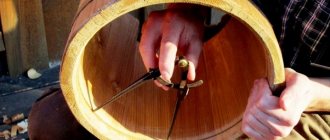
Tubs, buckets and other containers
Bathhouse accessories include a large set of cooperage products in the form of tubs, buckets, ladles and tubs. In rare cases, when visiting a bathhouse, they use plastic or metal accessories, because it is wooden items that contribute to a healing effect on the body due to the formation of a special atmosphere. Wooden products that are most often found among bath accessories are the following:
Ladle. Use it to pour water onto hot stones
It is important that the bath scoop has a long handle, otherwise the cloud of steam can cause a serious burn. Options for making bath ladles will be discussed in detail. Font
It is not always possible to dive into a natural body of water or pool after visiting a steam room. An important sauna accessory is intended for these purposes - a large barrel for cooling. Gang. Another familiar accessory for bath procedures. The container is a low wooden vessel, the size of which is usually smaller than a standard bucket. Depending on the volume, it has one or two handles. The purpose of this convenient bath accessory is to pour or add water, steam a broom or dissolve aromatic oils.
Grilles, hangers, ventilation holes and other bath accessories are also best selected from wood. Due to the low thermal conductivity and healing properties of wood, they are optimally suited for a sauna climate.
Kinds
Some people like minimalism in the interior, and the small size of the bath room does not allow placing too much furniture, while others furnish the bathhouse with maximum comfort, thinking through everything down to the smallest detail.
In addition to standard shelves in the washing department of the bathhouse, tables, chairs, benches, stools, couches, and benches are used. Experts recommend making tabletops, backs and seats with small gaps for water drainage, which will significantly extend the durability of wooden furniture.
The dimensions of the rectangular table depend on the size of the family and the number of friends who will presumably come into your bathhouse for a “light.” If you want to save space in a small room, you can make folding tables yourself.
Of course, the easiest to build with your own hands and at the same time the most popular bath furniture are simple benches, which can accommodate enough people at the same time. In addition, tubs, buckets and other bath accessories are placed on them.
And from additional wooden accessories you can make or order from specialists carved lamps, hangers, water containers, all kinds of stands and shelves.
Accessories for visiting the steam room
Mittens for steam room
- Workers
. You can add firewood in them, clean the heater from soot when you first supply water, open the stove door, and replace stones if necessary. They will also protect the skin from soot and ash. - For the steam room
. To make this accessory, canvas fabric, tarpaulin, and wool are usually used. In these mittens you steam with a broom, protecting your hands from possible small cuts or calluses. Steamed skin on the palms is very sensitive. - Bath mitten
. Used for body massage and sweat removal. The best option is a product made from natural materials. Artificial mittens can get very hot or cause irritation, so give preference to models made from coconut fibers, date stamens or horsehair. - Crags
. Professional bath attendants usually work in such mittens. The bells in such models reach the elbow and protect the hand completely.
When choosing mittens for a bath, keep in mind that they should be several sizes larger so that, if necessary, they can be put on easily and quickly.
Brooms for steam rooms
- Deciduous
. The most popular brooms are made of oak, linden, birch, maple, and eucalyptus. - Conifers
. From juniper, spruce, fir, cedar, larch, pine. - Herbal
. To make them, nettle, wormwood, mint, oregano, and sage are used.
Aroma oils for the steam room
- Dilute a few drops of the desired aroma in water.
- Let it brew for about 20 minutes.
- Rinse the stones with plain water and immediately serve the flavored water.
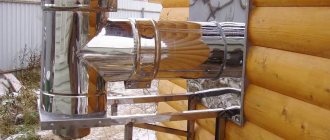
Shower and toiletries
Previously, the bathhouse was called a “soaphouse,” so it is necessary to take a skin cleanser into it. Some people prefer shower gel, others prefer regular soap, and today you can also see special bath soap on store shelves. It is preferable to choose natural washcloths.
The bathhouse is a great place for a massage. Take a wooden brush with you and do a self-massage; it will help make your skin firmer and smoother and remove cellulite.
During a visit to the steam room, the pores on the body open, blood circulation improves, so the effectiveness of using cosmetics increases. Women prefer to take special body wraps, body masks and various creams with them to the bathhouse.
And for some more tips on how to choose accessories for a bath, watch the video:
https://www.youtube.com/watch?v=6aBUeEnmDcY
Bath procedures will be pleasant and healthy only if you know how to steam in a bath correctly, and also do not forget about accessories and use them. In addition, they will help create coziness in the room and become stylish decorative elements.
5
1 042
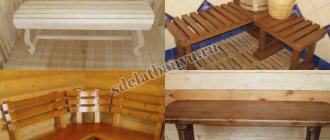
DIY garden furniture made from boards
Successful country crafts often become the main decoration of a summer cottage. Before deciding which garden furniture will be best and how to make it, you need to determine what it can be made from. The best material for country furniture is wood. It fits perfectly into the landscape of any suburban area.
Of course, other materials are also needed. Be sure to look around to see if you still have any seemingly unnecessary things in your dacha or country house. Quite often, masterpieces are made from the simplest objects. Here are 23 great ideas on how to make your own furniture from boards for your garden.
Unexpected decision! The stones act both as a support and as a decorative element.
A bench and a flower garden - two in one. How great!
I'll probably take this idea into consideration.
After working, you can relax. Moreover, it is a pleasure to sit on such a garden bench!
I love radius solutions. Rounded furniture is my weakness!
New garden furniture, tables and chairs are similar to new interior items in the apartment. With it, both the room and the garden look different.
Another interesting solution for a street bench.
The baby and the dog have already taken a liking to this wonderful garden furniture set. It’s not at all difficult to make one, the main thing is to stock up on the necessary materials and inspiration to create.
It seems like nothing special, but I want to look at this wonderful solution for a long time, and then get up and start implementing something similar for my garden. Very harmonious!
Stylish and tasteful!
And this idea is perfect for public recreation areas.
Garden furniture has many varieties, but in any case, be it sets consisting of a table and chairs, or benches, hammocks, sofas and garden poufs, they can be easily moved to another place. That is why garden furniture is also called mobile seating areas.
And this idea can be realized from old pallets.
When choosing outdoor furniture, it is important to be guided by the spring view of the entire garden plot and the design of the building facade
This is exactly what I need! Now I know what my husband will do this weekend.
What do you think of this idea? I can already imagine how the whole family and friends gather around such a table and we have fun, eating delicious dinners, and then play board games.
Wooden furniture can be found in both mobile and stationary versions. The mobile look is certainly preferable; such tables and chairs can be brought into the garage for the winter or hidden in the summer during frequent, prolonged rains. However, having treated the wood well and impregnated it with special impregnations, you can not be afraid to leave such furniture outside all year round!
When choosing outdoor furniture made of wood, it is important to take into account the quality of the species, protective coating and manufacturing of fittings. Any garden furniture made of wood is treated with special antiseptics to avoid rotting. The surface of furniture items is coated with varnishes or paints
If you have an old spreading tree on your site, then you can safely arrange a circular bench around it, and even a small table!
And this idea is my favorite.
How great it is to drink herbal tea and read your favorite book, sitting on such a bench in your garden.
By making such furniture from boards with your own hands, you can easily transform your dacha garden into the vacation spot of your dreams! Many pieces of furniture can be made with your own hands, and all ready-made furniture without exception can be decorated by hand, giving it uniqueness and updating it if it is old.
How to build a kilt pattern for a bath
In fact, the product is very simple, so there is no need to create a pattern. The Scots did not always make their skirts using a pattern. It was an ordinary piece of fabric, folded according to a special pattern. The folds were fastened with a belt. If you are not confident in your abilities and do not often sew clothes, then it is better to draw a pattern on paper and then transfer it to fabric.
Pattern for a men's kilt for the bath
To create a kilt pattern for a bath, take a sheet of paper, preferably tracing paper. If you don’t have it in the house, regular newspapers or unnecessary wallpaper will do. You need to draw a rectangle measuring 120 by 50 cm on a piece of paper. This is the entire pattern, you don’t need to do anything else. To sew a kilt for a men's bathhouse, you need to purchase a fabric measuring 120 by 50 cm. A men's kilt is shorter, as it does not involve wearing the product on the chest. For men, this is a kind of loincloth. If a man is short, a length of 40 cm is sufficient. For representatives of the stronger half of humanity who work out in the gym, chest volume is taken as the basis for the measurement. If it is more than 100 cm, then purchase two lengths of fabric for sewing the accessory.
Pattern for a women's kilt for the bath
For women, this bath accessory is a little more complicated. To create a pattern, you need to draw a rectangle measuring 120 by 80 cm. Round the two bottom edges of the paper. To do this, use a compass. The compass needle must be installed in the center of the constructed square, the side of which is equal to the radius of the circle. Cut out the edges. If you want to add pockets to the product, then you need to create a pattern for it. This is a rectangle or square of the size you need. Typically the pocket size is 20 by 15 cm. One pocket is enough; you can put jewelry and jewelry in it.
If you have experience in sewing clothes, then you do not need to create a pattern. After all, it’s not at all difficult to draw a rectangle and, if necessary, round the edges.
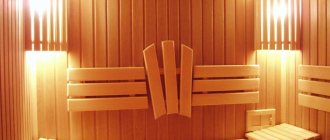
Making your own rounded headrest
Before you make a rounded headrest for a bathhouse with your own hands: drawings for the product should be prepared. You also need to purchase:
Step-by-step process on how to make a headrest for a bathhouse with your own hands:
First stage. First, the sides are given a rounded shape, so that later the slats that serve to support the head are attached to them. To do this, two rectangles with a length of 400 and a height of 100 millimeters are cut out of a wooden blank 25-28 millimeters thick. Marks are applied to them with a pencil.
The maximum height of the first edge of the sidewall should be 100 millimeters, and the second – 20 millimeters. Connect the marks together with a rounded smooth line. According to the markings, two parts are cut out. The edges of the sidewalls are processed with a grinder, all existing roughness and irregularities are carefully rubbed down.
Second phase. The slats should be cut into elements of the required length. Since the width of the headrest should be 450 millimeters, they are made of the same parameter. You will need to cut 8-9 pieces using a jigsaw or hacksaw. The edges of the slats are treated with sandpaper. The resulting surface is made absolutely smooth.
The final stage. The structure is assembled. Holes are drilled at the ends of the sidewalls, and a rail is screwed to each of them using screws. Metal fasteners should be embedded in wood because they become hot at high temperatures and can cause burns on human skin.
10mm gaps are left between the slats, which are necessary to ensure moisture drainage and air circulation
This is important when the wood tends to heat up.
Rules for laying the flooring of a washing room or steam room
The first thing you should pay attention to is the screed. It is performed in 3 stages
First, the first layer is poured. After complete drying, waterproofing and thermal insulation are laid, after which the finishing layer of concrete screed is poured. In this case, the floor covering should be 5-20 cm higher than the poured concrete.
When installing wooden floors, the “leaking” option is often used, when water seeps freely through cracks in the floor. Here it will be necessary to install drainage from the outside. This method of drainage is simpler and does not require much time, effort and money.
Bathroom floors require a special approach - they also need to be insulated
The second option is leak-free, sealed floors. Most often used when finishing floors with tiles. In this case, the floor is sloped in a certain direction, and a drain is installed at the lowest point - a drain hole. Under the floor, a sewer pipe runs from the drain, draining water into a drainage channel or septic tank.
However, in addition to drainage, the flooring in the bathhouse has one more nuance - the use of tiles requires heating. Ceramics is a cold material. Considering that the temperature below is always lower than above, you should consider a “warm floor” system.
Installing a heated floor is complicated, but can be done with your own hands
Mosaic crafts for the soul
Surely there is a place in your dacha or garden plot, in the house or on the street, or in a gazebo, that you want to somehow decorate, but at the same time do it in an unusual way. We offer to decorate any surface with crafts in eco-style. The essence of the method is to lay absolutely any pattern or image from wood cuts of different sizes. We will need:
- Plywood sheet;
- Liquid Nails;
- Varnish;
- Jigsaw or hacksaw;
- Many thin cuts of different sizes.
First, come up with a drawing that will delight you and lift your spirits with its appearance. Now you need to transfer the sketch from paper to a sheet of plywood, following the scale. When the drawing is ready, attach it to the attachment point and estimate the size. Perhaps the craft will turn out to be too bulky or, conversely, so small that it will get lost against the background of a long wall. This can be fixed at this stage. After adjustments, you can begin cutting out the plywood base. Now all that remains is to glue the wooden circles with glue and enjoy your creation.
protect the craft with clear varnish
If you have an old mirror at your dacha, you can use the same principle to frame it in a beautiful frame. The mirror must be glued in the center to a sheet of plywood, leaving the edges free for attaching saw cuts. Usually, if the mirror has a round shape, then the frame follows its contour. And you try to use the opposite method - enclose a round mirror in a square frame and see how unusual it becomes after its transformation.
Why is there a hanger in the bathhouse?
A hanger is an indispensable attribute not only of a bathhouse, but also of other types of buildings. You can hang outerwear or underwear on its hooks. Of course, instead of a hanger in the bathhouse, you can install a wardrobe, because it is also intended for storing things, but such products, as a rule, are bulky and take up a lot of space. The advantage of a hanger is that it is compact, so if it is installed in a bathhouse, then a lot of usable space will be freed up, which can be used for other purposes.
Why do you need a bath hanger?
Low cost is another advantage of a hanger over a cabinet, because the manufacture of this piece of furniture requires few materials, while for a cabinet you need to purchase several times more boards or plywood. The hanger will also perform decorative functions, decorating the bathhouse. Even without special skills, you can make a unique hanger that will complement the interior of the bathhouse, making it more comfortable.
A hanger will cost less than a wardrobe
Example of a bath hanger with dimensions