A swimming pool on a property or cottage is a popular alternative to relaxing by the water where there are no natural bodies of water nearby. A polypropylene pool eliminates the need for the tedious construction of a concrete bowl and its subsequent lining. It can be purchased ready-made, but you can make it yourself; fortunately, there are several relatively inexpensive and quick construction options. Not long ago I helped my friends build a pool from polypropylene, so I can introduce the technology better.
Source remont-system.ru
Properties, scope of application of polypropylene
But first, let's study polypropylene in detail. What is its peculiarity, what properties does it have?
We are talking about a material that has a milky white color. Depending on production technologies and thickness, physical properties may vary. However, they are quite versatile, which allows the use of polypropylene in various branches of construction. It is significantly superior to PVC and plastic.
Polypropylene used in the manufacture of the pool
For their discovery, two chemists, Karl Ziegler (Germany), Giulio Natta (Italy), were awarded the Nobel Prize. Modern production of polypropylene comes down to the production of the following types of thermoplastic:
- Homopolymer or PP BUT. It has extremely high hardness and bending strength.
- Metallocene or mPP. Externally it looks like rubber.
- Copolymer, also known as PPCP. Available in granule form. Even at sub-zero temperatures it retains impact strength. Is elastic.
- Random copolymer – PP Random Copolymer with a crystalline structure. It is used in the production of packaging, films, etc.
Tips for choosing a location
For a pool that will only be used in summer, any location is suitable. Inflatable pools are a cheap option that does not require major changes to the site.
If you have decided on a stationary pool, before digging it, you need to choose the right location on the site. After all, it will not be possible to move such a structure after completing all the work on its creation.
There are several important points to consider:
Trees. They shouldn't be near the pool for two reasons. The first is the root system, which negatively affects the waterproofing of the pool. The second is foliage that pollutes the water surface. If the leaves are not removed in time, the water “blooms” and the pool loses its attractiveness.
Soil type. Ideal if your site has clay soil
It does not allow water to pass through, which is important if the waterproofing suddenly becomes damaged.
- Direction of the wind. The pool will one way or another become clogged with wind-blown debris. It will be nailed to a certain side. Therefore, make sure that this is where cleaning the pool is as convenient as possible and you can quickly remove the brought leaves, blades of grass, etc. This is also where you should place the drainage system.
- Water pipes. By placing the pool close to the water supply, you will ensure that filling the bowl is easy and quick.
If you decide to install a frame pool, try to ensure that the surface allocated for it is absolutely flat. Potholes, irregularities, dents, remains from tree roots - all this should not exist. Ideally, the site is concreted, creating a smooth base for the pool.
Advantages and minor disadvantages
In the manufacture of swimming pools from polypropylene, the material has proven itself to be positive. It has a number of advantages:
- Ease of processing. A bowl of a bizarre, unusual shape is not a problem at all. The material allows you to implement the most creative solutions, develop individual schemes and drawings. And due to its delicate shade and uniform structure, the material will fit perfectly into the design of a personal plot.
- Reliable fixation. The waterproofing layer that forms at the joints does not require additional processing. It is quite airtight and durable.
- By the way, you won’t have to do additional sealing when installing the lighting system, filters and nozzles. This is due to the fact that all equipment is installed directly into polypropylene.
- The finishing issue has been resolved once and for all. Due to the perfectly flat surface and attractive appearance, the production of polypropylene pools does not require additional finishing with tiles, mosaics, etc.
- You won't need a holding frame or formwork either. All sides of the bowl are filled with concrete mixture.
- Since the welding of the seams is strong enough, you don’t even have to mount the pool in the pit. Just install it on the ground surface.
- A propylene pool is absolutely safe, as it is made from environmentally friendly components. It does not release toxic substances when interacting with water, and is harmless even for small children.
- It is almost impossible to slip in such a tank. Of course, this does not mean that after building a polypropylene pool with your own hands, you don’t have to clean it. The inner coating will quickly become covered with a layer of microorganisms and begin to slide.
- By the way, the pond is very easy to clean.
- Due to its low thermal conductivity, water cools slowly.
- The color is uniform. If scratches or other damage appears, they will not be noticeable.
- However, the likelihood of damage is minimal, because polypropylene is famous for its unsurpassed strength. It is not afraid of sudden temperature changes and is convenient for transportation and subsequent processing. We are talking about original high-quality products - there are many fakes on the modern market. Always ask for a quality certificate and find out the terms of the warranty before building a polypropylene pool with your own hands.
- Also obvious advantages include high installation speed (you can complete it in a week) and relatively affordable cost.
Disadvantages include the need to purchase equipment and color change under the influence of UV rays. But you can always borrow the necessary equipment from a neighbor or friend. And install a polypropylene pool so that exposure to the sun is minimal.
Alternative options
Initially, friends considered different methods of building a pool. Thus, the ease of implementation attracted the option in which the frame for the pool was made of plastic pipes. There is no need to dig a pit for it; it is installed on a prepared site. The advantage of this option is that it is economical, since ordinary plastic water pipes are used for the frame, and the sides and bottom are made of stretch film.
However, a frame made of pipes (or pallets) with film was rejected, since such a design can hardly be called reliable and durable. The express pool will serve until the first puncture, and organizing its full cleaning with filtration is unprofitable.
Source stroy-podskazka.ru
About the technology of cooking polypropylene sheets using a manual extruder in the following video:
Calculation of materials, determination of size
Preparatory work includes choosing a location for the pool and developing a project. Pay attention to the following points:
- The future swimming tank should be located as far as possible from trees and bushes. Roots growing underground can damage the structure, and leaves will fall from the branches.
- On the other hand, the distance between the artificial reservoir and the water supply should be small.
- Owners of plots with clay soil are lucky. This soil retains moisture much better.
- When marking, take into account the fact that the finished pit should be one meter wider than the pool area.
In addition to the polypropylene itself, construction will require bricks and concrete, steel rods, crushed stone, and geotextiles. The latter can be replaced with polystyrene foam (if available).
The secret of construction: for the bottom and walls, use material of varying thickness. The diameter of the walls will be larger.
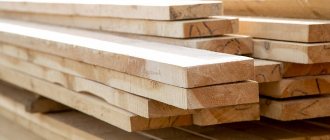
Modern manufacturers produce polypropylene sheets of different sizes and diameters. The most common options: 150 x 300 and 200 x 400 centimeters. The thickness varies from 0.5 to 1.5 cm. The minimum threshold for an artificial reservoir is 0.8 cm. Anything thinner will have an unaesthetic appearance. And when gluing the seams it can tear.
Polypropylene sheets
To calculate the required number of sheets, you will need to know the volume of the bowl. It doesn't matter if you are building a tank of complex shape. It is simply divided into simple shapes. The resulting volume values are summed together. To calculate the volume, use a simple formula: V = a ∙ b ∙ h, in which a is length, b is width, h is height.
We substitute the obtained values into the table. It will help you calculate the exact number of sheets:
| Length, mm | Width, mm | Depth, mm | Volume, m3 | Sheet size | Number of sheets |
| 4000 | 1500 | 1500 | 9 | 1500x300 | 5 |
| 6000 | 2000 | 1500 | 18 | 1500x300 | 10 |
| 8000 | 2000 | 2000 | 32 | 2000x4000 | 7 |
| 6000 | 3000 | 2000 | 36 | 2000x4000 | 10 |
To calculate the amount of concrete, take into account the perimeter and volume, as well as the diameter of the gap. Usually this value is 30-40 cm. And if you multiply the area of the base by the height of the layer (30 cm), you will get the amount of crushed stone that you need to stock up on.
A lattice of rods will help to strengthen the base, but even here you can’t do without mathematics. We calculate the number of transverse rods using a simple formula: divide the width of the base by 20 cm (grid pitch). Determining the number of longitudinal rods is also easy. It is enough to divide the length of the base by the width of the step. The rods are connected with wire - each connection will require approximately 40 cm. Also stock up on brick halves - we will place a grate on them.
Pool bowl diagram
Stage 1: Preparatory work
Even before the construction of the pool begins, you will need to decide on several important points and perform a number of preparatory procedures. First, it is necessary to draw up an installation project. In fact, it should be a plan diagram of the structure with detailed markings of all elements, joints of polypropylene sheets and an indication of the exact dimensions of the bowl of the future pool.
Important! Do not forget to add to the dimensions of the bowl a margin of 1 m in width and 50 cm in depth - this space will be needed for constructing a pit and placing auxiliary equipment.
Secondly, you need to decide on the location of the reservoir. The pool should be located close to the water supply, but away from the garden, so that the root system of trees does not destroy the structure and leaves do not clog the water.
Thirdly, you need to buy polypropylene. The optimal material thickness is 10-15 mm. Select the number of sheets based on the data of your pool project.
Sheet polypropylene
Fourthly, you need to acquire welding tools. Specifically, you will need an extruder and a heat gun. The remaining working tools are traditional for all construction work.
Pit digging technique
Before you make a polypropylene pool with your own hands, check the possibility of renting a hot air gun and an extruder in your city. They will be needed for assembly. Otherwise, you will have to buy the installations in a store, and this is expensive.
If you plan to dig a pit yourself, without the help of specialists with an excavator, be prepared for long, painstaking work. Stock up on a shovel (or better yet, two – bayonet or scoop), a cord, wooden pegs, a level, a pencil and tape measure, and buckets. Let's get started:
- Drive pegs around the perimeter and pull the cord. This will mark the boundaries of the pool. But be careful! We make the depth half a meter greater than expected - there will be a concrete pad below. We also expand on the sides, because we need to take into account the laying of communications and the indentation for pouring concrete.
- When the pit is dug, level the bottom and compact it. Place geotextiles and a 30-centimeter layer of crushed stone on top (even more is possible). Use a spirit level to level and tamp down thoroughly again.
- Next, the grid of reinforcement is installed on the brick halves. The optimal rod diameter is 10-12 mm. It is very convenient to pour concrete using a wooden chute. The mixture is quickly delivered to the pit and distributed evenly. It has been established that the concrete of a future polypropylene pool dries in 5-6 days. In case of precipitation, the base is covered with polyethylene, after drying it is lined with geotextiles and polystyrene foam.
Required inventory
Building a swimming pool is a serious undertaking that will require the use of a lot of different equipment and tools. Most likely you will need:
- Equipment with a bucket for digging a pit
- Various shovels (scoop, bayonet)
- Concrete mixer
- Extruder for welding PP sheets with accessories and nozzles
- Hot air gun for welding correction
- Wooden stops
- Ladder and containers for storing liquid and bulk substances
- Level, measuring tape
- Pencil and knife
Making a bowl
A plastic bowl can be made both in the pit itself and in the surrounding area. The second option is chosen if the vessel is small - you can easily lower it into the hole without outside help. When building a huge pool, it is better to carry out welding work with polypropylene inside.
Types of pool bowl
In addition, this is an additional guarantee that there will be no shifts during installation.
- Creating a bowl is perhaps the most important part of the work. It is very important to perform it accurately and carefully, carefully reading the instructions. To make the seams smooth and strong, an extruder is used. You will also need attachments that allow you to make different seams.
- How does an extruder work? After the air is supplied, the polypropylene for the pool becomes very hot. Using an extruder, a rod is inserted to connect the two sheets. The seam turns out neat.
- First, the blanks are cut according to patterns : bottom, steps, ribs, etc. The edges of the sheets are cleaned in such a way as to obtain a double-sided bevel with angles of 45 degrees.
- First, the bottom parts are connected . Leave allowances that will be needed when pouring the mixture later.
- At the next stage of installing a plastic pool, you need to attach the sides . The sheets are applied to the edges, welded on both sides, replacing the nozzles. For reliability, a double seam is made, welding from the outside and from the inside. The principle and technology for welding stages are the same. How to make a pool without deformation? Use wooden stops.
- Stiffening ribs are attached perpendicular to the bowl using a polypropylene rod . The average distance between them is 50 centimeters.
- If welding was carried out in a pit, it is necessary to drill holes , install a pipe in an overflow pool made of polypropylene, and other communications. Otherwise, drilling of technological holes is performed only after installation.
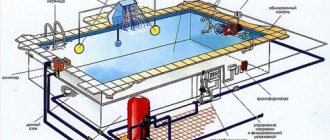
- Each pipe is enclosed in a protective sleeve to achieve good thermal insulation. Then the pump, filters and other equipment are connected. It is very convenient to place it in a separate room in the house. You can perform all the necessary settings without even leaving your home.
Briefly about the main thing
An alternative to a classic concrete pool is increasingly becoming a structure made of sheet polypropylene. The option is popular due to its practicality and low cost; polypropylene is safe for health, it is easy to form a product of any shape, depth and size.
During the construction process, a pit is dug under the pool bowl and a reinforced concrete base is made. Then a bowl is welded from plastic, the sides of which are reinforced with stiffening ribs, reinforced and the outside is filled with concrete mortar. At the last stage, equipment is installed and the area around is landscaped.
Question
Write in the comments what you think - is it worth additionally smoothing the seams on the sides using a heat gun (hot air gun)?
Securing the bowl
If all equipment works flawlessly, you can proceed to the final stage - filling the polypropylene bowl. The process is labor-intensive and time-consuming. We recommend being patient, most of the work has already been done.
- Before pouring concrete, the edges are fixed with spacers made of chipboard and boards. The formwork is being built and reinforced. Filling is done gradually, without unnecessary haste and fuss.
- To prevent the formation of deflections, water is first poured into the tank to a depth of 40-50 centimeters, then filled with the same layer of concrete. A day later, when the material has dried, a similar layer is made.
- The free space is filled with previously dug earth. The spacers are removed only at the end, when the final hardening of the structure occurs.
Possible mistakes
When installing polypropylene bowls, various mistakes can be made:
- assembling the bottom on a fragile, loose platform: this will cause cracks, ruptures and leaks;
- poor-quality soldering of seams;
- pouring the sides without water in the bowl, creating deforming forces on the walls of the pool.
As a rule, the cause of errors is a lack of experience in performing such work. If you assemble the bowl yourself, without the necessary preparation, it is very difficult to avoid mistakes.
In order to eliminate undesirable consequences, specialists from specialized organizations should be involved in installation.
How to design a pond?
A finished polypropylene pool, made by yourself, can be covered with PVC film or butyl rubber. The coating is resistant to temperature changes. Installation will not take much time. According to experts, butyl rubber film is more convenient to use. It is spread over the area of the reservoir with a slight overlap; cold welding is used for fixation. You can also concrete the path to the pond, lay it out with tiles and boards.
Thus, to independently build a swimming structure right in your yard, you will not need huge financial investments or professional skills. The materials are sold in hardware stores, instructions are already available. By following the recommendations exactly, you can please your loved ones with a wonderful vacation spot in a short time.
Where and at what cost can I order this turnkey work?
The installation of a polypropylene pool should be ordered from specialized organizations with qualified workers and the necessary equipment.
It is necessary to check that the organization operates officially and provides a guarantee for the work. This is an important point, since there are many unofficial brigades operating.
The cost of installing a polypropylene bowl costs an amount approximately equal to the price of the material. It is difficult to name specific amounts, since the final price depends on many factors.
For most organizations, prices start at 35,000 rubles and increase in accordance with the volume and scope of work.
Step-by-step instructions - how to make a polypropylene ladder with your own hands
The production of stairs from polypropylene pipes occurs in stages. Before starting work, you need to perform some preparatory steps, prepare working drawings and prepare the necessary tools.
Tools and materials
You need to prepare the following tools:
- fine-tooth hacksaw or jigsaw;
- ruler, tape measure, marker;
- device for welding polypropylene pipes.
You will need the following materials:
- polypropylene pipes with a diameter of 40 mm;
- fittings matching the pipe size;
- fasteners for fixing the ladder to the walls of the bowl (if required).
Only the most necessary materials and tools are listed. Additional accessories can be used to assemble complex structures.
Drawing
An assembly drawing is necessary for a detailed representation of the structure, clarifying the dimensions and number of individual elements.
An example of a drawing of a staircase made of polypropylene pipes, the design of which is intended for use in frame or inflatable bowls. This is the most complex design; for stationary bowls, ordinary bowstrings with crossbars are used, fixed inside the bowl on the walls of the sides.
Manufacturing process
The procedure for assembling the stairs:
- According to the assembly drawing, parts are cut. It is recommended to immediately make the required quantity of all identical parts, so that it does not turn out that some elements are missing. It is necessary to carefully check the size and take into account joint allowances.
- The crossbars (steps) with fittings are assembled. Then sections of strings are inserted and welded using a welding machine for polypropylene pipes. Thus, both parts of the crossover ladder or one part of the structure for the stationary bowl are assembled.
- Assemble the upper part (bend), connecting both strings (inner and outer) to each other. The assembled elements are welded and the accuracy of the assembly is checked.
- Install the ladder into the bowl and check the correct dimensions and compliance with the configuration of the pool. If everything is done correctly, final installation is carried out.
If you don’t have a machine for welding polypropylene pipes at hand, you can use a construction hair dryer. It is necessary to select the optimal temperature and first heat the section of the pipe that will be inserted into the fitting.
Why is the business of producing polypropylene swimming pools for summer cottages relevant?
Pools made of polypropylene have significant advantages:
- Profitable price;
- Resistance to any environmental influences;
- Resistance to temperature changes;
- Ease of maintenance;
- Long service life;
- Possibility of installation both indoors and outdoors.
The water in it remains clean and transparent for a long time. Polypropylene is a reliable and safe material. Doctors recommend swimming for children from a young age. Its price is affordable for everyone. A small pool for a private home can be made from 40,000 rubles. Or you can open a plant for the production of polypropylene swimming pools, but this requires a good material base.
Choosing a location for a swimming pool
First of all, decide where you want to install the pool - inside or outside the house. This is what further actions will depend on; these methods have their own specific features.
For example, for a swimming pool in the house you will need a suitable room: it should have high ceilings if you simply place a ready-made bowl inside the room, and enough space for supporting and accompanying structures - fixing formwork, stairs, slopes, sides.
It would be more correct to place the pool at an appropriate depth below the floor level. To do this, you will need to dig a hole inside the room. Will this be advisable taking into account the foundation and structural features?
Installing a pool outside the house is much easier than inside
The simplest and most logical option is to build a pool in an open area. Moreover, polypropylene is excellent for outdoor use and tolerates any temperature and climatic conditions. Therefore, we will discuss in more detail how not to make a mistake in choosing a suitable place.
How to choose the right place in an open area
You will have to take into account not only your taste and wishes, but also such features as:
- slope of the site;
- soil type;
- wind direction on the ground;
- features of the location of large plants.
It is not a good idea to place the pool next to large deciduous trees or young plantings. Firstly, the root system tends to grow and reach for moisture. This may damage the waterproofing of the product. Secondly, you will have to constantly catch leaves from the water. Otherwise, they will lead to the emergence and growth of green algae.
Not a bad place for a pool: close to the building, there are no large trees or plantings nearby
Clay soil is most suitable for building a swimming pool. Clay does not allow water to pass through, and this can be useful if the waterproofing layer is damaged.
Sloping the site can also be helpful. It can provide savings in the volume of excavation work. Taking into account the direction of the wind is necessary to make it more convenient to remove debris that gets into the pool. It is advisable that it be nailed to the same place. There you need to install a pipe for overflow. This way, all your excess water will go down the drain, taking the garbage with it.
Features of operation
The duration of operation of the pool and the preservation of its attractive appearance directly depend on compliance with the operating rules. First of all, do not forget about scheduled cleanings performed by:
- physically - manual waste collection;
- pump;
- automatically - use of underwater vacuum cleaners;
- chemically - treating the walls and water with special compounds designed to restore the pH of the water;
- electrophysically, using ozonizers, UV lamps, ionizers.
Water changes are carried out at least once a season. In cases where the water becomes cloudy, it is advisable to drain the tank and clean the walls, bottom, and filters.
